In Stock
Express Post: 1-3 Days | Standard Post: 2-5 Days
Can I use Command™ Products on glass windows?
It is okay to use Command™ Products if the glass is not exposed to direct sunlight and not flooded with water. For glass shower doors use our special Water-Resistant line of products (blue strip) which are clearly marked on our packaging.
Will Command™ Products stick to brick?
No. Command™ Products are intended for mostly smooth surfaces such as those listed above. However, our products will stick to painted, smooth cinder block (the type found inside many school and office buildings).
Can I use Command™ Products on fresh paint?
Paint should be fully cured (check paint can for manufacturer's cure time) before using Command Products. We recommend waiting 28 days before use on fresh paint. Also, alcohol may remove or dull the surface of fresh paint.
Can I use Command™ Products on wallpaper?
No. Most wallpapers are too delicate and can tear when adhesives are applied.
Will it hold soundproofing acoustic foam board or decorative plates?
Yes, provided the item is within the weight limit specified for Command™ Picture Hanging Strips. We do not recommend hanging tapestry or other fabrics. For decorative plates, please ensure there is a smooth surface for the strip to adhere to. Do not hang valuable or irreplaceable items.
In Stock
Express Post: 1-3 Days | Standard Post: 2-5 Days
Reliable adhesive hanging solution for tidy, damage-free organising.
Installs in minutes without tools
Removes cleanly from most painted walls
Use indoors on smooth surfaces
Examples of use:
Organise entryways and kitchens
Hang decor for events
Add storage in bathrooms and offices
In Stock
Express Post: 1-3 Days | Standard Post: 2-5 Days
Can I use Command™ Products on glass windows?
It is okay to use Command™ Products if the glass is not exposed to direct sunlight and not flooded with water. For glass shower doors use our special Water-Resistant line of products (blue strip) which are clearly marked on our packaging.
Will Command™ Products stick to brick?
No. Command™ Products are intended for mostly smooth surfaces such as those listed above. However, our products will stick to painted, smooth cinder block (the type found inside many school and office buildings).
Can I use Command™ Products on fresh paint?
Paint should be fully cured (check paint can for manufacturer's cure time) before using Command Products. We recommend waiting 28 days before use on fresh paint. Also, alcohol may remove or dull the surface of fresh paint.
Can I use Command™ Products on wallpaper?
No. Most wallpapers are too delicate and can tear when adhesives are applied.
Will it hold soundproofing acoustic foam board or decorative plates?
Yes, provided the item is within the weight limit specified for Command™ Picture Hanging Strips. We do not recommend hanging tapestry or other fabrics. For decorative plates, please ensure there is a smooth surface for the strip to adhere to. Do not hang valuable or irreplaceable items.
In Stock
Express Post: 1-3 Days | Standard Post: 2-5 Days
Reliable adhesive hanging solution for tidy, damage-free organising.
Installs in minutes without tools
Removes cleanly from most painted walls
Use indoors on smooth surfaces
Examples of use:
Organise entryways and kitchens
Hang decor for events
Add storage in bathrooms and offices
In Stock
Express Post: 1-3 Days | Standard Post: 2-5 Days
Damage-free picture hanging strips for clean, strong holds on flat surfaces.
No nails, no residue on removal
Holds frames level
Suitable for painted walls and most smooth surfaces
Examples of use:
Mount family photos or art frames
Hang lightweight notice boards
Create gallery walls without drilling
In Stock
Express Post: 1-3 Days | Standard Post: 2-5 Days
Reliable adhesive hanging solution for tidy, damage-free organising.
Installs in minutes without tools
Removes cleanly from most painted walls
Use indoors on smooth surfaces
Examples of use:
Organise entryways and kitchens
Hang decor for events
Add storage in bathrooms and offices
In Stock
Express Post: 1-3 Days | Standard Post: 2-5 Days
Keep notes, artwork, bills and reminders up where you can see them without nails or mess. Command Spring Clips grip paper and lightweight items securely, then remove cleanly when you are ready for a change. Ideal for kitchens, study corners, classrooms, rentals and offices.
Why you will like it
Damage free hanging on most painted walls, tile, metal and glass
Holds firmly, then removes cleanly with no sticky residue
Simple squeeze to clip, easy lift tab to remove the strip
Clean white finish that blends with any space
Great for lists, rosters, kids art, mail and reminders
What is in the box
8 × Command Spring Clips, White
12 × Command Adhesive Strips
Model number: 17089-8ES
Recommended uses
Pin timetables on pantry doors
Display school notes near the entry
Hold recipes at eye level while you cook
Organise invoices and mail by the desk
Where it works
Most painted drywall, finished wood, tile, metal, glass
Where not to use
Wallpaper, brick, rough or textured surfaces
Walls painted with non stick or low VOC paints that resist adhesives
Wet areas that stay steamy for long periods
How to apply
Clean the surface with methylated spirits or isopropyl alcohol. Let it dry.
Peel the liner marked “wall” and press the strip to the wall for 30 seconds.
Peel the other liner and press the clip base to the strip for 30 seconds.
Slide the clip onto its base and wait 1 hour before use for best hold.
How to remove cleanly
Hold the clip gently so it does not spring off.
Grip the tab and pull the strip straight down, slowly, keeping it flat against the wall until it releases.
Good to know
Use a fresh strip if you reposition the clip
Do not hang valuable or irreplaceable items
Test first on an inconspicuous spot if unsure about the surface
Specs
Finish
White
Pack contents
8 clips, 12 adhesive strips
Model
17089-8ES
Room
Kitchen, study, office, classroom
Surface type
Most smooth, sealed surfaces
Tips for best results
Apply to clean, dry, cool surfaces
Wait the full hour before clipping items
Replace strips if the clip is moved to a new spot
In Stock
Express Post: 1-3 Days | Standard Post: 2-5 Days
Wall-mounted hanger to air, dry or stage outfits without drilling.
Folds when not in use
Strong adhesive backing
Great for laundries and wardrobes
Examples of use:
Hang shirts after ironing
Air-dry gym gear
Stage school uniforms overnight
In Stock
Express Post: 1-3 Days | Standard Post: 2-5 Days
Adhesive key rail with multiple hooks to organise everyday carry items.
Damage-free install
Stable hold for keys and lanyards
Neat, minimalist look
Examples of use:
Park car and house keys by the door
Hang dog leads and caps
Keep swipe cards in the office
In Stock
Express Post: 1-3 Days | Standard Post: 2-5 Days
Tiny hooks for lightweight items where discretion matters.
Clear or white low-profile design
Peel off without residue
Ideal for renters and offices
Examples of use:
Hang fairy lights droppers
Display small decor tags
Hold charging cables or earphones
In Stock
Express Post: 1-3 Days | Standard Post: 2-5 Days
Bathroom caddy accessory that mounts without drilling for tidy storage.
Water-resistant adhesive
Rust-free design
Removes cleanly from tiles and glass
Examples of use:
Hold soap and sponges at the sink
Keep shower gels within reach
Organise shaving accessories
In Stock
Express Post: 1-3 Days | Standard Post: 2-5 Days
Adhesive holder designed to hang standard trigger spray bottles securely.
Space-saving vertical storage
Water resistant
No drilling required
Examples of use:
Hold glass cleaner in the kitchen
Store disinfectant in the laundry
Keep garden sprays in the shed
In Stock
Express Post: 1-3 Days | Standard Post: 2-5 Days
High-capacity adhesive hook or strip for heavier household items.
Big hold with clean removal
For smooth, sealed surfaces
No nails or screws required
Examples of use:
Hang large frames within rating
Hold bulky robes or bags
Mount organisers or small shelves
In Stock
Express Post: 1-3 Days | Standard Post: 2-5 Days
Replacement adhesive strips to reuse your existing Command hooks and hangers.
Fresh adhesive for reliable hold
Easy to apply and remove cleanly
Sized to fit matching hooks
Examples of use:
Refresh worn strips on bathroom hooks
Swap seasonal decor without new hardware
Rehang key rails and caddies
In Stock
Express Post: 1-3 Days | Standard Post: 2-5 Days
Wall-mounted hanger to air, dry or stage outfits without drilling.
Folds when not in use
Strong adhesive backing
Great for laundries and wardrobes
Examples of use:
Hang shirts after ironing
Air-dry gym gear
Stage school uniforms overnight
In Stock
Express Post: 1-3 Days | Standard Post: 2-5 Days
Reliable adhesive hanging solution for tidy, damage-free organising.
Installs in minutes without tools
Removes cleanly from most painted walls
Use indoors on smooth surfaces
Examples of use:
Organise entryways and kitchens
Hang decor for events
Add storage in bathrooms and offices
In Stock
Express Post: 1-3 Days | Standard Post: 2-5 Days
Damage-free picture hanging strips for clean, strong holds on flat surfaces.
No nails, no residue on removal
Holds frames level
Suitable for painted walls and most smooth surfaces
Examples of use:
Mount family photos or art frames
Hang lightweight notice boards
Create gallery walls without drilling
In Stock
Express Post: 1-3 Days | Standard Post: 2-5 Days
Thin adhesive strips for posters and prints without pinholes or tape marks.
Removes cleanly from painted walls
Holds securely yet peels away
Low profile for flat finish
Examples of use:
Mount kids’ posters in bedrooms
Display timetables in a study
Put up event signs for parties
In Stock
Express Post: 1-3 Days | Standard Post: 2-5 Days
Picture hanger engineered for wire-back or sawtooth frames with stable support.
Quick stick-on install
Clean removal with no wall damage
Keeps frames level
Examples of use:
Hang framed art and certificates
Display mirrors within weight rating
Mount signage in halls
In Stock
Express Post: 1-3 Days | Standard Post: 2-5 Days
Can I use Command™ Products on glass windows?
It is okay to use Command™ Products if the glass is not exposed to direct sunlight and not flooded with water. For glass shower doors use our special Water-Resistant line of products (blue strip) which are clearly marked on our packaging.
Will Command™ Products stick to brick?
No. Command™ Products are intended for mostly smooth surfaces such as those listed above. However, our products will stick to painted, smooth cinder block (the type found inside many school and office buildings).
Can I use Command™ Products on fresh paint?
Paint should be fully cured (check paint can for manufacturer's cure time) before using Command Products. We recommend waiting 28 days before use on fresh paint. Also, alcohol may remove or dull the surface of fresh paint.
Can I use Command™ Products on wallpaper?
No. Most wallpapers are too delicate and can tear when adhesives are applied.
Will it hold soundproofing acoustic foam board or decorative plates?
Yes, provided the item is within the weight limit specified for Command™ Picture Hanging Strips. We do not recommend hanging tapestry or other fabrics. For decorative plates, please ensure there is a smooth surface for the strip to adhere to. Do not hang valuable or irreplaceable items.
In Stock
Express Post: 1-3 Days | Standard Post: 2-5 Days
Concremate Expanding Anchoring Cement
Anchor, patch and lock in place with confidence. Concremate is a high-performance expanding cement designed for rapid, reliable anchoring and structural patching. Mixed to a workable, mortar-like consistency, it expands slightly as it cures to counteract drying shrinkage. That controlled expansion grips embedded items and surrounding material tightly, delivering a secure, long-lasting hold that stands up to strain, stress and vibration.
Why choose Concremate
Fast turnaround: initial set in about 30 minutes and hard in approximately 1 hour, so many jobs can progress the same day.
Expands and grips: engineered expansion of about 0.125% offsets shrinkage and locks into the substrate.
High ultimate strength: cures to a finish that becomes harder than standard concrete at 28 days when properly mixed and applied.
Versatile application: ideal for anchoring bolts, rails, brackets and fixtures, as well as patching holes, chases and cracks.
Durable performance: forms a robust, long-term bond that resists severe mechanical stress and vibration.
Where it excels
Use Concremate for secure embedment and structural repairs on common mineral surfaces. It is suitable for:
Concrete and masonry
Brickwork and stone
Tiles and terrazzo
Plaster and similar mineral substrates
Typical projects
Anchoring handrails, posts, machine base bolts, threaded rods and heavy brackets
Fixing door and window hardware to masonry openings
High-pressure grouting under plates, around pipe sleeves and service penetrations
Patching voids, chased conduits, spalled edges and impact damage in floors, walls and ceilings
How it works
Concremate is a mineral-based expanding cement. After mixing with clean water, the paste hydrates and begins to set. A small, controlled expansion during cure offsets natural drying shrinkage. The result is a tight, interference-style fit that increases grip on embedded items and keys the patch into surrounding material. For best results, the material must be able to expand slightly while drying and should not be constrained in a completely sealed cavity.
Directions for use
Surface preparation: Remove dust, loose material, laitance, oil and contaminants. Roughen smooth surfaces and blow or brush clean. Pre-dampen porous substrates to a surface-saturated dry condition; do not leave standing water.
Mixing: Add powder to clean water while stirring until a smooth, lump-free, mortar-like consistency is reached. Mix only what you can place within the working time. Do not over-water.
Placement for anchoring: Fill the prepared hole or pocket from the bottom up to avoid entrapped air. Insert the fixture or fastener while the mix is workable and align immediately. Hold steady until initial set.
Placement for patching: Tightly pack the mix into the void in layers, compacting each layer to ensure full contact. Strike off and finish the surface as required.
Curing: Protect from rapid drying, wind and direct sun during early cure. Avoid vibration or load until the material has hardened.
Cleanup: Clean tools and splashes with water while product is fresh. Once hardened, mechanical removal may be required.
Good practice tips
Plan the job so placement occurs immediately after mixing for best expansion and bond.
For deep holes or large voids, place in lifts and compact each lift.
Do not confine completely in a sealed cavity; allow space for controlled expansion.
Avoid adding sand, cement or other admixtures that can change performance.
Performance and durability
When correctly mixed and applied, Concremate develops a hard, dense matrix with strong adhesion to mineral substrates and embedded metals. The slight expansion on cure reduces micro-gapping at the interface, improving load transfer and long-term durability. After full cure at 28 days, the set material achieves hardness that exceeds standard concrete, supporting demanding anchoring and patching tasks.
Safety and handling
Wear suitable gloves, eye protection and a dust mask when mixing and placing.
Avoid contact with skin and eyes. In case of contact, rinse with plenty of water.
Store in a cool, dry place in the original, tightly closed container.
Keep out of reach of children and pets.
Specifications
Product type
Expanding cement anchoring and patching compound
Form
Premixed dry powder
Color
Grey
Mix consistency
Mortar-like paste when mixed with clean water
Initial set
About 30 minutes (conditions dependent)
Hard set
Approximately 1 hour (conditions dependent)
Ultimate hardness
Harder than standard concrete at 28 days
Expansion
Approx. 0.125% during cure
Recommended substrates
Concrete, brick, stone, tiles, plaster, terrazzo
Primary uses
Anchoring bolts, rails, brackets and fixtures; patching holes, chases and cracks; high-pressure grouting
Cleanup
Water while fresh
Storage
Cool, dry conditions in sealed container
What to expect on the job
With suitable surface preparation and correct mixing, you can expect a smooth placement, quick set and a dense, high-integrity bond. The expansion action helps lock hardware and patches into place. Protect new work from early movement and moisture loss, then return to service once the hard set has been achieved and the repair or anchorage has reached the necessary strength for your application.
Limitations
Not for use where the mix cannot expand slightly during cure.
Do not apply over active movement joints or flexible substrates.
Working and set times vary with temperature, humidity and mix ratio.
Note: Always trial on a small, inconspicuous area or non-critical hole to confirm suitability for your specific substrate and conditions.
In Stock
Express Post: 1-3 Days | Standard Post: 2-5 Days
Shower Plug Penetrating Sealer 220mL
Stop leaks without removing tiles. Shower Plug penetrates into masonry surfaces and forms a water repellent barrier that fixes and prevents leaks in showers, balconies and other masonry areas. One application lasts 10 years.
Penetrates grout, tile and masonry to block water at the source
No tile removal required
Indoor and outdoor use, friction and UV resistant
Does not change surface appearance or make it slippery
Makes surfaces easier to clean and helps prevent mould
Breathable seal allows trapped moisture below tiles to escape
Seals gaps up to 1 mm. For wider cracks, repair with grout or silicone first
Why Shower Plug
Released in 1992, Shower Plug is the original Australian penetrating sealer technology for leaking shower repair. It delivers cost and time efficiency with proven longevity and reliability.
Fixing a leaking shower, methods compared
Item
Tile and membrane removal and replacement
Shower Plug 220mL
Typical cost
> $1000
$55
Time required
> 5 days
30 minute application, ready to use in 12 hours
Skill level
Trade
DIY
Effective lifespan
Average 5 years
10 years minimum
Coverage
Approx. 7 m² per pack (about 75 ft²), depending on porosity.
Where to use
Grout
Tiles including ceramic, porcelain, marble, glazed or unglazed, terrazzo, slate, terracotta and more
Concrete and masonry
Bare plaster. If painting later, use a solvent primer undercoat after treatment
Showers, balconies, other tiled or masonry wet areas
Not suitable for
Plastics and polymers such as polyurethane and polycarbonate
Glass
Metal
Wood
Painted surfaces
How to apply
Ensure the surface is clean and dry.
Using a natural bristle brush, apply the first coat evenly.
After 5 minutes, apply a second coat.
Five minutes after the second coat, wipe away any remaining excess from the surface.
Allow to cure. Area is ready to use in 12 hours.
Important: Wipe the final coat off within 5 minutes. If left to dry on the surface, a white residue may appear. Remove any residue with turpentine.
Good to know
Gives off a mild solvent type odour during application and cure. This fades by the end of curing.
Does not affect clothing under normal use.
Safer to handle than household paint when used as directed. Always use protective gear and ventilation.
Specifications
SKU
SP220ML
Category
Shower Plug
Pack size
220 mL
Coverage
Up to 7 m² per pack
Weight
0.25 kg
Dimensions
7.5 cm x 7.5 cm x 8 cm
Finish
Invisible. No change to surface look or feel
Use areas
Showers, balconies, tiled and masonry wet areas
Lifespan
10 years
Directions recap
Two coats applied 5 minutes apart. Wipe off excess 5 minutes after second coat. Ready to use in 12 hours.
What you get
Shower Plug 220 mL bottle
Simple step by step instructions
Shower Plug gives you the solution.
In Stock
Express Post: 1-3 Days | Standard Post: 2-5 Days
Accurate measurements up to 0.02mm
Outside, Inside and Depth measurement scale
Metric
The Craftright 150mm vernier caliper is perfect for your next precision measuring job, made from Carbon steel and measuring from 0 to 150mm.
Precise metric measurements as low as 0.02mm can be obtained using the main scale for full numbers in combination with the vernier scale for accurate measurements between 0 to 1mm.
In Stock
Express Post: 1-3 Days | Standard Post: 2-5 Days
Crommelin Hybrid MS Polyurethane Flexible Sealant 300ml Take on interior and exterior sealing with a professional grade hybrid MS polyurethane. This single component sealant delivers a flexible, durable seal on common building substrates and is suitable for a wide range of construction and maintenance tasks. Key benefits Very low VOC and isocyanate free UV resistant for long term outdoor performance High flexibility to accommodate joint movement Excellent adhesion on properly prepared porous and non porous surfaces Easy to gun, tool and clean up Typical applications Construction and expansion joints Perimeter sealing around windows and doors Roofing and cladding laps, flashings and penetrations General gap sealing in wet and dry areas Suitable substrates Concrete, masonry, brick and render Timber and fibre cement Metals and coated metals Many plastics* and glass *Always pre test for compatibility and adhesion. Surface preparation Surfaces must be clean, dry, sound and free of dust, oil, release agents and loose material. Remove old sealant and contaminants. Abrade dense or glossy surfaces if required. Use suitable primer if specified for difficult or highly porous substrates. Mask edges for neat joints and install closed cell backing rod where needed to control joint depth. Application Cut nozzle to required bead size and load cartridge into a quality caulking gun. Gun a continuous bead into the joint ensuring full contact with sides and backing. Tool off with a moistened spatula for a smooth finish before skin forms. Protect from water and disturbance during initial cure. Clean up Clean tools and fresh spills promptly. Once cured, remove by mechanical means. Good to know Low odour formulation suitable for indoor use with ventilation. Paintable with many water based coatings once skinned and cured. Always test first. Store upright in a cool, dry place. Keep out of direct sunlight. Safety Wear suitable gloves and eye protection. Avoid contact with skin and eyes. If contact occurs, rinse with clean water. Refer to the product Safety Data Sheet for full precautions. What’s in the box 1 x 300ml cartridge 1 x application nozzle
In Stock
Express Post: 1-3 Days | Standard Post: 2-5 Days
Strengthen critical junctions and stop leaks before they start. Crommelin Waterproofing Tape is a flexible, self-adhesive reinforcing tape designed to bridge cracks, joints, and movement-prone areas so your waterproofing membranes and sealants perform at their best.
Why you will like it
Reinforces weak points at wall to floor junctions, around drains, over hairline cracks, and along internal corners.
Excellent adhesion to common building surfaces when used with compatible primers and membranes.
Flexible backing conforms to corners and curves to maintain a continuous seal.
Moisture barrier assist helps reduce the risk of water ingress beneath tiles and finishes.
Easy to cut and apply for fast prep on bathrooms, balconies, laundries, and wet areas.
Ideal for
Showers, bathrooms, and laundries
Balconies and terraces before tiling
Planter boxes and upstands
Penetrations such as pipes and wastes
Internal corners, junctions, and small static cracks
Quick specs
Product
Waterproofing reinforcement tape
Length
5 m
Finish
Flexible tape for embedment into compatible membranes
Typical surfaces
Concrete, rendered masonry, fibre cement, primed timber, sealed gypsum, existing compatible membranes
Application
Hand applied, press firmly with roller or trowel
How to use
Prepare the area. Surface must be clean, dry, sound, and free of dust, oils, and loose material. Prime as required by your chosen waterproofing membrane system.
Measure and cut lengths to suit corners, junctions, and penetrations. Pre fit to check placement.
Bed the tape into the first wet coat of compatible membrane or approved adhesive. Press firmly to remove air pockets and ensure full contact.
Overlap joins by at least 50 mm. At corners, mitre or fold neatly so the tape remains flat without creases that could trap water.
Topcoat with additional coats of membrane to fully encapsulate the tape, observing required dry times between coats.
Cure the membrane system as directed before tiling or finishing.
Good to know
Cover the tape with a compatible liquid membrane. Do not leave exposed to prolonged UV.
Always follow the membrane manufacturer instructions for primers, coat thickness, and cure times.
If in doubt about compatibility, perform a small adhesion test on your substrate and membrane.
Storage and safety
Store in a cool, dry place away from direct sunlight.
Wear gloves and eye protection during surface prep and membrane application.
Dispose of offcuts and packaging according to local regulations.
What is in the box
1 roll Crommelin Waterproofing Tape, 5 m length
Glues Australia helps Australians fix and protect with confidence. If you need help choosing a compatible membrane or primer for this tape, contact our team.
In Stock
Express Post: 1-3 Days | Standard Post: 2-5 Days
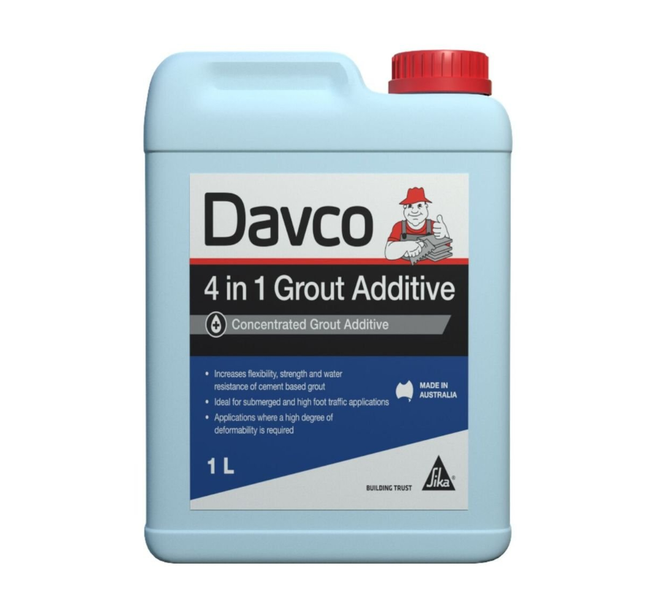
Concentrated grout additive designed to increase the flexibility, strength and water resistance of cement based grouts.
Davco® 4 in 1 Grout Additive is suitable for interior and exterior domestic applications. Ideal for submerged and high foot traffic areas, where a high degree of deformability is required.
Increases flexibility, strength and water resistance of cement based grout
Enhances the colour of grout
Reduced likelihood of efflorescence
Usage
To reduce the porosity of cement based grouts
To improve the compressive strength of cement based grouts
To improve the flexural strength of cement-based grouts
Suitable for use when grouting over fibre cement sheet floors and swimming pools or where a greater performance level / heavy duty performance is required
Advantages
Increases flexibility, strength and water resistance of cement based grout
Enhances the colour of grout
Reduced likelihood of efflorescence
In Stock
Express Post: 1-3 Days | Standard Post: 2-5 Days
Davco Ceramacrete Cement Base Tile Adhesive 5kg
Davco Ceramacrete is a cement based tile adhesive for rigid substrates with patented Dust Less technology that reduces airborne dust during mixing. It offers good bond strength, tidy mixing and clean up, and can be used in thin or thick beds for efficient tiling results.
Where to Use
Interior and exterior walls and floors
Bathrooms, showers, kitchens, laundries, living areas, balconies and patios
Domestic and light duty commercial projects
Tile Types
Ceramic
Mosaic
Terracotta
Slate
Quarry tiles
Not suitable for natural stone.
Suitable Substrates
Concrete
Cement based screeds and renders
Rendered block or brickwork
For flexible framed substrates or submerged applications such as pools and spas, use with Davco Davelastic additive as directed.
Key Features
Dust Less formula for less mess and faster clean up
Good bond strength
Usable for thin bed and thick bed tiling
Colour varies from white to grey
Low VOC 5 g/L
Mixing and Application
Mixing ratio 1.25 L of clean cool water per 5 kg bag
Allow to stand for 5 minutes after mixing, then remix before use
Do not add extra water after initial mixing
Working Times at 23°C and 50% RH
Pot life 40 minutes
Open time 7 minutes
Adjustability time 15 minutes
Ready for Use
Grouting after 24 hours
Return to dry area service after 24 hours
Return to wet area service after 7 days
Preparation Tips
Ensure substrates are sound, clean, dry and free from contaminants
Prime as required according to substrate condition and primer directions
Install movement joints in line with good tiling practice
Clean Up and Safety
Clean tools with water before the adhesive dries
Use appropriate personal protective equipment
Refer to the product SDS for detailed safety advice
In Stock
Express Post: 1-3 Days | Standard Post: 2-5 Days
Davco Davelastic Tile Adhesive Additive 1 L is a reliable latex additive to upgrade cement based tile adhesive performance chosen for home repairs, trade work, and craft builds when you want a bond you can trust. Designed for Australian conditions, it balances strength, ease of use, and clean application so you can get professional results without special tools. The 1 L pack is ideal for general work and keeps neatly in a toolbox or caddy.
Why choose Davco Davelastic for your next project
Everyday jobs often involve mixed materials and imperfect surfaces. Davco Davelastic Tile Adhesive Additive 1 L has been formulated to wet out well, grab quickly, and cure to a tough finish that resists movement and contact stress. It maintains bond integrity across common temperature swings and has dependable resistance to moisture and most household chemicals. Whether you are fixing, building, sealing, or assembling, this product gives you confidence from first squeeze through final set.
Best for
Improving bond strength and flexibility
Situations where extra deformability is required
Wet area tiling as part of a system
Suitable surfaces
The adhesive works well on the following surface types when properly prepared:
Concrete, screeds, and renders
Cement based adhesives and grouts as specified
Surface preparation
Good preparation is the key to a long lasting repair. Remove loose material, dust, and grease. Wipe glossy areas with methylated spirits or an approved cleaner and allow to dry. On very smooth plastics and metals, lightly roughen with fine abrasive paper to give the adhesive a mechanical key. Dry fit parts first and mark alignment points so you can assemble accurately within the open time. If bonding porous materials, ensure both faces are dry and free of surface chalking.
How to use
Check fit and plan clamping. Do a trial run without adhesive so you know the order of steps.
Apply a thin, continuous bead to one surface. For wide pieces, use a zig zag pattern to maximise wetting.
Bring surfaces together within the stated open time of follows the base adhesive behaviour. Reseat once if needed, then hold steady.
Apply even pressure using clamps, tape, weights, or temporary fasteners. Avoid squeezing all adhesive out of the joint.
Allow to cure undisturbed. Initial handling strength will develop as the adhesive sets, with a full cure reached based on the chemistry described below.
Cure profile
Replace all or part of the mixing water with the additive as directed. Observe normal set and cure times for the base adhesive.
Temperature and environmental performance
Use within the recommended application window of the system you are modifying. Avoid application to very cold, sweating, or waterlogged surfaces. For outdoor use protect fresh bonds from rain until the skin has formed and the core has progressed in cure. Once fully cured, the bond resists normal weathering, splash water, and intermittent UV exposure based on the substrate and paint systems used.
Clean up and finishing
Wash tools with water while the mix is fresh. When cured, excess can be carefully trimmed or sanded. For painted finishes, allow the adhesive to fully cure before priming. Test paint on a small area to confirm compatibility and drying behaviour.
Coverage guide
Coverage varies with bead size, surface porosity, and technique. As a general guide, a 3 mm bead yields approximately 10 to 12 linear meters per 310 mL cartridge. Smaller packs scale proportionally. Gaps, rough edges, and highly absorbent materials will reduce coverage. Plan an extra margin for offcuts and practice passes.
Tips for best results
Work within the recommended open time so the adhesive can properly wet the surfaces.
Use light clamping pressure to keep parts aligned while maintaining a film thickness for strength.
For very porous substrates, apply a thin precoat as a primer layer and allow it to tack before final assembly.
Keep joint lines clean by masking edges with painter tape and removing it before the adhesive skins.
Where movement or vibration is expected, design the joint to share load across a large area.
Troubleshooting
Poor adhesion: Check for oil, release agents, or surface dust. Reclean and lightly abrade if necessary.
Slow cure: Low temperature and low humidity extend cure time. Maintain moderate conditions for best results.
Visible squeeze out: Wipe fresh material with a suitable solvent and a soft cloth. Once cured, trim carefully.
Bond line prints through paint: Allow a full cure, then prime and apply thin coats of paint, allowing proper drying between coats.
Storage and shelf life
Keep sealed. Protect from freezing. Shake before use. Always check the pack for a lot code and use by guidance. Reseal immediately after use and store upright. Dispose of empty containers responsibly.
Safety
Read the label before use. Wear gloves when handling uncured material. Provide ventilation in enclosed areas. Avoid contact with skin and eyes. Keep out of reach of children and pets. If sensitivity occurs, stop use and seek advice. Do not ingest. First aid directions and detailed handling information are available on the package and the safety data sheet.
Frequently asked questions
Can I bond dissimilar materials? Yes, provided each surface is clean and sound. Differences in expansion are managed by the adhesive film thickness and the inherent flexibility after cure.
Is clamping required? Light clamping improves alignment and final strength. Excessive pressure can starve the joint of adhesive which reduces performance.
Is the bond water resistant? Once cured the bond resists splash water and routine humidity. For permanent immersion choose an adhesive designed for underwater service and follow the manufacturer guidance.
Planning your job
Measure twice and cut once. Dry assemble parts so you can confirm squareness and alignment before adhesive is involved. Keep rags, clamps, and spacers ready. If you are new to the product, test on offcuts to get a feel for bead size and squeeze out. A consistent 1 to 2 mm bond line is a good starting point for most rigid materials. Thicker lines help when surfaces are uneven. Avoid starving the joint by pressing too hard without giving the adhesive a place to reside.
Responsible use
Choose an adhesive that suits the materials and the environment the finished piece will face. If a joint will be submerged, carry structural loads, or be exposed to strong chemicals, check the technical data sheet for specific guidance. Many general purpose products are perfect for day to day work, while specialised tasks call for a system designed and tested for that environment. Using the right product first saves time, money, and rework.
Aftercare and maintenance
Adhesive joints are remarkably strong when used correctly. Design repairs so that routine loads are shared across a generous area. Where heavy vibration is present, pair the adhesive bond with appropriate mechanical fasteners. Keep cleaning chemicals mild, and avoid abrasive pads on visible joints. If a bond will be repainted, choose flexible paint where movement is expected, and keep edges sealed to prevent dirt tracking along the bond line.
Recycling and disposal
Allow empty containers to cure before disposal. Check local council guidance for recycling of plastics and metal cartridges. Never pour uncured product into drains or soil. Wipe tools on scrap material and let residue harden before placing in general waste. Smart handling keeps the workspace clean and reduces environmental impact.
In Stock
Express Post: 1-3 Days | Standard Post: 2-5 Days
Davco Grey One Pot Premixed Tile Adhesive is a high-performance, ready-to-use acrylic-based adhesive, perfect for interior wall and floor tiling. Its premixed formula eliminates the need for onsite preparation, providing excellent adhesion and ease of application for both professionals and DIYers.
Surface Preparation: Ensure all surfaces are sound, dry, and free from dust, oil, grease, or any other contaminants. Painted or glossy surfaces should be roughened and cleaned. For porous surfaces, priming may be required to ensure maximum adhesion.
Application Instructions:
Stir the adhesive thoroughly before use.
Using a notched trowel, apply the adhesive to the substrate. Only spread as much adhesive as can be tiled within 20 minutes.
Firmly press tiles into the adhesive, ensuring full coverage on the tile back.
Adjust tiles within 20 minutes of placing them.
Allow adhesive to set for 24 hours before grouting.
Coverage: Approximately 0.75–1.25 m² per litre using a 6mm notched trowel. Coverage may vary depending on substrate and trowel size.
Drying Time: Allow 24 hours before grouting. Full cure achieved within 7 days under normal conditions.
Clean Up: Clean tools and excess adhesive with water immediately after use. Once dried, adhesive is more difficult to remove.
Technical Data:
Appearance: Grey paste
Base: Acrylic
Open Time: 20 minutes
Adjustment Time: 20 minutes
Application Temperature: 5°C to 35°C
Ready for Grouting: After 24 hours
In Stock
Express Post: 1-3 Days | Standard Post: 2-5 Days
Davco PrimeX Multipurpose Acrylic Primer 5L is a professional-grade, water-based primer specially formulated to improve the adhesion of tile adhesives and waterproofing membranes to porous surfaces. Ideal for interior and exterior walls and floors in domestic and commercial applications, this primer ensures strong bonding performance while reducing porosity and dusting of substrates.
Surface Preparation:
Surfaces must be clean, dry, and free from dust, oil, grease, wax, paint, curing compounds, and other contaminants. Remove any laitance, loose materials, or previous coatings that may interfere with adhesion. On hot or windy days, dampen porous substrates lightly to avoid flash drying—but do not leave standing water.
Application Instructions:
Stir the primer thoroughly before use. Apply evenly using a roller, brush, broom, or squeegee in a thin, consistent layer. Allow the primer to dry fully before proceeding—drying is complete when the white, milky appearance turns clear.
Coverage:
Approximately 6–10m² per litre, depending on surface porosity.
Drying Time:
Typically dries within 30–60 minutes under standard conditions. Cooler temperatures or high humidity may extend drying time.
Clean Up:
Clean tools and equipment with water immediately after use. Do not allow the product to dry on tools.
Technical Data:
Type: Acrylic-based
Colour: Milky white (dries clear)
Suitable for: Cement render, concrete, fibre cement sheets
VOC Content: Low
Packaging: 5 Litre plastic container
In Stock
Express Post: 1-3 Days | Standard Post: 2-5 Days
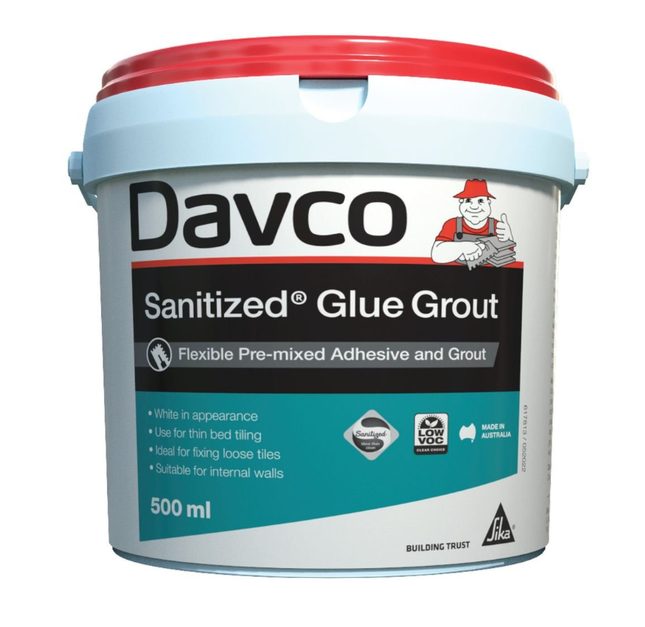
Davco® Sanitized Glue Grout
A Pre-mixed, Ready-to-Use Wall Tile Adhesive and Grout
Davco® Sanitized Glue Grout is a flexible, white, pre-mixed adhesive and grout for internal wall tile applications. Ideal for thin bed fixing of porous-backed ceramic tiles, it’s suitable for domestic areas like bathrooms, kitchens, and laundries.
Key Features:
White appearance
Pre-mixed and ready for immediate use
Dual-purpose: serves as both adhesive and grout
Ideal for fixing lifted or popped tiles
No wastage
Usage:
Surfaces:
Cement renders
Rendered brickwork and blockwork
Plasterboard
Fibre-cement wall sheets
Tiles:
Suitable for thin-bed fixing of most porous-backed ceramic tiles
Areas:
Interior applications, including domestic walls, bathrooms, kitchens, and laundries
Advantages:
Ready to use, no mixing required
Suitable for adhesive and grout in one product
Convenient for quick repairs or installations
No product wastage
Packaging & Colour:
Packaging: 500g pail
Colour: White paste
Application Information:
Adjustability Time: 20-30 minutes (depending on climate and substrate porosity)
Ready for Use: 24 hours
Note: Drying time may vary based on climate, substrate, and tile porosity.
Coverage:
A 500ml tub of Davco® Sanitized Glue Grout covers approximately 0.5m² when applied with a 6mm notched trowel as an adhesive.
Application Steps:
Surface Preparation:
Ensure all surfaces are structurally sound, dry, clean, and free of contaminants like oil, grease, or loose material. Deeply contaminated surfaces should be abraded to expose at least 80% of the original substrate. Follow these preparation guidelines:
Substrate
Specific Requirement
Primer
Rendered brick/blockwork
Cured minimum 7 days, sound
Davco PrimeX or Ultraprime
Fibre-cement sheet/plasterboard
Correctly and firmly fixed
Davco PrimeX or Ultraprime
Previously painted surfaces
Sand back to expose 80% of surface
Davco PrimeX or Ultraprime
Mixing:
No mixing required. Davco® Sanitized Glue Grout is ready to use straight from the pail.
In Stock
Express Post: 1-3 Days | Standard Post: 2-5 Days
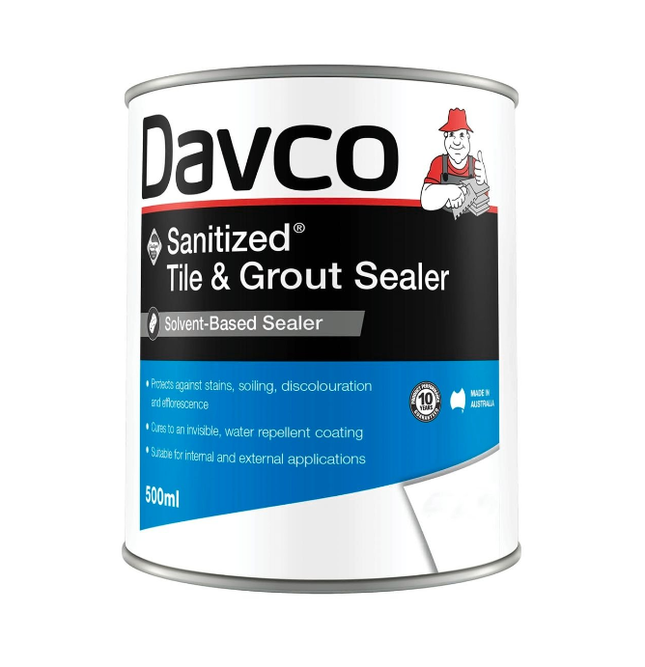
Davco® Sanitized Tile & Grout Sealer is a solvent-based sealer that provides excellent protection against stains, soiling, discolouration, and efflorescence. It’s an easy-to-apply, clear solution that cures to form an invisible, water-repellent coating.
Key Benefits:
Clear solution that cures to an invisible, water-repellent coating
Easy to apply
Usage:
Surfaces:
Only suitable for cement-based grouts
Can be applied over most unglazed porous ceramic tiles
Areas:
Suitable for both interior and exterior applications
Ideal for commercial and domestic wall and floor grout joints
Advantages:
Protects against stains, soiling, and discolouration
Provides an invisible protective layer that repels water
Perfect for enhancing the durability of grout in high-traffic areas
In Stock
Express Post: 1-3 Days | Standard Post: 2-5 Days
Davco SMP Evo Flexible Tile Adhesive 5 kg is a reliable polymer modified flexible tile adhesive for demanding substrates chosen for home repairs, trade work, and craft builds when you want a bond you can trust. Designed for Australian conditions, it balances strength, ease of use, and clean application so you can get professional results without special tools. The 5 kg pack is ideal for general work and keeps neatly in a toolbox or caddy.
Why choose Davco SMP for your next project
Everyday jobs often involve mixed materials and imperfect surfaces. Davco SMP Evo Flexible Tile Adhesive 5 kg has been formulated to wet out well, grab quickly, and cure to a tough finish that resists movement and contact stress. It maintains bond integrity across common temperature swings and has dependable resistance to moisture and most household chemicals. Whether you are fixing, building, sealing, or assembling, this product gives you confidence from first squeeze through final set.
Best for
Bathrooms, kitchens, and balconies
Tiling over existing tiles where movement accommodation is needed
Floor and wall applications
Suitable surfaces
The adhesive works well on the following surface types when properly prepared:
Concrete and screeds
Fibre cement sheeting
Existing glazed tiles after scuffing and cleaning
Surface preparation
Good preparation is the key to a long lasting repair. Remove loose material, dust, and grease. Wipe glossy areas with methylated spirits or an approved cleaner and allow to dry. On very smooth plastics and metals, lightly roughen with fine abrasive paper to give the adhesive a mechanical key. Dry fit parts first and mark alignment points so you can assemble accurately within the open time. If bonding porous materials, ensure both faces are dry and free of surface chalking.
How to use
Check fit and plan clamping. Do a trial run without adhesive so you know the order of steps.
Apply a thin, continuous bead to one surface. For wide pieces, use a zig zag pattern to maximise wetting.
Bring surfaces together within the stated open time of per data on the bag, adjust for weather. Reseat once if needed, then hold steady.
Apply even pressure using clamps, tape, weights, or temporary fasteners. Avoid squeezing all adhesive out of the joint.
Allow to cure undisturbed. Initial handling strength will develop as the adhesive sets, with a full cure reached based on the chemistry described below.
Cure profile
Observe open time, bed thickness, and traffic restrictions. The polymer modification gives improved flexibility once cured.
Temperature and environmental performance
Install in moderate conditions and shield fresh work from wind and direct sun. Avoid application to very cold, sweating, or waterlogged surfaces. For outdoor use protect fresh bonds from rain until the skin has formed and the core has progressed in cure. Once fully cured, the bond resists normal weathering, splash water, and intermittent UV exposure based on the substrate and paint systems used.
Clean up and finishing
Water clean-up while fresh. Remove haze before it hardens. When cured, excess can be carefully trimmed or sanded. For painted finishes, allow the adhesive to fully cure before priming. Test paint on a small area to confirm compatibility and drying behaviour.
Coverage guide
Coverage varies with bead size, surface porosity, and technique. As a general guide, a 3 mm bead yields approximately 10 to 12 linear meters per 310 mL cartridge. Smaller packs scale proportionally. Gaps, rough edges, and highly absorbent materials will reduce coverage. Plan an extra margin for offcuts and practice passes.
Tips for best results
Work within the recommended open time so the adhesive can properly wet the surfaces.
Use light clamping pressure to keep parts aligned while maintaining a film thickness for strength.
For very porous substrates, apply a thin precoat as a primer layer and allow it to tack before final assembly.
Keep joint lines clean by masking edges with painter tape and removing it before the adhesive skins.
Where movement or vibration is expected, design the joint to share load across a large area.
Troubleshooting
Poor adhesion: Check for oil, release agents, or surface dust. Reclean and lightly abrade if necessary.
Slow cure: Low temperature and low humidity extend cure time. Maintain moderate conditions for best results.
Visible squeeze out: Wipe fresh material with a suitable solvent and a soft cloth. Once cured, trim carefully.
Bond line prints through paint: Allow a full cure, then prime and apply thin coats of paint, allowing proper drying between coats.
Storage and shelf life
Keep the bag closed and dry between uses. Always check the pack for a lot code and use by guidance. Reseal immediately after use and store upright. Dispose of empty containers responsibly.
Safety
Read the label before use. Wear gloves when handling uncured material. Provide ventilation in enclosed areas. Avoid contact with skin and eyes. Keep out of reach of children and pets. If sensitivity occurs, stop use and seek advice. Do not ingest. First aid directions and detailed handling information are available on the package and the safety data sheet.
Frequently asked questions
Can I bond dissimilar materials? Yes, provided each surface is clean and sound. Differences in expansion are managed by the adhesive film thickness and the inherent flexibility after cure.
Is clamping required? Light clamping improves alignment and final strength. Excessive pressure can starve the joint of adhesive which reduces performance.
Is the bond water resistant? Once cured the bond resists splash water and routine humidity. For permanent immersion choose an adhesive designed for underwater service and follow the manufacturer guidance.
Planning your job
Measure twice and cut once. Dry assemble parts so you can confirm squareness and alignment before adhesive is involved. Keep rags, clamps, and spacers ready. If you are new to the product, test on offcuts to get a feel for bead size and squeeze out. A consistent 1 to 2 mm bond line is a good starting point for most rigid materials. Thicker lines help when surfaces are uneven. Avoid starving the joint by pressing too hard without giving the adhesive a place to reside.
Responsible use
Choose an adhesive that suits the materials and the environment the finished piece will face. If a joint will be submerged, carry structural loads, or be exposed to strong chemicals, check the technical data sheet for specific guidance. Many general purpose products are perfect for day to day work, while specialised tasks call for a system designed and tested for that environment. Using the right product first saves time, money, and rework.
Aftercare and maintenance
Adhesive joints are remarkably strong when used correctly. Design repairs so that routine loads are shared across a generous area. Where heavy vibration is present, pair the adhesive bond with appropriate mechanical fasteners. Keep cleaning chemicals mild, and avoid abrasive pads on visible joints. If a bond will be repainted, choose flexible paint where movement is expected, and keep edges sealed to prevent dirt tracking along the bond line.
Recycling and disposal
Allow empty containers to cure before disposal. Check local council guidance for recycling of plastics and metal cartridges. Never pour uncured product into drains or soil. Wipe tools on scrap material and let residue harden before placing in general waste. Smart handling keeps the workspace clean and reduces environmental impact.
In Stock
Express Post: 1-3 Days | Standard Post: 2-5 Days
Davco SMP Evo Tile Adhesive is a high-performance, flexible cement-based adhesive ideal for the installation of natural stone, porcelain, and marble tiles. Specially designed with advanced low-dust technology, it provides a cleaner and safer working environment. Its superior non-slump properties make it perfect for wall and floor tiling, including large-format tiles.
Surface Preparation:
Ensure surfaces are structurally sound, dry, and free from contaminants like dust, oil, and wax. Smooth surfaces should be roughened slightly, and absorbent substrates should be primed. Existing tiles must be clean, dry, and securely bonded.
Mixing:
Mix 5kg of powder with approximately 1.4–1.5L of clean water using a mechanical mixer until a smooth, lump-free paste is formed. Allow it to stand for 5 minutes before remixing. Do not add more water after mixing.
Application:
Apply the adhesive with a notched trowel over an area no larger than can be tiled within the open time. Firmly press tiles into the adhesive bed with a twisting motion to ensure full contact. Back-buttering may be necessary for large tiles or uneven substrates.
Coverage:
Approximately 1.5–1.75m² per 5kg bag using a 10mm notch trowel.
Drying Time:
Tiles can generally be grouted after 24 hours. Allow 2 days before exposure to water in wet areas and 21 days for submerged areas like pools.
Clean-up:
Clean tools and excess adhesive with water before it sets. Once cured, adhesive must be removed mechanically.
Technical Data:
Classification: C2S1TE
Pot life: 1.5 hours
Open time: 30 minutes
Adjustability time: 20 minutes
VOC content: Low
Appearance: White powder
In Stock
Express Post: 1-3 Days | Standard Post: 2-5 Days
Davco Supamastic is a ready to use white wall tile adhesive for internal areas. It is ideal for porous tiles and porous substrates in residential spaces and delivers non slump performance with easy water cleanup.
Key benefits
Ready to use paste with fast and easy cleanup
White formulation suits light coloured tiles and grout lines
Non slump for reliable hold on walls
Low VOC
Classified D1TE to AS ISO 13007
Best for
Internal wall tiling with porous tiles greater than 3 percent absorption
Residential dry area floors with porous backed tiles over primed cement sheet or ceramic tile underlay
Suitable substrates
Fibre cement sheet
Plasterboard
Ceramic tile underlay
Rendered blockwork and brickwork
Davco K10 Plus waterproof membrane on walls only
Tile types
Ceramic and mosaics
Natural stone that is not moisture sensitive
Not suitable for
Porcelain tiles larger than 200 x 200 mm
Concrete substrates
Moisture sensitive stone
Coverage
Approximate coverage with a 6 mm notch trowel: 4 L covers about 3 m².
Application guide
Ensure the substrate is sound, clean, dry and properly primed.
Spread adhesive with a suitable notch trowel at about 60 degrees and comb in one direction.
Press tiles firmly into the ribs and slide across the rib direction to collapse the ribs and remove voids.
Back butter large format tiles if required to achieve full coverage.
Clean excess adhesive from joints and tile faces with a damp sponge while wet.
Set and cure times at 22°C and 50% RH
Open time: about 30 minutes
Adjustability: about 45 minutes
Grout after: 24 hours
Dry area service: 48 hours
Wet area service: 7 days
Practical limits
Layer thickness up to 4 mm
Apply and cure between +5°C and +35°C ambient and substrate temperatures
Drying times extend in cool weather, over membranes and with low porosity tiles
Good to know
If tile or substrate porosity is uncertain, consider a suitable alternative adhesive from the same brand for low porosity tiles.
Install movement joints to applicable standards and allow adequate drying before grouting.
In Stock
Express Post: 1-3 Days | Standard Post: 2-5 Days
Davco® Tile & Grout Cleaner is specially formulated to tackle tough dirt and stains from tiles and grout. It’s also effective in removing minor efflorescence, making it a versatile cleaner for common tiled surfaces.
Key Benefits:
Specially formulated ingredients
Effectively cleans tiles and grout
Removes minor efflorescence from grout
Helps remove mould and mildew from grout surfaces
Usage: Davco® Tile & Grout Cleaner is suitable for a wide range of tiled surfaces, including:
Ceramic
Porcelain
Mosaic
Quarry
Slate tiles
It’s ideal for removing tough dirt and stains from tiles, as well as refreshing aged grout.
Packaging:
Size: 1 Litre Jerry Can
Colour: Clear liquid
Application Steps:
Mixing:
Dilute Davco® Tile & Grout Cleaner with water in a clean plastic bucket at a ratio of 10 parts water to 1 part cleaner (e.g., 5L of water to 500ml of cleaner).
Application:
Prepare the Surface: Always wet the surface with clean water using a mop or sponge before applying the product.
For Normal Cleaning: Dampen a mop or sponge with the diluted solution and wipe over the surface, then immediately rinse with clean warm water.
For Heavily Soiled Areas: Apply a larger quantity of the solution and allow it to soak for up to 10 minutes. Scrub the affected area with a stiff nylon brush, then rinse thoroughly with clean warm water.
Keep your tiles and grout clean, refreshed, and free from tough stains and minor efflorescence with Davco® Tile & Grout Cleaner.
In Stock
Express Post: 1-3 Days | Standard Post: 2-5 Days
DEWALT Rapid-Heat Ceramic Glue Gun is a reliable robust hot glue gun with rapid heat technology and ceramic heating core chosen for home repairs, trade work, and craft builds when you want a bond you can trust. Designed for Australian conditions, it balances strength, ease of use, and clean application so you can get professional results without special tools. The pack is ideal for general work and keeps neatly in a toolbox or caddy.
Why choose DEWALT Rapid-Heat for your next project
Everyday jobs often involve mixed materials and imperfect surfaces. DEWALT Rapid-Heat Ceramic Glue Gun has been formulated to wet out well, grab quickly, and cure to a tough finish that resists movement and contact stress. It maintains bond integrity across common temperature swings and has dependable resistance to moisture and most household chemicals. Whether you are fixing, building, sealing, or assembling, this product gives you confidence from first squeeze through final set.
Best for
Site temporary fixes
Cable dressing and protection
Trim installation and packaging work
Suitable surfaces
The adhesive works well on the following surface types when properly prepared:
Timber, plastics that accept hot melt
Cardboard and composites
Ceramic ornaments
Surface preparation
Good preparation is the key to a long lasting repair. Remove loose material, dust, and grease. Wipe glossy areas with methylated spirits or an approved cleaner and allow to dry. On very smooth plastics and metals, lightly roughen with fine abrasive paper to give the adhesive a mechanical key. Dry fit parts first and mark alignment points so you can assemble accurately within the open time. If bonding porous materials, ensure both faces are dry and free of surface chalking.
How to use
Check fit and plan clamping. Do a trial run without adhesive so you know the order of steps.
Apply a thin, continuous bead to one surface. For wide pieces, use a zig zag pattern to maximise wetting.
Bring surfaces together within the stated open time of seconds to position parts before set. Reseat once if needed, then hold steady.
Apply even pressure using clamps, tape, weights, or temporary fasteners. Avoid squeezing all adhesive out of the joint.
Allow to cure undisturbed. Initial handling strength will develop as the adhesive sets, with a full cure reached based on the chemistry described below.
Cure profile
Fast heating means less waiting and consistent flow. Bonds set on cooling for immediate handling.
Temperature and environmental performance
Use in dry conditions and avoid hot melt on heat sensitive foams. Avoid application to very cold, sweating, or waterlogged surfaces. For outdoor use protect fresh bonds from rain until the skin has formed and the core has progressed in cure. Once fully cured, the bond resists normal weathering, splash water, and intermittent UV exposure based on the substrate and paint systems used.
Clean up and finishing
Collect stray filaments after they cool. Protect benchtops with scrap board or a mat. When cured, excess can be carefully trimmed or sanded. For painted finishes, allow the adhesive to fully cure before priming. Test paint on a small area to confirm compatibility and drying behaviour.
Coverage guide
Coverage varies with bead size, surface porosity, and technique. As a general guide, a 3 mm bead yields approximately 10 to 12 linear meters per 310 mL cartridge. Smaller packs scale proportionally. Gaps, rough edges, and highly absorbent materials will reduce coverage. Plan an extra margin for offcuts and practice passes.
Tips for best results
Work within the recommended open time so the adhesive can properly wet the surfaces.
Use light clamping pressure to keep parts aligned while maintaining a film thickness for strength.
For very porous substrates, apply a thin precoat as a primer layer and allow it to tack before final assembly.
Keep joint lines clean by masking edges with painter tape and removing it before the adhesive skins.
Where movement or vibration is expected, design the joint to share load across a large area.
Troubleshooting
Poor adhesion: Check for oil, release agents, or surface dust. Reclean and lightly abrade if necessary.
Slow cure: Low temperature and low humidity extend cure time. Maintain moderate conditions for best results.
Visible squeeze out: Wipe fresh material with a suitable solvent and a soft cloth. Once cured, trim carefully.
Bond line prints through paint: Allow a full cure, then prime and apply thin coats of paint, allowing proper drying between coats.
Storage and shelf life
Unplug, cool, and store upright. Keep spare sticks sealed. Always check the pack for a lot code and use by guidance. Reseal immediately after use and store upright. Dispose of empty containers responsibly.
Safety
Read the label before use. Wear gloves when handling uncured material. Provide ventilation in enclosed areas. Avoid contact with skin and eyes. Keep out of reach of children and pets. If sensitivity occurs, stop use and seek advice. Do not ingest. First aid directions and detailed handling information are available on the package and the safety data sheet.
Frequently asked questions
Can I bond dissimilar materials? Yes, provided each surface is clean and sound. Differences in expansion are managed by the adhesive film thickness and the inherent flexibility after cure.
Is clamping required? Light clamping improves alignment and final strength. Excessive pressure can starve the joint of adhesive which reduces performance.
Is the bond water resistant? Once cured the bond resists splash water and routine humidity. For permanent immersion choose an adhesive designed for underwater service and follow the manufacturer guidance.
Planning your job
Measure twice and cut once. Dry assemble parts so you can confirm squareness and alignment before adhesive is involved. Keep rags, clamps, and spacers ready. If you are new to the product, test on offcuts to get a feel for bead size and squeeze out. A consistent 1 to 2 mm bond line is a good starting point for most rigid materials. Thicker lines help when surfaces are uneven. Avoid starving the joint by pressing too hard without giving the adhesive a place to reside.
Responsible use
Choose an adhesive that suits the materials and the environment the finished piece will face. If a joint will be submerged, carry structural loads, or be exposed to strong chemicals, check the technical data sheet for specific guidance. Many general purpose products are perfect for day to day work, while specialised tasks call for a system designed and tested for that environment. Using the right product first saves time, money, and rework.
Aftercare and maintenance
Adhesive joints are remarkably strong when used correctly. Design repairs so that routine loads are shared across a generous area. Where heavy vibration is present, pair the adhesive bond with appropriate mechanical fasteners. Keep cleaning chemicals mild, and avoid abrasive pads on visible joints. If a bond will be repainted, choose flexible paint where movement is expected, and keep edges sealed to prevent dirt tracking along the bond line.
Recycling and disposal
Allow empty containers to cure before disposal. Check local council guidance for recycling of plastics and metal cartridges. Never pour uncured product into drains or soil. Wipe tools on scrap material and let residue harden before placing in general waste. Smart handling keeps the workspace clean and reduces environmental impact.