🌍 Worldwide Shipping Available | Fast & Secure Delivery ✈️

Flooring

77 products

  • Fix-A-Floor 10oz Extra Strength Adhesive for Loose and Hollow Tile Repair Fix-A-Floor 10oz Extra Strength Adhesive for Loose and Hollow Tile Repair

    Fix-A-Floor Fix-A-Floor 10oz Extra Strength Adhesive for Loose and Hollow Tile Repair

    In Stock  Express Post: 1-3 Days | Standard Post: 2-5 Days

    Note: If you are working on a timber floor, you will need to use Fix-A-Floor Polyurethane for Loose, Squeaky Wood Flooring Repair. You can purchase it here. Fix-A-Floor Repair Adhesive, now patented, is an extra-strength bonding adhesive designed specifically for re-bonding loose and hollow tiles, marble and stone without the cost and mess of removing or replacing them. Fix-A-Floor is a simple DIY repair solution that is fast, easy and affordable, and surprisingly rewarding. If you can operate a drill, a caulking gun and mix a small batch of grout, you can do it. It works on all types of subfloor materials. Just Drill & Fill! Tip: For more precise application or smaller holes, you can include the 30 mL Adhesive Syringe with Blunt Tip Fill Needle when purchasing this product. It makes applying the adhesive cleaner and more accurate, especially in tight or narrow grout lines. The Nozzle The nozzle of the 300 mL Fix-A-Floor tube is specially engineered with a pre-drilled 3 mm hole to make it ideal for filling drilled holes in loose or hollow tile, marble and stone floors. It is firm enough to form a strong seal for optimal flow and complete coverage. Markings on the nozzle indicate cut points for 4.5 mm, 6 mm or any size you need, making it suitable for both narrow grout lines and wider applications. The Adhesive Fix-A-Floor Repair Adhesive is strong and flexible, featuring elastomeric bonding properties that prevent future issues caused by foundation movement, expansion and contraction of the subfloor or poor original installation. Used by flooring professionals for years, this product allows any homeowner to fix loose, hollow or squeaky tiles quickly and permanently. It is non-toxic, non-flammable and eco-friendly. Whether you are repairing a small area or a large floor section, Fix-A-Floor delivers lasting results and is guaranteed for the life of your floor. Just Drill & Fill! FAQs Q: Will Fix-A-Floor work with heated floors?A: Yes. Many customers use Fix-A-Floor over heated floor elements with no issues. Turn off the heating before, during and for 48 hours after applying. Q: Some of my grout is missing. Can I still use Fix-A-Floor?A: Yes. If small gaps or cracks exist, simply Drill & Fill. The adhesive will re-bond and stabilise loose areas. If the grout is completely missing, re-grout lightly, allow it to dry and then apply Fix-A-Floor. Q: Can I repair my whole floor or just one tile?A: Fix-A-Floor works on all sizes of problem areas, from a single tile to an entire room. It is suitable for all types of tile, marble and stone floors. Q: Can I use Fix-A-Floor outside?A: Yes. It performs well in both interior and exterior applications, including patios and decks. Q: Can I use Fix-A-Floor in showers or pools?A: No. It is not recommended for areas exposed to constant or excessive moisture. Q: Is Fix-A-Floor safe?A: Yes. It is a non-toxic, non-flammable, water-based adhesive that is safe and environmentally friendly. Q: Can I use it to re-glue a tile that has come loose?A: Yes. Apply Fix-A-Floor directly to the floor where the tile was, press the tile firmly into place, apply weight and allow to cure for 24 hours. Q: Do I need to place weight on the floor after filling?A: It is recommended to place some weight, such as a heavy object or bucket, on the area to aid curing and ensure even distribution. It is not mandatory but helps achieve optimal results. Q: What if adhesive does not appear from other holes?A: The adhesive may still be spreading beneath the tile. Move to the next hole and continue filling. Make sure you are not pressing the nozzle down onto the subfloor during application.

    In Stock  Express Post: 1-3 Days | Standard Post: 2-5 Days

    $34.95

  • Fix-A-Floor Polyurethane For Loose, Squeaky Wood Flooring Repair Fix-A-Floor Polyurethane For Loose, Squeaky Wood Flooring Repair

    Fix-A-Floor Fix-A-Floor Polyurethane For Loose, Squeaky Wood Flooring Repair

    In Stock  Express Post: 1-3 Days | Standard Post: 2-5 Days

    Note: This product is formulated for timber floors. If you need an adhesive for tiled floors, please use the regular Fix-A-Floor available Click here. NEW – Fix-A-Floor Polyurethane Wood Floor Repair Adhesive features an extra-strength, super-blend formula specifically designed for re-bonding loose, hollow, squeaky, popping, or bouncy timber floors. There’s no need to remove or replace floorboards — simply Drill & Fill for a long-lasting, nearly invisible repair. The precision nozzle allows for very small drill holes, ensuring a clean finish. Ideal for all solid hardwood, engineered timber, and bamboo floors. Suitable for both indoor and outdoor use, and for small or large repair areas. Odourless and very low in VOCs. Coverage: One 300 mL tube covers approximately 0.37 m² (around 600 mm x 600 mm). Just Drill & Fill! Flooring professionals often prefer polyurethane when repairing timber floors due to its strength and flexibility. The Fix-A-Floor polyurethane formula does not foam or expand when applied and cures within 24 hours. Once set, it moves naturally with the timber’s expansion and contraction, preventing cracking or bond failure. Perfect for permanently fixing loose, squeaky, or bouncy floors. Not recommended for use in moist or wet areas. The Fix-A-Floor Large Application Syringe is another excellent option for applying the adhesive if you’d like to drill even smaller holes than 3.5 mm. Always test on a small area first to confirm desired results, and keep from freezing before use. Directions for Repairing Timber Floors: Locate problem areas by tapping the floor with a wooden dowel, broom handle, or similar object, and mark the perimeter using chalk or painter’s tape. Inside the marked area, use a 3.5 mm drill bit and drill at least one hole on each end of the affected floorboard(s). Larger areas may require additional holes. Vacuum debris from each hole. Remove the cap and unscrew the nozzle. Pierce a large hole in the tube with an awl or similar tool. If needed, clear the nozzle before screwing it back on. Using a quality caulking gun, inject Fix-A-Floor into each drilled hole. When adhesive seeps from adjacent holes, you have achieved full coverage. Place a finger over the nozzle when moving between holes to prevent spills. Once complete, wipe away any excess with a damp cloth or sponge and allow to cure for 24 hours before filling holes. Use a matching timber filler or putty from your local hardware store. Clean any residue with mineral turpentine. Your floor is FIXED!

    In Stock  Express Post: 1-3 Days | Standard Post: 2-5 Days

    $49.95

  • Un-Du Adhesive & Sticker Remover Acid-Free Formula Un-Du Adhesive & Sticker Remover Acid-Free Formula

    Timbermate Un-Du Adhesive & Sticker Remover Acid-Free Formula

    In Stock  Express Post: 1-3 Days | Standard Post: 2-5 Days

    Say Goodbye to Stubborn, Sticky Messes! Tired of wrestling with stubborn price tags that tear and leave a papery, sticky mess? Frustrated by gummy residue left behind by tape on new appliances or furniture? We've all been there, risking our fingernails and damaging surfaces trying to scrape and scrub away unwanted adhesives. It’s time to stop the struggle. Introducing Un-Du® Adhesive Remover, the ultimate solution from Glues Australia that works like magic. This isn't just another solvent; it's a revolutionary removal system. Unlike harsh chemicals that dissolve glue and ruin your items, the Un-Du® formula cleverly works by temporarily neutralizing the adhesive. A few drops are all it takes to seep under the label or sticker, breaking the bond with the surface. Simply lift it off cleanly and effortlessly with the handy included scraper tool. The best part? Once the fast-evaporating Un-Du® formula disappears, the stickiness on the sticker returns, allowing you to reuse it somewhere else! It’s the perfect tool for repositioning labels, photos, and more. An Essential Tool for Every Australian Home From the kitchen to the garage, you'll find hundreds of uses for Un-Du®. It’s the one tool that’s more versatile than duct tape, designed to solve all those sticky problems that pop up in daily life. Keep a bottle handy and you'll always be prepared. Gift Giving Made Easy: Effortlessly removes price stickers from delicate gifts like crystal vases, books, and photo frames without leaving a trace. Clean Up Your Car: Finally get rid of that old bumper sticker from your ute or the remnants of a parking permit on your windscreen without damaging the paint or glass. Appliance & Furniture Rescue: Safely removes warranty stickers, energy rating labels, and masking tape from new fridges, TVs, and fine wood furniture. Household Accidents: Lifts chewing gum from carpet, tar from floors, and crayon marks from walls with remarkable ease. The Ultimate Office & Warehouse Productivity Hack Streamline your workflow and maintain a clean, professional workspace. Un-Du® is an indispensable asset for any office, mailroom, or warehouse environment, saving you time, money, and frustration. Package & Mail Management: Open self-sealing envelopes and padded mailers without tearing them, perfect for retrieving contents or reusing packaging. File & Asset Organisation: Easily remove and replace labels on files, shelves, computer disks, and office equipment without leaving a sticky, dirt-collecting residue. Mistake Correction: Quickly lifts correction fluid (White Out) from documents without smudging or tearing the paper. Workspace Maintenance: Removes old tape marks from desks, partitions, and windows, keeping your office looking pristine. A Must-Have for Crafters and Memory Keepers Your precious memories and delicate projects deserve the best care. The Un-Du® formula is completely acid-free and photo-safe, making it the trusted choice for hobbyists, scrapbookers, and archivists who demand perfection and preservation. Scrapbooking Perfection: Safely lift and reposition photos in albums and scrapbooks without causing fading, yellowing, or damage. Model Making: Remove masking tape from delicate models without lifting paint or leaving residue. Paper Crafts: Adjust stickers and embellishments on acid-free and lignin-free papers with total confidence. Stop struggling and start un-sticking the clean, simple, and safe way. Add Un-Du® Adhesive & Sticker Remover to your cart today and discover a world free from sticky situations! Product Specifications Brand: Un-Du® Product Name: Adhesive & Sticker Remover Formula: Acid-Free, Photo-Safe, Quick-Evaporating Solvent Key Feature: Temporarily neutralizes adhesives, allowing for the reuse of most stickers and labels after evaporation. Residue: Leaves no oily, greasy, or sticky residue behind. Tool: Comes with an attached, non-scratching, integrated scraper tool for easy lifting. Common Applications: Sticker & Label Removal Tape & Decal Removal Price Tag Removal Gum & Tar Cleaning Correction Fluid (White Out) Lifting Opening Sealed Envelopes Safe For Use On Surfaces Including: Glass & Plastics Fine Wood Furniture Metals Carpets & Upholstery Delicate Fabrics Photos Acid & Lignin-Free Papers Painted Surfaces & Wallpaper And much more!

    In Stock  Express Post: 1-3 Days | Standard Post: 2-5 Days

    $19.00

  • Timbermate Woodfiller putty crack filler Interior 2Kg [Jarrah] Timbermate Woodfiller putty crack filler Interior 2Kg [Jarrah]

    Timbermate Timbermate Woodfiller putty crack filler Interior

    In Stock  Express Post: 1-3 Days | Standard Post: 2-5 Days

    Timbermate Wood filler is an Interior grade 4 in 1 Wood Putty, Grain Filler, Edge Filler and Crack Filler. When thinned slightly with water can also be used as a sanding sealer. Timbermate does not shrink, sink, crack or fall out and has an indefinite shelf life. It is non-flammable, non-toxic and can be used to the last gram. The secret ingredient of Timbermate is tap water, therefore, containing no Acrylic, Latex or Solvents. Timbermate comes in 13 premixed colours plus Natural Tint Base. Timbermate takes all types of known stains, varnishes and coatings. The Timbermate formula is over 85 years old and is the only genuine water-based formula in the world proving that the formulation has stood the test of time. Features & Benefits of Timbermate No Waste, Usable to the last drop. If tub dries out just add water to soften. Won't Shrink, Sink, Crack or Fall Out. Suitable for use in all Timbers including Particle Board M.D.F. (Custom Wood) *Plaster Board, Flooring, Panelling etc. Can be used as Wood Putty, Sanding Sealer, Prime Coat, Grainfiller, Crackfiller, Undercoat & Edge Filler all in one. Available in 13 Timber Tones plus Natural. Use White for top coats only. Can be tinted in wet state or overstained when dry. Use any type of Colorant i.e. Water Based Spirit based ochers etc. Easy sanding, will not clog paper when DRY Sanded dust can be mixed with water for re-use. Fast drying approx. 20-30 min, but can be heat dried with a heat gun or lamp for faster drying. Temperature can affect drying time. Clean hands or tools with water. Non-Flammable, Non-Toxic, Non-Yellowing. Solvent, Latex and Acrylic Free. Heat Proof and Freezeproof. Provides a strong foundation for all top coats inc. Single & two pack products polyurethane's, oils, acrylics, french polish wax etc. Takes nails, screws, planing, sawing, drilling and routing Can be used on Metal, Plastic, Fibreglass and in Foundries. 100% Australian Made and Owned. Available in pack sizes of 250g, 500g, 2Kg, 8Kg, 20Kg and 200Kg. Interior Grade. Edgefiller Apply TIMBERMATE with a spatula or knife using hand pressure to force into the Edge or End of the grain. For spray gun use stir 10%-15% water into TIMBERMATE fit a 2mm mozzle and set pressure to 60psi. Boards can be stacked for easy spraying. Allow to dry and sand with a fine grit paper and apply topcoat. Woodfiller/Wood Putty Fills cracks, knots, pin and screw holes, splits, blemishes, etc. Fill deep holes in layers allowing time for each layer to dry. Will not blind natural wood grain. Drying time is about 30 minutes. TIMBERMATE dries hard and smooth without shrinking or sinking and can be belt or drum sanded as it is not affected by heat, the hotter it gets the harder and faster it sets and that means less "Down Time."  You can speed dry TIMBERMATE by adjusting the surrounding air temperature. This can be done by using either hot air, heat lamps, or kiln ovens.TIMBERMATE can be mixed with any stains before or after the filler is dry. To match medium and darker shades mix with Natural, Pine or other light shades. Use white TIMBERMATE only for white top coats. Grainfiller Mix 10% to 15% water into TIMBERMATE to make a perfect Grainfiller, Sanding Sealer and Prime Coat all in one application. First sand surface and with fine grit sandpaper, then apply Grainfiller to surface with a spray gun, paint roller, hessian or a cloth rolled into a ball, rub across the grain in a circular motion finishing with the grain. Sand, once filler is dry, to perfection with either sandpaper or power sander, using a fine grit paper. Grain filer can be used in a Roller or Curtain Coater or Spray Gun using a 2mm nozzle and 60psi pressure. Can be further thinned down with water if required. MDF Due to the finishing system used to manufacture MDF, it is essential to seal the job with a water-based non-acrylic product before applying top coats. Therefore TIMBERMATE meets your needs.
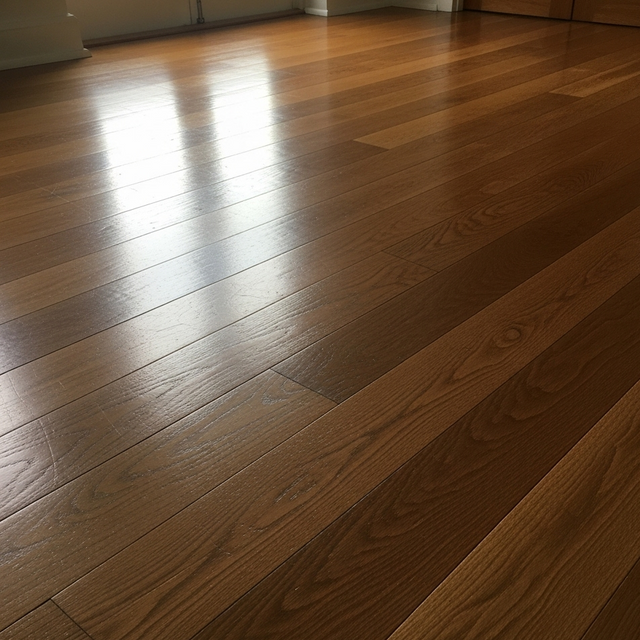
 Flooring Preparing old floors: Scrape all dust and waste between boards and surface as well as from knot holes and nail heads, vacuum well and carry out first sanding to prepare for filling and coating. Ensure that floor is stabilised, dry and free of movement. Application new floors and prepared old floors: Fill cracks, knot and nail holes and all blemished with a putty knife. Fill deeper holes in layers of about 6mm allowing each fill to dry. Apply TIMBERMATE to the entire floor, as a sealant, using a squeegee, trowel or paint roller. Allow to dry and sand off with a fine paper - 120 to 150 grit is recommended for best results. The floor can now be stained or varnished. Frequently Asked Questions Question: Is TIMBERMATE toxic, flammable or harmful? Answer: It is advisable to carry out safe work practices, as you would when working with dust. (Use an approved dust mask and safety goggles). TIMBERMATE contains no harmful ingredients and is non-flammable. Question: Can TIMBERMATE be used externally? Answer: No, as TIMBERMATE® is resoluble in water it is not advisable to use it outdoors. TIMBERMATE IS RECOMMENDED FOR INTERIOR USE. For external use, we recommend Earls MulTFill, Powder Putty or Porion Flexible Filler. Question: Can TIMBERMATE be used with stains and other finishes? Answer: Yes, TIMBERMATE® will take all types of known stains, coatings and colourants which can be Water based, Oil based, Solvent or Spirit based and even Acid Catalysed Lacquers. Question: Can TIMBERMATE be grainfilled? Answer: Yes, TIMBERMATE is a non-solvent based filler and is ideal for grainfilling. Mix 10-15% hot water to thin the Timbermate, then rub over the grain or spread thinly (see below for more detailed instructions). TIMBERMATE will: *Not raise the grain *Not damage the grain TIMBERMATE is: *Easy to sand when dry *Easy to stain when dry *Heat proof so you can speed the drying time by heating with a hair dryer, heat gun, lights etc. Question: How is the grainfiller applied? Answer: Take some TIMBERMATE out of the tub and place it in a separate container. Add approximately 10-15% water, (1gm=1ml) and mix into a slurry like paste (like toothpaste). Use a LINT FREE CLOTH AND RUB ACROSS THE GRAIN. When grainfiller goes "whitish" and sands off easily like talc powder, it is dry. TIMBERMATE will not blind the sandpaper (ie. clog up). If sandpaper gets clogged the grainfiller is not dry. Sand off in the same direction as the grain. Stain or coat when dry. Question: When is the stain applied? Answer: You can stain before or after applying TIMBERMATE (see "How do I match colours"). Question: How are the colours matched? Answer: Colour matching is easy. You can do it either of the following ways: Add your colourant to the putty and match the exact colour whilst wet. TIMBERMATE will dry lighter, but coat back to its original wet colour once coated with clear finishes. The final result is what you see (wet) is what you get. You can stain TIMBERMATE once it is dry. To test if dry, just rub sandpaper over putty. If putty clogs the sandpaper the filler is still wet. Wait for TIMBERMATE to dry and then stain. Question: How long does TIMBERMATE take to dry? Answer: Depending on the weather and depth of fill, TIMBERMATE will dry as follows: In hot weather, TIMBERMATE dries quicker. In cold weather, the depth of fill will determine the drying time. You can speed up the drying time by using a heat gun, hair dryer or light. Question: What depth or width can be filled? Answer: Do not fill holes deeper than 6-8mm at a time. TIMBERMATE dries quicker when filled in layers. Allow TIMBERMATE to dry between layers. Question: Why is the tub hard some days and feels dry and soft on other days? Answer: TIMBERMATE is waterbased. It contains no harmful solvents or acrylics and is, therefore, temperature sensitive. The warmer the weather or environment the softer the putty. On hot days it will start to dry in the tub if not properly sealed. Add a few drops of water to re moisten. Question: How is TIMBERMATE softened? Answer: Add a few drops of warm water to the top of the tub. It will soften quite quickly. If tub is frozen, thaw out by standing tub in a tub of hot water or place in a microwave for 20 seconds. TIMBERMATE is freeze thaw stable. Question: Can TIMBERMATE be used for any other purpose other than wood repair? Answer: TIMBERMATE does not shrink, sink, crack or fallout and can, therefore, be used on Plasterboard, Masonry, Fibreglass, Plastic and any other surface. Bearing in mind that steel must be coated with a primer to avoid rusting. Question: Can TIMBERMATE go off or does it have a shelf life? Answer: TIMBERMATE has an unlimited shelf life and will last indefinitely. If contents become dry merely add a few drops of water to reconstitute. DO NOT add more water than is necessary or leave excess water in the tub for a long period of time. The trapped excess water in the tub will cause the putty to become contaminated and will start to degenerate. Question: Why are so many colours available? Answer: We manufacture 13 colours to match almost all shades and types of timber. If you are using a clear coat you must match your putty colour. If staining, use Natural (tinting base). Question: What is Tint Base (Natural) putty and why? Answer: Tint Base (Natural putty) is putty in its natural state uncoloured. You may add the lightest shade of tint to change its colour. Question: Can TIMBERMATE be used on floors? Answer: TIMBERMATE is ideal for filling cracks, gaps, and nail holes in floors. TIMBERMATE will enhance the grain on the floor. As it does not shrink, sink, crack or fall out it is highly recommended for all floors. Question: Can TIMBERMATE be used with French Polish and Waxes? Answer: You can use all types of Waxes, Shellac and Oils on TIMBERMATE. Question: How is an incorrect match or badly filled hole fixed? Answer: Errors can be fixed with ease. If TIMBERMATE is not coated then wash out. If already coated, then break the top coat and then wash out. Refill or rematch if necessary. Question: Is TIMBERMATE Australian owned and manufactured? Answer: Yes. TIMBERMATE is 100% Australian owned and manufactured. An all Australian dedicated workforce does all manufacturing in our Melbourne factory.

    In Stock  Express Post: 1-3 Days | Standard Post: 2-5 Days

    $0.00 - $89.00

  • Sika Sikaflex®-111 Stick & Seal White: 1-Part Adhesive & Sealant 290ml

    Sika Sika Sikaflex 111 Stick & Seal 1-Part Adhesive & Sealant 290ml [White]

    In Stock  Express Post: 1-3 Days | Standard Post: 2-5 Days

    Sikaflex®-111 Stick & Seal is a high-performance 1-part multipurpose adhesive and sealant that bonds and seals a wide range of construction materials for both internal and external applications. Its advanced silane-terminated polymer technology delivers exceptional adhesion without surface pre-treatment, even on damp substrates. Key Features Bonds well to a wide variety of substrates without surface pre-treatment Adheres to damp concrete and other porous materials Compatible with most construction materials, including EPS/XPS and building wraps Excellent mechanical strength and weathering resistance Low VOC, LEED v4 EQc 2 compliant, and EC 1PLUS certified Ideal for bonding and sealing in indoor and outdoor environments Where to Use Designed for professional and DIY use across construction and renovation projects. Perfect for bonding or sealing: Concrete and masonry Wood and timber components Ceramic, stone, and tiles Metal surfaces Glass and plastic materials such as PVC, PA, PET, and EPS/XPS Applications Adhesive for bonding construction components Sealant for vertical and horizontal joints Repairs, renovations, and installations in building and civil works Technical Information Composition Silane-terminated polymer Density ~1.40 kg/L (ISO 1183-1) Shore A Hardness ~36 (after 28 days) Tensile Strength ~1.5 N/mm² (ISO 37) Elastic Recovery ~75 % (ISO 7389) Service Temperature −50 °C to +80 °C Curing Rate ~3 mm per 24 h (at 23 °C / 50 % r.h.) Skinning Time ~35 minutes (at 23 °C / 50 % r.h.) Colour Options Available in White, Concrete Grey, and Black. Packaging 290 ml cartridge | 12 cartridges per box Storage & Shelf Life Store unopened in a cool, dry place between +5 °C and +25 °C. Shelf life 12 months from production date. Certifications CE Marking – EN 15651-1 (Facade elements Class F EXT-INT CC 20HM) GEV-EMICODE EC 1PLUS (Very Low Emissions) LEED v4 EQc 2 Low-Emitting Materials compliant French VOC Regulation Class A+ Why Choose Sikaflex®-111 Stick & Seal This versatile adhesive-sealant provides superior adhesion on most construction materials, making it the go-to solution for professionals and renovators who need reliable bonding and sealing performance. Whether you are working on concrete, metal, or plastic, Sikaflex®-111 Stick & Seal ensures a flexible, durable, and weather-resistant joint every time.

    In Stock  Express Post: 1-3 Days | Standard Post: 2-5 Days

    $23.00

  • Fix-A-Floor Loose Tile Repair Adhesive Needle [Pro Pack] Includes a Micro Syringe Injector and Drill Bit Fix-A-Floor Loose Tile Repair Adhesive Needle [Pro Pack] Includes a Micro Syringe Injector and Drill Bit

    Fix-A-Floor Fix-A-Floor Loose Tile Repair Adhesive Needle [Pro Pack] Includes a Micro Syringe Injector and Drill Bit

    In Stock  Express Post: 1-3 Days | Standard Post: 2-5 Days

    Note: If you are working on a timber floor, you will need to use Fix-A-Floor Polyurethane for Loose, Squeaky Wood Flooring Repair. You can purchase it here. Fix-A-Floor Repair Adhesive, now patented, is an extra-strength bonding adhesive designed specifically for re-bonding loose and hollow tiles, marble and stone without the cost and mess of removing or replacing them. Fix-A-Floor is a simple DIY repair solution that is fast, easy and affordable, and surprisingly rewarding. If you can operate a drill, a caulking gun and mix a small batch of grout, you can do it. It works on all types of subfloor materials. Just Drill & Fill! Tip: For more precise application or smaller holes, you can include the 30 mL Adhesive Syringe with Blunt Tip Fill Needle when purchasing this product. It makes applying the adhesive cleaner and more accurate, especially in tight or narrow grout lines. The Nozzle The nozzle of the 300 mL Fix-A-Floor tube is specially engineered with a pre-drilled 3 mm hole to make it ideal for filling drilled holes in loose or hollow tile, marble and stone floors. It is firm enough to form a strong seal for optimal flow and complete coverage. Markings on the nozzle indicate cut points for 4.5 mm, 6 mm or any size you need, making it suitable for both narrow grout lines and wider applications. The Adhesive Fix-A-Floor Repair Adhesive is strong and flexible, featuring elastomeric bonding properties that prevent future issues caused by foundation movement, expansion and contraction of the subfloor or poor original installation. Used by flooring professionals for years, this product allows any homeowner to fix loose, hollow or squeaky tiles quickly and permanently. It is non-toxic, non-flammable and eco-friendly. Whether you are repairing a small area or a large floor section, Fix-A-Floor delivers lasting results and is guaranteed for the life of your floor. Just Drill & Fill! FAQs Q: Will Fix-A-Floor work with heated floors?A: Yes. Many customers use Fix-A-Floor over heated floor elements with no issues. Turn off the heating before, during and for 48 hours after applying. Q: Some of my grout is missing. Can I still use Fix-A-Floor?A: Yes. If small gaps or cracks exist, simply Drill & Fill. The adhesive will re-bond and stabilise loose areas. If the grout is completely missing, re-grout lightly, allow it to dry and then apply Fix-A-Floor. Q: Can I repair my whole floor or just one tile?A: Fix-A-Floor works on all sizes of problem areas, from a single tile to an entire room. It is suitable for all types of tile, marble and stone floors. Q: Can I use Fix-A-Floor outside?A: Yes. It performs well in both interior and exterior applications, including patios and decks. Q: Can I use Fix-A-Floor in showers or pools?A: No. It is not recommended for areas exposed to constant or excessive moisture. Q: Is Fix-A-Floor safe?A: Yes. It is a non-toxic, non-flammable, water-based adhesive that is safe and environmentally friendly. Q: Can I use it to re-glue a tile that has come loose?A: Yes. Apply Fix-A-Floor directly to the floor where the tile was, press the tile firmly into place, apply weight and allow to cure for 24 hours. Q: Do I need to place weight on the floor after filling?A: It is recommended to place some weight, such as a heavy object or bucket, on the area to aid curing and ensure even distribution. It is not mandatory but helps achieve optimal results. Q: What if adhesive does not appear from other holes?A: The adhesive may still be spreading beneath the tile. Move to the next hole and continue filling. Make sure you are not pressing the nozzle down onto the subfloor during application.

    In Stock  Express Post: 1-3 Days | Standard Post: 2-5 Days

    $39.95

  • Last stock! Concremate Expanding Anchoring Cement - Fast Set Grout & Patch Concremate Expanding Anchoring Cement - Fast Set Grout & Patch

    Timbermate Concremate Expanding Anchoring Cement - Fast Set Grout & Patch

    In Stock  Express Post: 1-3 Days | Standard Post: 2-5 Days

    Concremate Expanding Anchoring Cement Anchor, patch and lock in place with confidence. Concremate is a high-performance expanding cement designed for rapid, reliable anchoring and structural patching. Mixed to a workable, mortar-like consistency, it expands slightly as it cures to counteract drying shrinkage. That controlled expansion grips embedded items and surrounding material tightly, delivering a secure, long-lasting hold that stands up to strain, stress and vibration. Why choose Concremate Fast turnaround: initial set in about 30 minutes and hard in approximately 1 hour, so many jobs can progress the same day. Expands and grips: engineered expansion of about 0.125% offsets shrinkage and locks into the substrate. High ultimate strength: cures to a finish that becomes harder than standard concrete at 28 days when properly mixed and applied. Versatile application: ideal for anchoring bolts, rails, brackets and fixtures, as well as patching holes, chases and cracks. Durable performance: forms a robust, long-term bond that resists severe mechanical stress and vibration. Where it excels Use Concremate for secure embedment and structural repairs on common mineral surfaces. It is suitable for: Concrete and masonry Brickwork and stone Tiles and terrazzo Plaster and similar mineral substrates Typical projects Anchoring handrails, posts, machine base bolts, threaded rods and heavy brackets Fixing door and window hardware to masonry openings High-pressure grouting under plates, around pipe sleeves and service penetrations Patching voids, chased conduits, spalled edges and impact damage in floors, walls and ceilings How it works Concremate is a mineral-based expanding cement. After mixing with clean water, the paste hydrates and begins to set. A small, controlled expansion during cure offsets natural drying shrinkage. The result is a tight, interference-style fit that increases grip on embedded items and keys the patch into surrounding material. For best results, the material must be able to expand slightly while drying and should not be constrained in a completely sealed cavity. Directions for use Surface preparation: Remove dust, loose material, laitance, oil and contaminants. Roughen smooth surfaces and blow or brush clean. Pre-dampen porous substrates to a surface-saturated dry condition; do not leave standing water. Mixing: Add powder to clean water while stirring until a smooth, lump-free, mortar-like consistency is reached. Mix only what you can place within the working time. Do not over-water. Placement for anchoring: Fill the prepared hole or pocket from the bottom up to avoid entrapped air. Insert the fixture or fastener while the mix is workable and align immediately. Hold steady until initial set. Placement for patching: Tightly pack the mix into the void in layers, compacting each layer to ensure full contact. Strike off and finish the surface as required. Curing: Protect from rapid drying, wind and direct sun during early cure. Avoid vibration or load until the material has hardened. Cleanup: Clean tools and splashes with water while product is fresh. Once hardened, mechanical removal may be required. Good practice tips Plan the job so placement occurs immediately after mixing for best expansion and bond. For deep holes or large voids, place in lifts and compact each lift. Do not confine completely in a sealed cavity; allow space for controlled expansion. Avoid adding sand, cement or other admixtures that can change performance. Performance and durability When correctly mixed and applied, Concremate develops a hard, dense matrix with strong adhesion to mineral substrates and embedded metals. The slight expansion on cure reduces micro-gapping at the interface, improving load transfer and long-term durability. After full cure at 28 days, the set material achieves hardness that exceeds standard concrete, supporting demanding anchoring and patching tasks. Safety and handling Wear suitable gloves, eye protection and a dust mask when mixing and placing. Avoid contact with skin and eyes. In case of contact, rinse with plenty of water. Store in a cool, dry place in the original, tightly closed container. Keep out of reach of children and pets. Specifications Product type Expanding cement anchoring and patching compound Form Premixed dry powder Color Grey Mix consistency Mortar-like paste when mixed with clean water Initial set About 30 minutes (conditions dependent) Hard set Approximately 1 hour (conditions dependent) Ultimate hardness Harder than standard concrete at 28 days Expansion Approx. 0.125% during cure Recommended substrates Concrete, brick, stone, tiles, plaster, terrazzo Primary uses Anchoring bolts, rails, brackets and fixtures; patching holes, chases and cracks; high-pressure grouting Cleanup Water while fresh Storage Cool, dry conditions in sealed container What to expect on the job With suitable surface preparation and correct mixing, you can expect a smooth placement, quick set and a dense, high-integrity bond. The expansion action helps lock hardware and patches into place. Protect new work from early movement and moisture loss, then return to service once the hard set has been achieved and the repair or anchorage has reached the necessary strength for your application. Limitations Not for use where the mix cannot expand slightly during cure. Do not apply over active movement joints or flexible substrates. Working and set times vary with temperature, humidity and mix ratio. Note: Always trial on a small, inconspicuous area or non-critical hole to confirm suitability for your specific substrate and conditions.

    In Stock  Express Post: 1-3 Days | Standard Post: 2-5 Days

    $17.00 - $99.00

  • Cabot's Wood Tone Putty Hole Filler 250g [Colour: Radiata Pine] Cabot's Wood Tone Putty Hole Filler 90g [Colour: Antique Walnut]

    Cabot's Cabot's Wood Tone Putty Hole Filler

    In Stock  Express Post: 1-3 Days | Standard Post: 2-5 Days

    Cabot's Wood Tone Putty is ideal for filling holes, cracks and blemishes in all interior timber without shrinking. It is easy to apply and sands to a fine, smooth finish. Wood Tone Putty is compatible with water or oil based paints, stains and timber finishes. Areas All interior timber Clean Up Water Product Type Water Based

    In Stock  Express Post: 1-3 Days | Standard Post: 2-5 Days

    $14.71 - $18.92

  • PC Fix PC Crete Expoxy Mouldable 3 minutes Waterproof Masonry Concrete 57g PC Fix PC Crete Expoxy Mouldable 3 minutes Waterproof Masonry Concrete 57g

    PC Products PC Fix PC Crete Expoxy Mouldable 3 minutes Waterproof Masonry Concrete 57g

    In Stock  Express Post: 1-3 Days | Standard Post: 2-5 Days

    PC-Crete™ Epoxy is a hand-mixable, fast-setting epoxy putty that quickly repairs concrete and masonry. After mixing, it forms a concrete repair polymer that cures to a concrete-like color and texture. The mixture readily sticks to concrete and masonry surfaces and is easily shaped. It will stick to ceramics, glass, metals and some plastics. It cures within 60 minutes. Each stick contains pre-measured portions of activator and base — no measuring or mixing tools are necessary. Here are just a few specific uses (there are hundreds of other uses): Quickly rebuild small missing pieces of concrete Fill holes in concrete and masonry Rebuild missing pieces of statues and birdbaths Seal hole for wire or conduit thru cinder block Fill chip or spall in concrete furniture Reattach loose or popped decorative stone Fill crack in stone fireplace Fill holes in brick or concrete walls; Apartment complexes, schools, government buildings etc. Fill cracks in concrete or stucco wall before painting Attach address numbers to brick or stone Attach hardware to brick or stone Fill abandoned screw holes and mounting holes in brick or cinderblock Replace missing mortar Seal rodent hole in cinderblock or concrete How to prepare a surface for bonding with PC-Crete™ Old concrete must be clean and profiled or textured. Surface must be clean and sound. It may be dry or damp, but free of standing water. Remove contaminants such as dust, dirt, oil and grime with a solvent such as denatured alcohol (ethanol), acetone, rubbing alcohol (isopropyl alcohol) or lacquer thinner. Mild detergent solution in water is also good removing contaminants. Use a clean paper towel or rag for wiping. Do not use mineral spirits or paint thinner for removing contaminants. Remove rust and loose paint with sandpaper or wire brush. Epoxy typically sticks to most paints. If there is a concern of the paint’s adhesion then remove it with sandpaper or wire brush. Smooth, glossy and shiny surfaces should be roughened using sandpaper to increase adhesion. How to clean-up after PC-Crete™ application Clean up mixed epoxy before it cures with paper towels and solvent. Denatured alcohol (ethanol), acetone, rubbing alcohol (isopropyl alcohol) or lacquer thinner are suitable solvents for removing uncured epoxy. Cured epoxy can be removed with paint stripper or remover. Can PC-Crete™ be used to repair a crack in a fountain? PC-Crete™ looks like concrete and is excellent for repairing concrete fountains, statues and lawn decorations. Will PC-Crete™ adhere to a concrete step? Can it be shaped to match a corner? PC- Crete™ is excellent to repairs on concrete surfaces such as steps. It shapes easily and can be sanded to match the look and texture of the concrete surface. Is PC-Crete™ suitable for filling a small crack or spall in a sidewalk or deck? Small crack repairs in concrete are easily made with or without the use of tools using PC-Crete™. PC-Crete™ is excellent for replacing missing or loose mortar between bricks and stones. Can PC-Crete™ be used in a fish tank or pond? PC-Crete™ is not recommended for aquatic use. Do not use this product in aquariums or ponds. The PC-Crete™ is not easily grabbing or sticking to the concrete surface. It pulls away lifting loose stones The putty wants to stick to the fingers more than the concrete surface. Wet the fingers with alcohol and then press, shape and smooth the applied putty. Also, loose stones can be wire brushed away to provide a sound surface. PC-Crete™ does not have a smooth texture. It has particles throughout The particles in PC-Crete™ are used to simulate the appearance of concrete.

    In Stock  Express Post: 1-3 Days | Standard Post: 2-5 Days

    $16.17

  • Parfix Maxi Nails 300g: The Ultimate Multi-Surface Construction Adhesive High Strength, Paintable & Perfect for Both Indoor and Outdoor Applications

    Parfix Parfix Maxi Nails 300g: The Ultimate Multi-Surface Construction Adhesive High Strength, Paintable & Perfect for Both Indoor and Outdoor Applications

    In Stock  Express Post: 1-3 Days | Standard Post: 2-5 Days

    Parfix Maxi Nails 300g: The Ultimate Multi-Surface Construction Adhesive Key Features High-strength bond suitable for a variety of applications Paintable for aesthetic versatility Effective both indoors and outdoors Specifications Colour: Beige Model Name: Parfix 300g Maxi Nails Construction Adhesive Material: Polymer Dissolved in Hydrocarbon Solvent Outdoor: Yes Indoor: Yes Why Choose Parfix Maxi Nails 300g? Designed to handle a multitude of construction challenges, Parfix Maxi Nails 300g provides a robust bond that lasts. Whether you're working indoors or taking on external projects, this adhesive is formulated to give you the results you need.

    In Stock  Express Post: 1-3 Days | Standard Post: 2-5 Days

    $4.19

  • Packshot of Dunlop Ready-To-Go Vinyl Flooring Spray Adhesive 454g

    Dunlop Dunlop Ready-To-Go Vinyl Flooring Spray Adhesive 454g

    In Stock  Express Post: 1-3 Days | Standard Post: 2-5 Days

    Dunlop Ready-To-Go Vinyl Flooring Spray Adhesive is a fast and tidy spray-on adhesive for installing vinyl sheet, vinyl tiles, and vinyl planks with vinyl backing over concrete, underlayment grade plywood, metal, and fibreglass. It delivers an even spray pattern, strong bond, and immediate traffic readiness once rolled. Why choose this adhesive Quick, clean spray application that saves time High initial grab for reliable placement Dry to touch in about 10 to 40 minutes Up to 3 hours open time once tacky Ready for immediate foot traffic after rolling Heat weld flooring 1 hour after installation Suitable with underfloor heating systems Water based acrylic blend with very low odour Suitable substrates Concrete, underlayment grade plywood, metal, and fibreglass. Use on vinyl-backed sheet, tiles, and planks. Not suitable for Cushion-backed flooring products. Surface preparation Ensure the substrate is flat, dry, and free from dust, oil, paint, old adhesive, wax, curing compounds, sealers, and hardeners. Lightly damp-mop concrete to remove fine dust before application. Correct surface imperfections before installation to avoid telegraphing. How to use Ventilate and mask the area to protect adjacent surfaces from overspray. Shake the can well and remove the blue safety tab. Hold the can upright 50 to 76 cm above the substrate and spray in smooth, even passes to achieve a uniform frosted look. Avoid heavy patches and overspray. Lightly re-spray missed areas if needed. Allow to dry until no adhesive transfers to the fingertips. Lay the vinyl and roll firmly within 1 hour using a suitable heavy roller to ensure full contact. The floor is ready for immediate use once rolled. Heat welding can commence after 1 hour. Key technical data Chemical type: water based acrylic blend Dry to touch: approximately 10 to 40 minutes Open time after tack: up to 3 hours Traffic allowance: immediate after rolling Underfloor heating: compatible Appearance when sprayed: milky white frost Storage and safety Store between 10°C and 50°C. Avoid freezing and direct sunlight. Pressurised dispenser. Do not pierce or burn the can, even when empty. Use in a well ventilated area and avoid contact with eyes and skin. Tip: Wipe any overspray from adjacent surfaces with a damp cloth before it dries.

    In Stock  Express Post: 1-3 Days | Standard Post: 2-5 Days

    $48.36

  • Packshot of Selleys Direct Stick Timber Flooring Adhesive Sausage 700g

    Selleys Selleys Direct Stick Timber Flooring Adhesive Sausage 700g

    In Stock  Express Post: 1-3 Days | Standard Post: 2-5 Days

    Selleys Liquid Nails Direct Stick Liquid Nails Direct Stick is a high strength polyurethane flooring adhesive designed for timber strip flooring and parquetry. Its semi rigid formula delivers a strong bond that helps reduce cupping and rafting. A controlled foaming action fills minor gaps. Fast cure means most floors can be sanded the next day to keep your project moving. Key Features High strength bond for timber flooring Semi rigid formula to help reduce cupping and rafting Foaming action fills small gaps and irregularities Fast cure so you can sand the next day Easy application with a strip flooring or parquetry trowel Where It Works Timber strip flooring Parquetry installations Interior floors on suitable, dry substrates Technical Details Technology Polyurethane adhesive Cure time Overnight under normal conditions. Sand and finish the next day. Application temperature 10°C to 30°C Coverage 2 m² per 1 L using the correct trowel 20 m² per 10 L using the correct trowel Clean up Protect adjacent finishes. Wipe fresh adhesive from surfaces before cure. Important Information Apply with a strip flooring or parquetry trowel to achieve stated coverage. Floors can usually be sanded the next day after proper cure. Protect surrounding finishes from expansion during foaming. Limitations Not suitable for wet or damp substrates. Avoid application below 10°C. Directions for Use Prepare the surface. Ensure substrates are clean, dry, sound, and free from dust, oil, and contaminants. Apply adhesive. Use the correct strip flooring or parquetry trowel. Spread adhesive evenly within the working time. Lay flooring. Place boards or parquetry into the wet adhesive. Press firmly to ensure full contact and adhesive transfer. Allow to cure. Leave to cure overnight under recommended conditions. Finish. Sand and finish the floor as required once the adhesive has cured. Good to Know Semi rigid bond helps manage seasonal timber movement. Foaming action assists with minor surface irregularities and gap filling. For best results, follow timber flooring manufacturer guidelines and site preparation standards. Available sizes: typically 1 L and 10 L tubs. Check current availability on this page before ordering.

    In Stock  Express Post: 1-3 Days | Standard Post: 2-5 Days

    $13.34

  • Packshot of Dunlop Premixed Resaflex Wall & Floor Tile Adhesive 15kg

    Dunlop Dunlop Premixed Resaflex Wall & Floor Tile Adhesive 15kg

    In Stock  Express Post: 1-3 Days | Standard Post: 2-5 Days

    Dunlop Premixed Resaflex Tile Adhesive Ready to use, flexible and tough ceramic tile adhesive for dependable indoor tiling. Ideal for interior walls and fibre-cement sheet residential floors. No mixing required, spreads smoothly, and delivers a secure bond when applied at the correct bed thickness. Key Benefits Ready mixed convenience for faster start and less mess Flexible bond that helps accommodate minor movement Non-slump paste with excellent grab on vertical surfaces Suitable for common interior wall substrates and fibre-cement sheet floors Where To Use Walls: Interior applications on cement render, plasterboard, and fibre-cement sheet Floors: Residential fibre-cement sheet floors Tiles: Ceramic and similar porous tiles Surface Preparation Surfaces must be flat, clean, dry and firmly fixed. Remove dust, oil, grease and loose materials. Prime porous surfaces like cement render and fibre-cement sheet, and any base jointing compound on plasterboard, then allow to dry. Remove water based paints completely. If paint integrity is uncertain, roughen or remove. Application Use an appropriate notched trowel: as a guide 6 mm for walls, 10 mm for floors. Spread only as much as you can tile within open time, typically about 1 m² at a time. Ensure no skin has formed. Bed tiles into a 1.5 mm to 6 mm adhesive layer. Press and slide to ensure full contact. Clean excess adhesive from tile faces and joints before it sets. Coverage Guide Tile Size Notch Size Approx. Coverage per kg Up to 150 x 150 mm 4.5 mm ~0.7 m² 150 x 150 to 250 x 250 mm 6 to 8 mm ~0.5 m² 250 x 250 mm and over 10 to 12 mm ~0.3 m² Coverage varies with substrate condition, trowel angle and application technique. Drying and Grouting Typical set time is about 24 hours at 23°C and 50% relative humidity. Allow longer for dense tiles or cool and humid conditions. Grout after adhesive has set, usually after 24 hours. Movement Joints Provide joints around perimeters and at intervals consistent with good tiling practice, for example at about 5 m on floors and about 3.5 m along walls. Keep joints about 6 mm wide and free of adhesive and grout. Fill with a suitable flexible sealant. Limitations Not suitable over concrete where extended drying can occur. Not for areas subject to water immersion such as pools. Do not use for non-porous tiles over non-porous substrates or for moisture-sensitive stone. Final adhesive bed must be at least 1.5 mm and not more than 6 mm thick. Clean Up Clean tools and any fresh residue with water before the adhesive sets. Technical Data Type Single part viscous paste Colour Grey Bulk Density ~1.2 g/cm³ pH ~8.5 Slip 0 mm Extended Open Time ~1.2 MPa after 30 min Shear Bond Strength ~0.9 MPa Pack Sizes and Shelf Life Available in 1 kg, 4 kg, 10 kg and 20 kg pails Shelf life 12 months in unopened packaging stored in a dry place Good Practice Tips Use tile spacers for consistent joints and remove them before grouting. Prime porous substrates as directed for best results. Always follow movement joint requirements for long-term performance.

    In Stock  Express Post: 1-3 Days | Standard Post: 2-5 Days

    $79.80

  • Packshot of Selleys Liquid Nails Construction Adhesive 320g (3 Pack)

    Selleys Selleys Liquid Nails Construction Adhesive 320g (3 Pack)

    In Stock  Express Post: 1-3 Days | Standard Post: 2-5 Days

    SELLEYS LIQUID NAILS Original is a premium grade multi-purpose construction adhesive that delivers a consistently strong and lasting bond on most building materials. Shrinkage and thermal movement in buildings can cause bonds to weaken over time, but Liquid Nails is flexible enough to response to movement allowing a strong bond to be maintained over time. Features Strong bond – which will cope with shrinkage and thermal movement, so you know the job will last. Adheres well to wet and dry timber, so there is no need to wait for the timber to dry. Easily extruded and easy to use in low Winter temperatures, so it allows you to continue with the job at low temperatures. Paintable when dry, to give you a neat, quality finished job. Doesn’t drip, sag or string, so there is less mess when you are using the product. Is available in a range of sizes and delivery styles. Meets requirements specified by Australian Standard AS 2329-1999. Bridges gaps on rough and ill fitting construction material Has a life expectancy, when cured, of 20 years Not for use on polyethylene, polypropylene, Teflon, silicone or polystyrene. Perfect for use: Sheet flooring to joists Metal or aluminium door strips to floors or walls Timber or fibre cement sheeting to cement block or brick walls Masonite to timber Wallboard or panelling to wood or metal frames Cork tiles to timber, fibro or plaster Tempered hardboard to floorboards To eliminate the squeaks in tongue & groove boards Not suitable for use on Mirrors, use Liquid Nails Mirrors, Metal and Glass Not suitable for use on Styrene Foam, use Liquid Nails Fast Not suitable for metals heated by direct sunlight, as bonds weaken at high temperatures. eg metal roofing and siding. Not suitable for bonding materials in areas which will be constantly damp or wet. Not suitable for use in tightly clamped joints eg cabinet making or joinery use Selleys Aquadhere What materials is this product suitable for? Brick & Concrete Plasterboard, particleboard & fibre cement sheeting Ceramic tiles Aluminium Painted surfaces Timber Hardboards Render Many other building surfaces

    In Stock  Express Post: 1-3 Days | Standard Post: 2-5 Days

    $17.49

  • Packshot of Bastion Bond Breaker Joint Sealant 300ml

    Bastion Bastion Bond Breaker Joint Sealant 300ml

    In Stock  Express Post: 1-3 Days | Standard Post: 2-5 Days

    Bastion Bond Breaker Joint Sealant Professional silicone bond breaker for wet areas. Create a flexible, waterproof separation at wall to wall and wall to floor junctions so your membrane and tile system can move without cracking. Ideal for bathrooms, showers, laundries and balconies. Why choose this sealant Permanently flexible to absorb movement in corners and junctions Neutral cure silicone suitable for use with most waterproofing membranes Low odour, low VOC, indoor use friendly Excellent adhesion to common building materials including concrete, masonry, ceramic tile, porcelain and most metals Water resistant once cured and designed for wet area applications Easy to gun out and tool for a smooth finish Typical uses Forming a bond breaker fillet in shower bases, bathrooms and laundries before waterproofing Movement joints at internal corners prior to tiling General wet area sealing where a flexible joint is needed Surface preparation Ensure surfaces are clean, dry and free from dust, oil, loose material and old sealant. Mask adjacent edges for a neat finish if required. For wide gaps, insert backing rod to control sealant depth. How to apply Cut the cartridge nozzle to the desired bead size and load into a standard caulking gun. Gun a continuous bead into the corner or joint. Aim for a smooth cove fillet in the 5 to 12 mm range. Tool the bead with a spatula or rounded tool to compact and shape it. Remove masking tape while the sealant is still wet. Allow the bond breaker to skin before applying compatible waterproofing membranes over the area. Follow your membrane manufacturer’s recoat time. Cure and finishing Skin time is typically minutes depending on temperature and humidity. Full cure occurs over 24 to 48 hours for standard beads. Thicker sections require longer. After the membrane has cured, complete tiling and finish perimeter joints with a sanitary grade silicone. Clean up Wipe away excess immediately with a clean cloth. Once cured, remove mechanically by trimming and peeling. Handy tips Not paintable. If painting is required, paint adjacent surfaces before sealing. Always use backing rod for large joints to control sealant depth and reduce three sided adhesion. Pre test on sensitive or natural stone surfaces. Do not use in continuously immersed conditions or for structural glazing. Storage and packaging Cartridge size: 300 mL Store upright in a cool, dry place. Use before the best by date printed on the cartridge. Safety Use in a well ventilated area. Avoid contact with skin and eyes. Keep out of reach of children. Refer to the product label for first aid directions. In the box 1 x 300 mL cartridge of Bastion Bond Breaker Joint Sealant 1 x application nozzle

    In Stock  Express Post: 1-3 Days | Standard Post: 2-5 Days

    $10.85

  • Packshot of Dunlop FC Polyurethane Flexible Joint Sealant 300ml

    Dunlop Dunlop FC Polyurethane Flexible Joint Sealant 300ml

    In Stock  Express Post: 1-3 Days | Standard Post: 2-5 Days

    Dunlop FC Joint Sealant Dunlop FC Joint Sealant is a premium, ultra flexible, moisture curing polyurethane sealant designed for jointing fibre cement, blueboard and compressed fibre cement sheets. The non slump formula handles joints up to 40 mm wide with a movement capability of plus or minus 25 percent. It is easy to apply, solvent free and isocyanate free. Colour: Grey. Why choose this sealant High flexibility for dynamic joints Non slump for clean, accurate beads on vertical and horizontal surfaces Solvent free and isocyanate free Paintable after curing Reliable performance supported by a 10 year guarantee Ideal uses Joints in fibre cement, blueboard and compressed fibre cement sheets Facade and cladding joints where movement is expected General building joints up to 40 mm width Compatible surfaces Adheres to most common construction substrates, including: Fibre cement sheets and blueboard Precast concrete panels, blockwork and bricks Sandstone and granite Fibreglass Plasterboard Technical details Movement capability ± 25% Joint width Up to 40 mm Skin time Approximately 35 minutes at 23°C and 50% RH Tack free time Approximately 1 hour at 23°C and 50% RH Cure rate About 2.5 mm per 24 hours at 23°C and 50% RH Application temperature 10°C to 35°C Clean up Warm water immediately after use Shelf life 12 months unopened, stored cool and dry Finish Paintable when dry. Can be overcoated with paint or texture coats. Colour Grey Surface preparation Ensure surfaces are clean and dry, free of dust, oil, grease, salt, mould, release agents and any contaminants that may affect adhesion. Mask adjacent areas to keep lines neat. Follow sheet fixing instructions from the board manufacturer. How to apply Cut the nozzle at a sharp angle slightly wider than the desired bead or joint width. Use a suitable backing rod where required to control depth. Aim for a joint depth equal to half the joint width. Gun the sealant into the joint and tool within 10 minutes using a round spatula to ensure full contact with the joint sides. Curing times increase in cold or humid conditions. Safety and handling Avoid contact with skin and eyes. Wear protective gloves, clothing and eye protection. Ensure adequate ventilation during application. Keep out of reach of children. Refer to the product SDS for full safety guidance. Guarantee Backed by a 10 year guarantee when used as directed.

    In Stock  Express Post: 1-3 Days | Standard Post: 2-5 Days

    $21.58

  • Packshot of Crommelin Hybrid MS Polyurethane Flexible Sealant 300ml

    Crommelin Crommelin Hybrid MS Polyurethane Flexible Sealant 300ml

    In Stock  Express Post: 1-3 Days | Standard Post: 2-5 Days

    Crommelin Hybrid MS Polyurethane Flexible Sealant 300ml Take on interior and exterior sealing with a professional grade hybrid MS polyurethane. This single component sealant delivers a flexible, durable seal on common building substrates and is suitable for a wide range of construction and maintenance tasks. Key benefits Very low VOC and isocyanate free UV resistant for long term outdoor performance High flexibility to accommodate joint movement Excellent adhesion on properly prepared porous and non porous surfaces Easy to gun, tool and clean up Typical applications Construction and expansion joints Perimeter sealing around windows and doors Roofing and cladding laps, flashings and penetrations General gap sealing in wet and dry areas Suitable substrates Concrete, masonry, brick and render Timber and fibre cement Metals and coated metals Many plastics* and glass *Always pre test for compatibility and adhesion. Surface preparation Surfaces must be clean, dry, sound and free of dust, oil, release agents and loose material. Remove old sealant and contaminants. Abrade dense or glossy surfaces if required. Use suitable primer if specified for difficult or highly porous substrates. Mask edges for neat joints and install closed cell backing rod where needed to control joint depth. Application Cut nozzle to required bead size and load cartridge into a quality caulking gun. Gun a continuous bead into the joint ensuring full contact with sides and backing. Tool off with a moistened spatula for a smooth finish before skin forms. Protect from water and disturbance during initial cure. Clean up Clean tools and fresh spills promptly. Once cured, remove by mechanical means. Good to know Low odour formulation suitable for indoor use with ventilation. Paintable with many water based coatings once skinned and cured. Always test first. Store upright in a cool, dry place. Keep out of direct sunlight. Safety Wear suitable gloves and eye protection. Avoid contact with skin and eyes. If contact occurs, rinse with clean water. Refer to the product Safety Data Sheet for full precautions. What’s in the box 1 x 300ml cartridge 1 x application nozzle

    In Stock  Express Post: 1-3 Days | Standard Post: 2-5 Days

    $15.15

  • Packshot of Selleys Liquid Nails Fast Grab Construction Adhesive 420g (20 Pack)

    Selleys Selleys Liquid Nails Fast Grab Construction Adhesive 420g (20 Pack)

    In Stock  Express Post: 1-3 Days | Standard Post: 2-5 Days

    Liquid Nails Fast is a water-based, high-strength construction adhesive with fast grab and low odour. It has a thick, non-runny consistency and is ideal for adhering timbers and other porous construction materials. Once dry, it has a beige (light tan) finish. Uses Liquid Nails Fast has a high initial grab that reduces the need to support joins while the adhesive cures. The grab works best with porous surfaces. It bonds to a wide range of materials including MDF, particle board, timber, plasterboard, styrene foam, masonry, concrete, tiles, ceramics, metals, plastics*, rubber and glass. Faster results occur when at least one surface is porous. Typical applications include: Areas where nailing is not desirable Skirting boards, architraves, and cornices Wall panelling to masonry Styrene foam to metal roofing Technical Features Fast grab – high initial holding reduces slippage on vertical surfaces Complies with AS 2329-1999 (Mastic adhesives for fixing wall boards) Non-drip formula – does not sag or string between panels Bridges gaps and adheres to uneven surfaces Low mess – excess can be wiped away with a damp cloth No solvent fumes – ideal for indoor projects Flexible – withstands thermal movement and vibration Heat resistant – maintains bond strength under sunlight Paintable when dry Easy to extrude in all temperatures Application Tips Use in conjunction with permanent mechanical fasteners except for low-stress applications such as wall panelling or lightweight fixtures. Bonds are not water resistant – protect from water if used outdoors. Drying time is extended in cold or damp conditions and with non-porous materials. Thicker layers take longer to dry. Test plastics before use – adheres well to UPVC but not to polyethylene or polypropylene. For wood flooring, use solvent-based Liquid Nails instead. Satisfactory for fixing sheet flooring to joists with the manufacturer’s minimum nailing specification, but not recommended for bonding sheet flooring to existing or concrete floors. Technical Details & Performance Good bond strength after 24 hours on porous substrates; continues strengthening over 2–3 days. Appearance: Smooth beige paste, free from lumps and air bubbles Specific Gravity: Approx. 1.44 g/mL @ 25°C Viscosity: 7000–9000 Poise Slump: 0 mm (typical) Shear Adhesion Strength (7 days, AS2329): >1500 kPa (Hoop pine substrate) Peel Adhesion Strength (7 days cure): 40 N/25 mm (variant to AS2329) Initial Bond Strength (24 hrs): >200 kPa Heat Resistance: Withstands up to 140°C temporarily. Constant high temperatures may reduce load-holding power. Creep Resistance (under constant load): – At 80°C: holds 500 g (7.8 kPa) on 625 mm² bond area – At 25°C: holds 6 kg (100 kPa) on 625 mm² bond area Coverage Approximately 15 metres of a 5 mm diameter bead. Curing time increases with thicker bonds or larger bond areas. Data provided is indicative only and not for design use. Cleaning Clean with hot soapy water or a damp cloth while wet. Once dry, remove by scraping or peeling. *Always pre-test plastics for adhesion suitability.

    In Stock  Express Post: 1-3 Days | Standard Post: 2-5 Days

    $143.34

  • Packshot of Dunlop Vinyl Adhesive 4L

    Dunlop Dunlop Vinyl Adhesive 4L

    In Stock  Express Post: 1-3 Days | Standard Post: 2-5 Days

    Fast, reliable bond for vinyl sheet and tiles Dunlop Vinyl Adhesive is a water based, high strength adhesive that spreads easily and delivers dependable bonds for vinyl sheet and vinyl tile on most concrete and timber subfloors. Ideal for installers and serious DIYers who want clean application and solid performance. Key features High initial grab for confident placement Easy to spread with smooth, low odour application Suitable for vinyl sheet and vinyl tile on concrete and timber subfloors Approximate coverage: 4 to 5 m² per litre, depending on surface and technique Tack time: 5 to 15 minutes at 23°C and 50% RH Sets in 24 hours for light foot traffic and finishing Where to use Interior installations of vinyl sheet and vinyl tile Most prepared concrete and timber subfloors Surface preparation Ensure surfaces are dry, smooth, clean and free of dust, oil, paint or contaminants that could limit adhesion. Prime highly porous concrete or timber with a suitable primer as directed by the manufacturer. Level or repair imperfections with a compatible floor leveller or floor repair compound before bonding. Application Apply an even coat to the subfloor using a 1.6 × 1.6 × 1.6 mm V notched trowel. Allow adhesive to become tacky before laying vinyl. Typical tack time is about 10 minutes, longer in cool conditions and shorter in warm conditions. Do not allow a skin to form. Lay the vinyl into the adhesive. Roll firmly in both directions to ensure full transfer to the back of the vinyl. Clean up Clean tools and spills immediately with warm soapy water. Remove dried adhesive with mineral turps. Conditions and storage Apply between 8°C and 35°C with adequate ventilation. Shelf life: 12 months in unopened container stored at approximately 20°C. Good to know Use a roller after placement to improve bond and minimise bubbles. Coverage varies with subfloor condition, porosity and trowel technique. Warranty Product is guaranteed for 10 years when installed in accordance with the manufacturer’s instructions.

    In Stock  Express Post: 1-3 Days | Standard Post: 2-5 Days

    $84.98

  • Packshot of Dunlop Vinyl Adhesive 1L

    Dunlop Dunlop Vinyl Adhesive 1L

    In Stock  Express Post: 1-3 Days | Standard Post: 2-5 Days

    Fast, reliable bond for vinyl sheet and tiles Dunlop Vinyl Adhesive is a water based, high strength adhesive that spreads easily and delivers dependable bonds for vinyl sheet and vinyl tile on most concrete and timber subfloors. Ideal for installers and serious DIYers who want clean application and solid performance. Key features High initial grab for confident placement Easy to spread with smooth, low odour application Suitable for vinyl sheet and vinyl tile on concrete and timber subfloors Approximate coverage: 4 to 5 m² per litre, depending on surface and technique Tack time: 5 to 15 minutes at 23°C and 50% RH Sets in 24 hours for light foot traffic and finishing Where to use Interior installations of vinyl sheet and vinyl tile Most prepared concrete and timber subfloors Surface preparation Ensure surfaces are dry, smooth, clean and free of dust, oil, paint or contaminants that could limit adhesion. Prime highly porous concrete or timber with a suitable primer as directed by the manufacturer. Level or repair imperfections with a compatible floor leveller or floor repair compound before bonding. Application Apply an even coat to the subfloor using a 1.6 × 1.6 × 1.6 mm V notched trowel. Allow adhesive to become tacky before laying vinyl. Typical tack time is about 10 minutes, longer in cool conditions and shorter in warm conditions. Do not allow a skin to form. Lay the vinyl into the adhesive. Roll firmly in both directions to ensure full transfer to the back of the vinyl. Clean up Clean tools and spills immediately with warm soapy water. Remove dried adhesive with mineral turps. Conditions and storage Apply between 8°C and 35°C with adequate ventilation. Shelf life: 12 months in unopened container stored at approximately 20°C. Good to know Use a roller after placement to improve bond and minimise bubbles. Coverage varies with subfloor condition, porosity and trowel technique. Warranty Product is guaranteed for 10 years when installed in accordance with the manufacturer’s instructions.

    In Stock  Express Post: 1-3 Days | Standard Post: 2-5 Days

    $27.85

  • Packshot of Poly Ultra Nails Construction Adhesive 320g

    Poly Poly Ultra Nails Construction Adhesive 320g

    In Stock  Express Post: 1-3 Days | Standard Post: 2-5 Days

    Poly Ultra Nails Construction Adhesive is a high strength, versatile adhesive designed for bonding a wide range of building materials both indoors and outdoors. It offers exceptional adhesion, easy application, and water resistance, making it a reliable choice for construction and renovation projects. Features High strength bonding suitable for multiple materials Repositionable for up to 20 minutes for precise alignment Waterproof once cured Ready to use straight from the cartridge Brown finish for a natural look Suitable Materials Concrete, brick, plasterboard, ceramics Plywood, particle board, aluminium Hardwood, softwood, steel, fibreglass Some plastics (pre-test recommended) Application Instructions Ensure surfaces are clean, dry, and free from dust, grease, or flaking paint. Cut the seal, fit the nozzle, and cut to the desired bead size. Insert into a caulking gun. For wall panelling and sheet flooring, apply 6mm beads along studs or joists in a zig-zag line at 40cm intervals. Bring surfaces together within 10 minutes and press firmly along glue lines. Reposition if needed within 20 minutes. Fix with nails, screws, or clamps for at least 24 hours to ensure bond strength. For contact bonding, apply to one surface, bring together, then separate for 3–5 minutes before rejoining. Clean tools and excess adhesive with mineral turpentine. Technical Information Coverage: Approximately 15 metres of 5mm bead Initial bond: Within 24 hours at 25°C Full cure: Up to 7 days Colour: Brown Important Notes Not suitable for mirrors, polystyrene foam, or continuous water immersion Avoid use on copper-based metals or metals exposed to direct sunlight heat Do not use for tightly clamped joints or heavy loads without mechanical fasteners Safety Information Use in a well-ventilated area and avoid breathing vapours Wear protective gloves and eye protection Keep away from heat, sparks, and open flames Keep out of reach of children If swallowed, do not induce vomiting — contact a doctor or Poisons Information Centre (AUST 131 126; NZ 0800 764 766) Contains 30% w/w liquid hydrocarbons

    In Stock  Express Post: 1-3 Days | Standard Post: 2-5 Days

    $4.85

  • Packshot of Bastion Premixed Tile Adhesive 15kg

    Bastion Bastion Premixed Tile Adhesive 15kg

    In Stock  Express Post: 1-3 Days | Standard Post: 2-5 Days

    Bastion Premixed Tile Adhesive 15 kg Overview Bastion Premixed Tile Adhesive 15 kg is a high quality tile adhesive designed to deliver consistent, reliable bonding performance for trade professionals and serious DIYers. It is formulated for dependable adhesion, easy application, and clean finishing so you can complete jobs with confidence and minimal rework. Why choose this product Reliable bond performance supported by proven chemistry and rigorous quality control. Smooth, predictable application that helps reduce mess and cleanup time. Versatile adhesion profile suited to a wide range of substrates and project types. Clear guidance on surface preparation, application method, and curing to help achieve the best possible result. Suitable for residential fit-outs, maintenance, repairs, and light commercial projects. Suitable materials ceramic tiles porcelain tiles mosaics stone suitable for porous adhesives most interior substrates Typical applications General installation, repair, and maintenance where a durable bond is required. Interior work that benefits from a neat finish and tidy joints. Projects where dependable initial grab and high final strength are important. Surface preparation Ensure all surfaces are clean, sound, and dry. Remove dust, oil, release agents, laitance, and any loose or flaky material. For dense or non-porous surfaces, light abrasion improves key. Test adhesion on a small area if you are unsure about compatibility. Observe local safety requirements when sanding or cutting. Application Check ambient and substrate temperature. Ideal application between 10°C and 30°C. Protect from freezing and rapid drying. Cut the nozzle to the required bead size or prepare the container according to the product type. Apply an even bead or spread with a suitable trowel where required. Avoid trapping air. Press the materials together, ensuring full contact. For sheet goods, roll firmly to promote transfer and wetting. Support, clamp, or brace as needed until the adhesive develops sufficient handling strength. Cure and working time Pot life and open time vary by product. Typically, tiles can be adjusted within minutes. Grouting commonly permitted after 24 hours under standard conditions. Cooler temperatures and high humidity will slow curing, while warmer, drier conditions accelerate it. Do not load or finish until the bond has developed adequate strength. Always follow best practice for ventilation and safe handling during cure. Coverage Coverage varies based on substrate profile, bead size, and installation method. As a guide, a 300 ml cartridge with a 6 mm round bead can lay several linear meters. For trowel applied adhesives, a notched trowel pattern will influence yield. Plan to have extra on hand for porous or uneven surfaces. Limitations Do not apply to surfaces that are visibly wet unless the product specifically allows damp application. Avoid continuous water immersion unless the product is rated for that exposure. Not all plastics are compatible; test on polypropylene, polyethylene, and PTFE if required. Observe maximum service temperature and any movement or vibration limits appropriate to the application. Clean up Clean excess adhesive from tile faces immediately with a damp sponge. Hardened material must be removed mechanically. Always read the product label and follow local regulations for disposal of leftover material and containers. Safety Read the label before use and keep out of reach of children. Use in a well ventilated area. Wear protective gloves and eye protection. If on skin, wash with soap and water. If in eyes, rinse cautiously and seek medical advice if irritation persists. Do not ingest. Refer to the product Safety Data Sheet for detailed information. Storage Store upright in a cool, dry place away from direct sunlight and heat sources. Keep the cap or nozzle tightly closed when not in use. Do not allow to freeze unless the product literature states it is freeze-thaw stable. Rotate stock to use older product first. Troubleshooting Poor adhesion: Check surface prep, remove contaminants, and reapply with firm pressure. Slow cure: Verify temperature and humidity. Increase airflow or allow more time. Excess squeeze-out: Reduce bead size or spread more evenly. Clean residue before it skins. Frequently asked questions Can I paint over it? Many adhesives can be overcoated once cured. Test a small area with your paint system first. Is it suitable outdoors? Check the product label for outdoor rating. Protect fresh adhesive from rain until cured. What is the service temperature range? Typical service ranges suit most building environments. Avoid direct flame or extreme heat. How do I remove cured material? Mechanical methods are usually required. Work carefully to avoid damaging surrounding finishes. Why buy from Glues Australia We curate a focused range so you can choose faster and build better. Every product listing includes practical how to detail, compatibility guidance, and straightforward support from a team that understands trade requirements. Order with confidence and get your project moving.

    In Stock  Express Post: 1-3 Days | Standard Post: 2-5 Days

    $45.00

  • Packshot of Dunlop Floor Tile Adhesive 4kg

    Dunlop Dunlop Floor Tile Adhesive 4kg

    In Stock  Express Post: 1-3 Days | Standard Post: 2-5 Days

    Dunlop Floor Tile Adhesive 4kg is a premium cement-based adhesive formulated for fixing a wide range of floor tiles, including ceramic, porcelain, mosaics, and natural stone. It provides strong bonding performance, easy application, and long-lasting durability for both indoor and outdoor projects. Key Features Ideal for floor installations in residential and commercial settings Suitable for concrete, cement screeds, compressed fibre-cement sheets, and existing tiles Strong adhesion with excellent workability and pot life of up to 2.5 hours Can be used indoors and outdoors for versatile tiling applications Grey colour finish for consistent, professional results Coverage Recommended trowel: 10 x 10 x 10 mm Approximate coverage: 0.4 m² per kg Typical total coverage: around 1.6 m² per 4 kg bag Mixing Instructions Use approximately 400 ml of clean water per 1 kg of powder. Add powder to water and mix to a thick, creamy consistency. Allow to stand for 5 minutes, then re-mix thoroughly before use. Do not add additional water once mixed. Application Apply with a suitable notched trowel ensuring full coverage under tiles. Spread only enough adhesive that can be tiled within the open time. Press and slide tiles at right angles to the notches for full contact. Do not exceed a bed thickness of 10 mm or less than 3 mm. Allow adhesive to set for approximately 24 hours before grouting. Limitations Not suitable for continuous water immersion such as pools or tanks Do not use over timber floors or non-absorbent substrates like metal Not recommended for substrates subject to movement or shrinkage Additional Information Clean tools with water immediately after use Shelf life: up to 12 months when stored sealed in a dry location Full traffic after 24 hours at 23°C and 50% relative humidity 10 Year Guarantee: Backed by Ardex Australia Pty Ltd against manufacturing defects when used according to the manufacturer’s directions. Based on Dunlop official technical data sheet. Always follow the latest installation guidelines and safety instructions.

    In Stock  Express Post: 1-3 Days | Standard Post: 2-5 Days

    $28.90

  • Packshot of Dunlop Multipurpose Carpet & Cork Adhesive 1L

    Dunlop Dunlop Multipurpose Carpet & Cork Adhesive 1L

    In Stock  Express Post: 1-3 Days | Standard Post: 2-5 Days

    High strength, water based adhesive for carpet and cork Dunlop Multipurpose Carpet & Cork Adhesive is a water based, high strength adhesive designed for installing smooth or textured backed carpets and cork tiles. It delivers excellent wet grab and reliable bond on prepared subfloors. Suitable Surfaces Concrete Marine plywood Fibre cement sheet Key Features Water based and low odour High initial grab for reduced slippage Repositioning window up to 60 minutes Install immediately into wet adhesive for most carpets For cork or stiff backings, allow 10 to 15 minutes tack time before laying Coverage Approx. 2.5 m² per litre with a 3.2 mm V notch trowel Approx. 3.5 m² per litre with a 2.4 mm V notch trowel Application Ensure subfloor is dry, smooth, clean and protected from moisture. Prime highly porous concrete or timber before applying. Spread an even coat with the recommended V notch trowel. Lay carpet into the wet film. For cork or stiff backings, wait until the adhesive becomes tacky. Roll in both directions with a suitable drum roller to ensure full transfer. Set and Traffic Times No foot traffic for 24 hours Heavy traffic after 48 hours Avoid water and cleaning for 48 hours Clean Up Clean tools immediately with warm soapy water Remove dried residue with mineral turps Storage Shelf life up to 12 months in an unopened container stored at around 23°C. Good To Know Apply between 10°C and 30°C. Coverage varies with subfloor condition and trowel technique.

    In Stock  Express Post: 1-3 Days | Standard Post: 2-5 Days

    $29.41

  • Packshot of Dunlop Trade Resaflex Rapidset Tile Adhesive 15kg

    Dunlop Dunlop Trade Resaflex Rapidset Tile Adhesive 15kg

    In Stock  Express Post: 1-3 Days | Standard Post: 2-5 Days

    Dunlop Trade Resaflex Rapidset Tile Adhesive 15kg is a high quality, fast setting, rubber modified cement-based adhesive designed for rapid installation and early grouting. It delivers strong adhesion on walls and floors and is suitable for interior applications and exterior areas with satisfactory drainage. Key benefits Ready to grout in about 3 hours at 23°C and 50% RH Rubber modified formulation for strong bond and improved workability Classified C1FES1 Suitable bed thickness from 1.5 mm up to 10 mm Wall and floor use, interior and exterior (with correct falls and drainage) Suitable tiles Ceramic, porcelain, vitrified and mosaics Non moisture sensitive stone Suitable substrates Render, plasterboard, fibre cement sheet walls Compressed fibre cement sheet floors, concrete floors Existing tiles for interior applications Mixing and use Water addition: 5.5 L to 6.0 L per 15 kg bag Pot life: about 40 minutes at 23°C and 50% RH Trowel guidance: 6 x 6 x 6 mm on walls to achieve about 1.5 mm bed. 10 x 10 x 10 mm on floors to achieve about 2.5 mm bed Back buttering recommended for deeply keyed tiles and tiles larger than 450 mm on any edge Grouting: typically after about 3 hours at 23°C and 50% RH Coverage guide Trowel size Approximate coverage 6 mm About 0.6 m² per kg (about 9 m² per 15 kg) 10 mm About 0.4 m² per kg (about 6 m² per 15 kg) Movement joints Include movement joints in line with AS 3958 and around perimeters, penetrations and changes in direction. Fill with a suitable flexible sealant. Clean up Clean tools and residue with water while the adhesive is wet. Limitations Not suitable for continuous immersion such as swimming pools Not for moisture sensitive or translucent stone Do not tile directly over timber floors Safety Wear gloves, eye and face protection. Avoid breathing dust. In case of contact with eyes, rinse with water and seek medical advice. Keep out of reach of children. Technical details are based on manufacturer guidance at standard conditions. Actual times and coverage vary with temperature, humidity, tile and substrate.

    In Stock  Express Post: 1-3 Days | Standard Post: 2-5 Days

    $56.95

  • Packshot of Dunlop Pressure Sensitive Carpet Tile Adhesive 2L

    Dunlop Dunlop Pressure Sensitive Carpet Tile Adhesive 2L

    In Stock  Express Post: 1-3 Days | Standard Post: 2-5 Days

    Dunlop Pressure Sensitive Carpet Tile Adhesive 2L Dunlop Carpet Tile Adhesive is a high strength, water based pressure sensitive adhesive designed for carpet tiles and double bonded underlay systems. It tacks off to a clear, dry-to-touch film that grips firmly yet allows tiles to be lifted and replaced for maintenance. Key features Pressure sensitive grab for secure hold and easy tile replacement Water based, low odour, easy to apply Suitable for smooth or textured tile backings and composition vinyl tiles Works with double bonded underlays in commercial fitouts Suitable substrates Concrete, plywood, fibre cement sheet, compressed fibre cement, and suitable underlay sheets. Subfloors must be dry, smooth, clean, and prepared to AS 1884 requirements including moisture testing. Coverage Approx. 10 m² per 2 L using a 1.6 mm V notched trowel Approx. 14 m² per 2 L using a long nap roller Drying and traffic Allow adhesive to become tacky and transparent before laying tiles. Typical tack off time is 2 to 4 hours depending on conditions. Heavy foot traffic after 24 hours Avoid wet cleaning or water exposure for 48 hours Application guide Prepare the subfloor. Prime very porous substrates if required. Treat rising damp or green concrete with a suitable moisture barrier. Apply adhesive evenly: Textured backs, composition vinyl tiles, and double bond underlays: 1.6 mm V notched trowel held at about 60 degrees Smooth backed tiles: long nap roller Wait until the film is tacky and clear with no transfer to fingertips. Early placement into wet adhesive will create a more permanent bond. Lay tiles, cut and reposition as required, then roll in both directions with a suitable roller to ensure full contact. Clean up Clean tools immediately with warm soapy water. Remove dried residue with mineral turps. Storage and shelf life 12 months in unopened packaging when stored in a cool, dry place at about 23°C and 50% RH. Good to know Do not apply below 15°C or above 30°C surface temperature. Not suitable for traditional carpet-to-underlay stretch-in installations. For double bond systems, follow the flooring manufacturer’s instructions. Safety Wear gloves and eye protection, ensure adequate ventilation, and keep out of reach of children. If eye contact occurs, rinse with water and seek medical advice if irritation persists.

    In Stock  Express Post: 1-3 Days | Standard Post: 2-5 Days

    $38.56

  • Packshot of Davco Ceramacrete Cement Base Tile Adhesive 5kg

    Davco Davco Ceramacrete Cement Base Tile Adhesive 5kg

    In Stock  Express Post: 1-3 Days | Standard Post: 2-5 Days

    Davco Ceramacrete Cement Base Tile Adhesive 5kg Davco Ceramacrete is a cement based tile adhesive for rigid substrates with patented Dust Less technology that reduces airborne dust during mixing. It offers good bond strength, tidy mixing and clean up, and can be used in thin or thick beds for efficient tiling results. Where to Use Interior and exterior walls and floors Bathrooms, showers, kitchens, laundries, living areas, balconies and patios Domestic and light duty commercial projects Tile Types Ceramic Mosaic Terracotta Slate Quarry tiles Not suitable for natural stone. Suitable Substrates Concrete Cement based screeds and renders Rendered block or brickwork For flexible framed substrates or submerged applications such as pools and spas, use with Davco Davelastic additive as directed. Key Features Dust Less formula for less mess and faster clean up Good bond strength Usable for thin bed and thick bed tiling Colour varies from white to grey Low VOC 5 g/L Mixing and Application Mixing ratio 1.25 L of clean cool water per 5 kg bag Allow to stand for 5 minutes after mixing, then remix before use Do not add extra water after initial mixing Working Times at 23°C and 50% RH Pot life 40 minutes Open time 7 minutes Adjustability time 15 minutes Ready for Use Grouting after 24 hours Return to dry area service after 24 hours Return to wet area service after 7 days Preparation Tips Ensure substrates are sound, clean, dry and free from contaminants Prime as required according to substrate condition and primer directions Install movement joints in line with good tiling practice Clean Up and Safety Clean tools with water before the adhesive dries Use appropriate personal protective equipment Refer to the product SDS for detailed safety advice  

    In Stock  Express Post: 1-3 Days | Standard Post: 2-5 Days

    $10.30

  • Packshot of Dunlop Trade Resaflex Rapidset Tile Adhesive 5kg

    Dunlop Dunlop Trade Resaflex Rapidset Tile Adhesive 5kg

    In Stock  Express Post: 1-3 Days | Standard Post: 2-5 Days

    Dunlop Trade Resaflex Rapidset Tile Adhesive 5 kg Overview Dunlop Trade Resaflex Rapidset Tile Adhesive 5 kg is a high quality tile adhesive designed to deliver consistent, reliable bonding performance for trade professionals and serious DIYers. It is formulated for dependable adhesion, easy application, and clean finishing so you can complete jobs with confidence and minimal rework. Why choose this product Reliable bond performance supported by proven chemistry and rigorous quality control. Smooth, predictable application that helps reduce mess and cleanup time. Versatile adhesion profile suited to a wide range of substrates and project types. Clear guidance on surface preparation, application method, and curing to help achieve the best possible result. Suitable for residential fit-outs, maintenance, repairs, and light commercial projects. Suitable materials ceramic tiles porcelain tiles mosaics stone suitable for porous adhesives most interior substrates Typical applications General installation, repair, and maintenance where a durable bond is required. Interior work that benefits from a neat finish and tidy joints. Projects where dependable initial grab and high final strength are important. Surface preparation Ensure all surfaces are clean, sound, and dry. Remove dust, oil, release agents, laitance, and any loose or flaky material. For dense or non-porous surfaces, light abrasion improves key. Test adhesion on a small area if you are unsure about compatibility. Observe local safety requirements when sanding or cutting. Application Check ambient and substrate temperature. Ideal application between 10°C and 30°C. Protect from freezing and rapid drying. Cut the nozzle to the required bead size or prepare the container according to the product type. Apply an even bead or spread with a suitable trowel where required. Avoid trapping air. Press the materials together, ensuring full contact. For sheet goods, roll firmly to promote transfer and wetting. Support, clamp, or brace as needed until the adhesive develops sufficient handling strength. Cure and working time Pot life and open time vary by product. Typically, tiles can be adjusted within minutes. Grouting commonly permitted after 24 hours under standard conditions. Cooler temperatures and high humidity will slow curing, while warmer, drier conditions accelerate it. Do not load or finish until the bond has developed adequate strength. Always follow best practice for ventilation and safe handling during cure. Coverage Coverage varies based on substrate profile, bead size, and installation method. As a guide, a 300 ml cartridge with a 6 mm round bead can lay several linear meters. For trowel applied adhesives, a notched trowel pattern will influence yield. Plan to have extra on hand for porous or uneven surfaces. Limitations Do not apply to surfaces that are visibly wet unless the product specifically allows damp application. Avoid continuous water immersion unless the product is rated for that exposure. Not all plastics are compatible; test on polypropylene, polyethylene, and PTFE if required. Observe maximum service temperature and any movement or vibration limits appropriate to the application. Clean up Clean excess adhesive from tile faces immediately with a damp sponge. Hardened material must be removed mechanically. Always read the product label and follow local regulations for disposal of leftover material and containers. Safety Read the label before use and keep out of reach of children. Use in a well ventilated area. Wear protective gloves and eye protection. If on skin, wash with soap and water. If in eyes, rinse cautiously and seek medical advice if irritation persists. Do not ingest. Refer to the product Safety Data Sheet for detailed information. Storage Store upright in a cool, dry place away from direct sunlight and heat sources. Keep the cap or nozzle tightly closed when not in use. Do not allow to freeze unless the product literature states it is freeze-thaw stable. Rotate stock to use older product first. Troubleshooting Poor adhesion: Check surface prep, remove contaminants, and reapply with firm pressure. Slow cure: Verify temperature and humidity. Increase airflow or allow more time. Excess squeeze-out: Reduce bead size or spread more evenly. Clean residue before it skins. Frequently asked questions Can I paint over it? Many adhesives can be overcoated once cured. Test a small area with your paint system first. Is it suitable outdoors? Check the product label for outdoor rating. Protect fresh adhesive from rain until cured. What is the service temperature range? Typical service ranges suit most building environments. Avoid direct flame or extreme heat. How do I remove cured material? Mechanical methods are usually required. Work carefully to avoid damaging surrounding finishes. Why buy from Glues Australia We curate a focused range so you can choose faster and build better. Every product listing includes practical how to detail, compatibility guidance, and straightforward support from a team that understands trade requirements. Order with confidence and get your project moving.

    In Stock  Express Post: 1-3 Days | Standard Post: 2-5 Days

    $23.94

  • Packshot of Dunlop Mastic Multipurpose Tile Adhesive 5kg

    Dunlop Dunlop Mastic Multipurpose Tile Adhesive 5kg

    In Stock  Express Post: 1-3 Days | Standard Post: 2-5 Days

    Dunlop Mastic Multipurpose Tile Adhesive High performance, cementitious, non-slump tile adhesive designed for walls and floors. Combines the ease of a mastic with the strength of a cement-based adhesive for reliable results on small to large format tiles. Why choose it Non-slump hold for heavy and large format tiles Indoor and outdoor use on approved substrates Extended open time of up to 30 minutes to position tiles Bed thickness up to 10 mm White colour for use under light or translucent tiles Classification: C2TES1 Suitable tiles Ceramic, porcelain, mosaics, natural stone that is not moisture sensitive, fully vitrified and translucent tiles. Suitable substrates Render, screeds, concrete Plasterboard, fibre cement sheet walls, compressed fibre cement sheet floors Ceramic tile underlay Existing ceramic tiles indoors (properly prepared) Dunlop undertile waterproofing membranes Where it excels Walls needing strong initial grab Floors requiring reliable coverage and non-slump Large format and deeply keyed tiles where full contact is critical Coverage guide 6 mm notch (walls): about 0.5 m² per kg 10 mm notch (floors): about 0.3 m² per kg 5 kg bag: up to ~2 m² on walls or ~1.2 m² on floors 20 kg bag: up to ~10 m² on walls or ~6 m² on floors Set and grout times Allow approximately 24 hours at 23°C and 50% RH before grouting and light foot traffic. Dense tiles, cool weather or humid conditions may extend set time. Mixing 20 kg bag: 6 to 6.5 L of clean water 5 kg bag: 1.5 to 1.75 L of clean water Mix to a creamy consistency, stand for 5 minutes, then re-mix before use Application tips Follow AS 3958 best practice Spread only as much adhesive as can be tiled within the open time Press and slide tiles at right angles to the notches to achieve full contact Back-butter large or deeply keyed tiles for 100% coverage Remove squeeze-out from joints before setting Not suitable for Moisture sensitive natural stone Areas under permanent water immersion such as pools Timber, metal or any substrates subject to movement Application below 5°C Sizes 5 kg and 20 kg bags. Clean up Clean tools with water immediately after use. Safety Wear gloves and eye protection. Avoid inhaling dust. Refer to the product SDS and follow all safety directions.

    In Stock  Express Post: 1-3 Days | Standard Post: 2-5 Days

    $21.05

  • Packshot of Dunlop Trade Resaflex Tile Adhesive 5kg

    Dunlop Dunlop Trade Resaflex Tile Adhesive 5kg

    In Stock  Express Post: 1-3 Days | Standard Post: 2-5 Days

    Dunlop Trade Resaflex Tile Adhesive 5 kg Overview Dunlop Trade Resaflex Tile Adhesive 5 kg is a high quality tile adhesive designed to deliver consistent, reliable bonding performance for trade professionals and serious DIYers. It is formulated for dependable adhesion, easy application, and clean finishing so you can complete jobs with confidence and minimal rework. Why choose this product Reliable bond performance supported by proven chemistry and rigorous quality control. Smooth, predictable application that helps reduce mess and cleanup time. Versatile adhesion profile suited to a wide range of substrates and project types. Clear guidance on surface preparation, application method, and curing to help achieve the best possible result. Suitable for residential fit-outs, maintenance, repairs, and light commercial projects. Suitable materials ceramic tiles porcelain tiles mosaics stone suitable for porous adhesives most interior substrates Typical applications General installation, repair, and maintenance where a durable bond is required. Interior work that benefits from a neat finish and tidy joints. Projects where dependable initial grab and high final strength are important. Surface preparation Ensure all surfaces are clean, sound, and dry. Remove dust, oil, release agents, laitance, and any loose or flaky material. For dense or non-porous surfaces, light abrasion improves key. Test adhesion on a small area if you are unsure about compatibility. Observe local safety requirements when sanding or cutting. Application Check ambient and substrate temperature. Ideal application between 10°C and 30°C. Protect from freezing and rapid drying. Cut the nozzle to the required bead size or prepare the container according to the product type. Apply an even bead or spread with a suitable trowel where required. Avoid trapping air. Press the materials together, ensuring full contact. For sheet goods, roll firmly to promote transfer and wetting. Support, clamp, or brace as needed until the adhesive develops sufficient handling strength. Cure and working time Pot life and open time vary by product. Typically, tiles can be adjusted within minutes. Grouting commonly permitted after 24 hours under standard conditions. Cooler temperatures and high humidity will slow curing, while warmer, drier conditions accelerate it. Do not load or finish until the bond has developed adequate strength. Always follow best practice for ventilation and safe handling during cure. Coverage Coverage varies based on substrate profile, bead size, and installation method. As a guide, a 300 ml cartridge with a 6 mm round bead can lay several linear meters. For trowel applied adhesives, a notched trowel pattern will influence yield. Plan to have extra on hand for porous or uneven surfaces. Limitations Do not apply to surfaces that are visibly wet unless the product specifically allows damp application. Avoid continuous water immersion unless the product is rated for that exposure. Not all plastics are compatible; test on polypropylene, polyethylene, and PTFE if required. Observe maximum service temperature and any movement or vibration limits appropriate to the application. Clean up Clean excess adhesive from tile faces immediately with a damp sponge. Hardened material must be removed mechanically. Always read the product label and follow local regulations for disposal of leftover material and containers. Safety Read the label before use and keep out of reach of children. Use in a well ventilated area. Wear protective gloves and eye protection. If on skin, wash with soap and water. If in eyes, rinse cautiously and seek medical advice if irritation persists. Do not ingest. Refer to the product Safety Data Sheet for detailed information. Storage Store upright in a cool, dry place away from direct sunlight and heat sources. Keep the cap or nozzle tightly closed when not in use. Do not allow to freeze unless the product literature states it is freeze-thaw stable. Rotate stock to use older product first. Troubleshooting Poor adhesion: Check surface prep, remove contaminants, and reapply with firm pressure. Slow cure: Verify temperature and humidity. Increase airflow or allow more time. Excess squeeze-out: Reduce bead size or spread more evenly. Clean residue before it skins. Frequently asked questions Can I paint over it? Many adhesives can be overcoated once cured. Test a small area with your paint system first. Is it suitable outdoors? Check the product label for outdoor rating. Protect fresh adhesive from rain until cured. What is the service temperature range? Typical service ranges suit most building environments. Avoid direct flame or extreme heat. How do I remove cured material? Mechanical methods are usually required. Work carefully to avoid damaging surrounding finishes. Why buy from Glues Australia We curate a focused range so you can choose faster and build better. Every product listing includes practical how to detail, compatibility guidance, and straightforward support from a team that understands trade requirements. Order with confidence and get your project moving.

    In Stock  Express Post: 1-3 Days | Standard Post: 2-5 Days

    $23.25

  • Packshot of Tuff Turf Synthetic Grass Adhesive 320g

    Tuff Turf Tuff Turf Synthetic Grass Adhesive 320g

    In Stock  Express Post: 1-3 Days | Standard Post: 2-5 Days

    Tuff Turf Synthetic Grass Adhesive 320 g Overview Tuff Turf Synthetic Grass Adhesive 320 g is a high quality synthetic grass adhesive designed to deliver consistent, reliable bonding performance for trade professionals and serious DIYers. It is formulated for dependable adhesion, easy application, and clean finishing so you can complete jobs with confidence and minimal rework. Why choose this product Reliable bond performance supported by proven chemistry and rigorous quality control. Smooth, predictable application that helps reduce mess and cleanup time. Versatile adhesion profile suited to a wide range of substrates and project types. Clear guidance on surface preparation, application method, and curing to help achieve the best possible result. Suitable for residential fit-outs, maintenance, repairs, and light commercial projects. Suitable materials synthetic turf backing seaming tape concrete compacted base plywood Typical applications General installation, repair, and maintenance where a durable bond is required. Interior work that benefits from a neat finish and tidy joints. Projects where dependable initial grab and high final strength are important. Surface preparation Ensure all surfaces are clean, sound, and dry. Remove dust, oil, release agents, laitance, and any loose or flaky material. For dense or non-porous surfaces, light abrasion improves key. Test adhesion on a small area if you are unsure about compatibility. Observe local safety requirements when sanding or cutting. Application Check ambient and substrate temperature. Install in dry conditions between 10°C and 30°C, avoiding heavy dew or rain. Cut the nozzle to the required bead size or prepare the container according to the product type. Apply an even bead or spread with a suitable trowel where required. Avoid trapping air. Press the materials together, ensuring full contact. For sheet goods, roll firmly to promote transfer and wetting. Support, clamp, or brace as needed until the adhesive develops sufficient handling strength. Cure and working time Working time varies with conditions. Allow sufficient cure before foot traffic. Full strength typically within 24 to 48 hours. Cooler temperatures and high humidity will slow curing, while warmer, drier conditions accelerate it. Do not load or finish until the bond has developed adequate strength. Always follow best practice for ventilation and safe handling during cure. Coverage Coverage varies based on substrate profile, bead size, and installation method. As a guide, a 300 ml cartridge with a 6 mm round bead can lay several linear meters. For trowel applied adhesives, a notched trowel pattern will influence yield. Plan to have extra on hand for porous or uneven surfaces. Limitations Do not apply to surfaces that are visibly wet unless the product specifically allows damp application. Avoid continuous water immersion unless the product is rated for that exposure. Not all plastics are compatible; test on polypropylene, polyethylene, and PTFE if required. Observe maximum service temperature and any movement or vibration limits appropriate to the application. Clean up Clean tools while wet with a suitable solvent or soapy water depending on formulation. Always read the product label and follow local regulations for disposal of leftover material and containers. Safety Read the label before use and keep out of reach of children. Use in a well ventilated area. Wear protective gloves and eye protection. If on skin, wash with soap and water. If in eyes, rinse cautiously and seek medical advice if irritation persists. Do not ingest. Refer to the product Safety Data Sheet for detailed information. Storage Store upright in a cool, dry place away from direct sunlight and heat sources. Keep the cap or nozzle tightly closed when not in use. Do not allow to freeze unless the product literature states it is freeze-thaw stable. Rotate stock to use older product first. Troubleshooting Poor adhesion: Check surface prep, remove contaminants, and reapply with firm pressure. Slow cure: Verify temperature and humidity. Increase airflow or allow more time. Excess squeeze-out: Reduce bead size or spread more evenly. Clean residue before it skins. Frequently asked questions Can I paint over it? Many adhesives can be overcoated once cured. Test a small area with your paint system first. Is it suitable outdoors? Check the product label for outdoor rating. Protect fresh adhesive from rain until cured. What is the service temperature range? Typical service ranges suit most building environments. Avoid direct flame or extreme heat. How do I remove cured material? Mechanical methods are usually required. Work carefully to avoid damaging surrounding finishes. Why buy from Glues Australia We curate a focused range so you can choose faster and build better. Every product listing includes practical how to detail, compatibility guidance, and straightforward support from a team that understands trade requirements. Order with confidence and get your project moving.

    In Stock  Express Post: 1-3 Days | Standard Post: 2-5 Days

    $12.76

  • Packshot of SikaBond High-Strength Foam Construction Adhesive 750 mL

    Sika SikaBond High-Strength Foam Construction Adhesive 750 mL

    In Stock  Express Post: 1-3 Days | Standard Post: 2-5 Days

    SikaBond High-Strength Foam Construction Adhesive 750 mL is a reliable one component foam construction adhesive dispensed from a can chosen for home repairs, trade work, and craft builds when you want a bond you can trust. Designed for Australian conditions, it balances strength, ease of use, and clean application so you can get professional results without special tools. The 750 mL pack is ideal for general work and keeps neatly in a toolbox or caddy. Why choose Sika High-Strength for your next project Everyday jobs often involve mixed materials and imperfect surfaces. SikaBond High-Strength Foam Construction Adhesive 750 mL has been formulated to wet out well, grab quickly, and cure to a tough finish that resists movement and contact stress. It maintains bond integrity across common temperature swings and has dependable resistance to moisture and most household chemicals. Whether you are fixing, building, sealing, or assembling, this product gives you confidence from first squeeze through final set. Best for Fixing studs, battens, and sheets Filling small gaps while bonding Fast installation where speed saves labour Suitable surfaces The adhesive works well on the following surface types when properly prepared: Timber and masonry Concrete and fibre cement Many building materials except PE and PP Surface preparation Good preparation is the key to a long lasting repair. Remove loose material, dust, and grease. Wipe glossy areas with methylated spirits or an approved cleaner and allow to dry. On very smooth plastics and metals, lightly roughen with fine abrasive paper to give the adhesive a mechanical key. Dry fit parts first and mark alignment points so you can assemble accurately within the open time. If bonding porous materials, ensure both faces are dry and free of surface chalking. How to use Check fit and plan clamping. Do a trial run without adhesive so you know the order of steps. Apply a thin, continuous bead to one surface. For wide pieces, use a zig zag pattern to maximise wetting. Bring surfaces together within the stated open time of assemble parts within the open time to ensure a strong bond. Reseat once if needed, then hold steady. Apply even pressure using clamps, tape, weights, or temporary fasteners. Avoid squeezing all adhesive out of the joint. Allow to cure undisturbed. Initial handling strength will develop as the adhesive sets, with a full cure reached based on the chemistry described below. Cure profile Expands slightly to fill gaps, then cures to a firm, high strength foam. Provides excellent initial grab and reduces the need for nails in many applications. Temperature and environmental performance Apply within the can's specified temperature range. Humidity supports foam curing. Avoid application to very cold, sweating, or waterlogged surfaces. For outdoor use protect fresh bonds from rain until the skin has formed and the core has progressed in cure. Once fully cured, the bond resists normal weathering, splash water, and intermittent UV exposure based on the substrate and paint systems used. Clean up and finishing Clean uncured foam with the prescribed cleaner. Once cured, cut back mechanically. When cured, excess can be carefully trimmed or sanded. For painted finishes, allow the adhesive to fully cure before priming. Test paint on a small area to confirm compatibility and drying behaviour. Coverage guide Coverage varies with bead size, surface porosity, and technique. As a general guide, a 3 mm bead yields approximately 10 to 12 linear meters per 310 mL cartridge. Smaller packs scale proportionally. Gaps, rough edges, and highly absorbent materials will reduce coverage. Plan an extra margin for offcuts and practice passes. Tips for best results Work within the recommended open time so the adhesive can properly wet the surfaces. Use light clamping pressure to keep parts aligned while maintaining a film thickness for strength. For very porous substrates, apply a thin precoat as a primer layer and allow it to tack before final assembly. Keep joint lines clean by masking edges with painter tape and removing it before the adhesive skins. Where movement or vibration is expected, design the joint to share load across a large area. Troubleshooting Poor adhesion: Check for oil, release agents, or surface dust. Reclean and lightly abrade if necessary. Slow cure: Low temperature and low humidity extend cure time. Maintain moderate conditions for best results. Visible squeeze out: Wipe fresh material with a suitable solvent and a soft cloth. Once cured, trim carefully. Bond line prints through paint: Allow a full cure, then prime and apply thin coats of paint, allowing proper drying between coats. Storage and shelf life Store cans upright. Do not expose to heat. Observe transport and disposal rules for pressurised containers. Always check the pack for a lot code and use by guidance. Reseal immediately after use and store upright. Dispose of empty containers responsibly. Safety Read the label before use. Wear gloves when handling uncured material. Provide ventilation in enclosed areas. Avoid contact with skin and eyes. Keep out of reach of children and pets. If sensitivity occurs, stop use and seek advice. Do not ingest. First aid directions and detailed handling information are available on the package and the safety data sheet. Frequently asked questions Can I bond dissimilar materials? Yes, provided each surface is clean and sound. Differences in expansion are managed by the adhesive film thickness and the inherent flexibility after cure. Is clamping required? Light clamping improves alignment and final strength. Excessive pressure can starve the joint of adhesive which reduces performance. Is the bond water resistant? Once cured the bond resists splash water and routine humidity. For permanent immersion choose an adhesive designed for underwater service and follow the manufacturer guidance. Planning your job Measure twice and cut once. Dry assemble parts so you can confirm squareness and alignment before adhesive is involved. Keep rags, clamps, and spacers ready. If you are new to the product, test on offcuts to get a feel for bead size and squeeze out. A consistent 1 to 2 mm bond line is a good starting point for most rigid materials. Thicker lines help when surfaces are uneven. Avoid starving the joint by pressing too hard without giving the adhesive a place to reside. Responsible use Choose an adhesive that suits the materials and the environment the finished piece will face. If a joint will be submerged, carry structural loads, or be exposed to strong chemicals, check the technical data sheet for specific guidance. Many general purpose products are perfect for day to day work, while specialised tasks call for a system designed and tested for that environment. Using the right product first saves time, money, and rework. Aftercare and maintenance Adhesive joints are remarkably strong when used correctly. Design repairs so that routine loads are shared across a generous area. Where heavy vibration is present, pair the adhesive bond with appropriate mechanical fasteners. Keep cleaning chemicals mild, and avoid abrasive pads on visible joints. If a bond will be repainted, choose flexible paint where movement is expected, and keep edges sealed to prevent dirt tracking along the bond line. Recycling and disposal Allow empty containers to cure before disposal. Check local council guidance for recycling of plastics and metal cartridges. Never pour uncured product into drains or soil. Wipe tools on scrap material and let residue harden before placing in general waste. Smart handling keeps the workspace clean and reduces environmental impact.

    In Stock  Express Post: 1-3 Days | Standard Post: 2-5 Days

    $31.50

  • Packshot of Davco Davelastic Tile Adhesive Additive 1 L

    Davco Davco Davelastic Tile Adhesive Additive 1 L

    In Stock  Express Post: 1-3 Days | Standard Post: 2-5 Days

    Davco Davelastic Tile Adhesive Additive 1 L is a reliable latex additive to upgrade cement based tile adhesive performance chosen for home repairs, trade work, and craft builds when you want a bond you can trust. Designed for Australian conditions, it balances strength, ease of use, and clean application so you can get professional results without special tools. The 1 L pack is ideal for general work and keeps neatly in a toolbox or caddy. Why choose Davco Davelastic for your next project Everyday jobs often involve mixed materials and imperfect surfaces. Davco Davelastic Tile Adhesive Additive 1 L has been formulated to wet out well, grab quickly, and cure to a tough finish that resists movement and contact stress. It maintains bond integrity across common temperature swings and has dependable resistance to moisture and most household chemicals. Whether you are fixing, building, sealing, or assembling, this product gives you confidence from first squeeze through final set. Best for Improving bond strength and flexibility Situations where extra deformability is required Wet area tiling as part of a system Suitable surfaces The adhesive works well on the following surface types when properly prepared: Concrete, screeds, and renders Cement based adhesives and grouts as specified Surface preparation Good preparation is the key to a long lasting repair. Remove loose material, dust, and grease. Wipe glossy areas with methylated spirits or an approved cleaner and allow to dry. On very smooth plastics and metals, lightly roughen with fine abrasive paper to give the adhesive a mechanical key. Dry fit parts first and mark alignment points so you can assemble accurately within the open time. If bonding porous materials, ensure both faces are dry and free of surface chalking. How to use Check fit and plan clamping. Do a trial run without adhesive so you know the order of steps. Apply a thin, continuous bead to one surface. For wide pieces, use a zig zag pattern to maximise wetting. Bring surfaces together within the stated open time of follows the base adhesive behaviour. Reseat once if needed, then hold steady. Apply even pressure using clamps, tape, weights, or temporary fasteners. Avoid squeezing all adhesive out of the joint. Allow to cure undisturbed. Initial handling strength will develop as the adhesive sets, with a full cure reached based on the chemistry described below. Cure profile Replace all or part of the mixing water with the additive as directed. Observe normal set and cure times for the base adhesive. Temperature and environmental performance Use within the recommended application window of the system you are modifying. Avoid application to very cold, sweating, or waterlogged surfaces. For outdoor use protect fresh bonds from rain until the skin has formed and the core has progressed in cure. Once fully cured, the bond resists normal weathering, splash water, and intermittent UV exposure based on the substrate and paint systems used. Clean up and finishing Wash tools with water while the mix is fresh. When cured, excess can be carefully trimmed or sanded. For painted finishes, allow the adhesive to fully cure before priming. Test paint on a small area to confirm compatibility and drying behaviour. Coverage guide Coverage varies with bead size, surface porosity, and technique. As a general guide, a 3 mm bead yields approximately 10 to 12 linear meters per 310 mL cartridge. Smaller packs scale proportionally. Gaps, rough edges, and highly absorbent materials will reduce coverage. Plan an extra margin for offcuts and practice passes. Tips for best results Work within the recommended open time so the adhesive can properly wet the surfaces. Use light clamping pressure to keep parts aligned while maintaining a film thickness for strength. For very porous substrates, apply a thin precoat as a primer layer and allow it to tack before final assembly. Keep joint lines clean by masking edges with painter tape and removing it before the adhesive skins. Where movement or vibration is expected, design the joint to share load across a large area. Troubleshooting Poor adhesion: Check for oil, release agents, or surface dust. Reclean and lightly abrade if necessary. Slow cure: Low temperature and low humidity extend cure time. Maintain moderate conditions for best results. Visible squeeze out: Wipe fresh material with a suitable solvent and a soft cloth. Once cured, trim carefully. Bond line prints through paint: Allow a full cure, then prime and apply thin coats of paint, allowing proper drying between coats. Storage and shelf life Keep sealed. Protect from freezing. Shake before use. Always check the pack for a lot code and use by guidance. Reseal immediately after use and store upright. Dispose of empty containers responsibly. Safety Read the label before use. Wear gloves when handling uncured material. Provide ventilation in enclosed areas. Avoid contact with skin and eyes. Keep out of reach of children and pets. If sensitivity occurs, stop use and seek advice. Do not ingest. First aid directions and detailed handling information are available on the package and the safety data sheet. Frequently asked questions Can I bond dissimilar materials? Yes, provided each surface is clean and sound. Differences in expansion are managed by the adhesive film thickness and the inherent flexibility after cure. Is clamping required? Light clamping improves alignment and final strength. Excessive pressure can starve the joint of adhesive which reduces performance. Is the bond water resistant? Once cured the bond resists splash water and routine humidity. For permanent immersion choose an adhesive designed for underwater service and follow the manufacturer guidance. Planning your job Measure twice and cut once. Dry assemble parts so you can confirm squareness and alignment before adhesive is involved. Keep rags, clamps, and spacers ready. If you are new to the product, test on offcuts to get a feel for bead size and squeeze out. A consistent 1 to 2 mm bond line is a good starting point for most rigid materials. Thicker lines help when surfaces are uneven. Avoid starving the joint by pressing too hard without giving the adhesive a place to reside. Responsible use Choose an adhesive that suits the materials and the environment the finished piece will face. If a joint will be submerged, carry structural loads, or be exposed to strong chemicals, check the technical data sheet for specific guidance. Many general purpose products are perfect for day to day work, while specialised tasks call for a system designed and tested for that environment. Using the right product first saves time, money, and rework. Aftercare and maintenance Adhesive joints are remarkably strong when used correctly. Design repairs so that routine loads are shared across a generous area. Where heavy vibration is present, pair the adhesive bond with appropriate mechanical fasteners. Keep cleaning chemicals mild, and avoid abrasive pads on visible joints. If a bond will be repainted, choose flexible paint where movement is expected, and keep edges sealed to prevent dirt tracking along the bond line. Recycling and disposal Allow empty containers to cure before disposal. Check local council guidance for recycling of plastics and metal cartridges. Never pour uncured product into drains or soil. Wipe tools on scrap material and let residue harden before placing in general waste. Smart handling keeps the workspace clean and reduces environmental impact.

    In Stock  Express Post: 1-3 Days | Standard Post: 2-5 Days

    $27.84

  • Packshot of Davco SMP Evo Flexible Tile Adhesive 5 kg

    Davco Davco SMP Evo Flexible Tile Adhesive 5 kg

    In Stock  Express Post: 1-3 Days | Standard Post: 2-5 Days

    Davco SMP Evo Flexible Tile Adhesive 5 kg is a reliable polymer modified flexible tile adhesive for demanding substrates chosen for home repairs, trade work, and craft builds when you want a bond you can trust. Designed for Australian conditions, it balances strength, ease of use, and clean application so you can get professional results without special tools. The 5 kg pack is ideal for general work and keeps neatly in a toolbox or caddy. Why choose Davco SMP for your next project Everyday jobs often involve mixed materials and imperfect surfaces. Davco SMP Evo Flexible Tile Adhesive 5 kg has been formulated to wet out well, grab quickly, and cure to a tough finish that resists movement and contact stress. It maintains bond integrity across common temperature swings and has dependable resistance to moisture and most household chemicals. Whether you are fixing, building, sealing, or assembling, this product gives you confidence from first squeeze through final set. Best for Bathrooms, kitchens, and balconies Tiling over existing tiles where movement accommodation is needed Floor and wall applications Suitable surfaces The adhesive works well on the following surface types when properly prepared: Concrete and screeds Fibre cement sheeting Existing glazed tiles after scuffing and cleaning Surface preparation Good preparation is the key to a long lasting repair. Remove loose material, dust, and grease. Wipe glossy areas with methylated spirits or an approved cleaner and allow to dry. On very smooth plastics and metals, lightly roughen with fine abrasive paper to give the adhesive a mechanical key. Dry fit parts first and mark alignment points so you can assemble accurately within the open time. If bonding porous materials, ensure both faces are dry and free of surface chalking. How to use Check fit and plan clamping. Do a trial run without adhesive so you know the order of steps. Apply a thin, continuous bead to one surface. For wide pieces, use a zig zag pattern to maximise wetting. Bring surfaces together within the stated open time of per data on the bag, adjust for weather. Reseat once if needed, then hold steady. Apply even pressure using clamps, tape, weights, or temporary fasteners. Avoid squeezing all adhesive out of the joint. Allow to cure undisturbed. Initial handling strength will develop as the adhesive sets, with a full cure reached based on the chemistry described below. Cure profile Observe open time, bed thickness, and traffic restrictions. The polymer modification gives improved flexibility once cured. Temperature and environmental performance Install in moderate conditions and shield fresh work from wind and direct sun. Avoid application to very cold, sweating, or waterlogged surfaces. For outdoor use protect fresh bonds from rain until the skin has formed and the core has progressed in cure. Once fully cured, the bond resists normal weathering, splash water, and intermittent UV exposure based on the substrate and paint systems used. Clean up and finishing Water clean-up while fresh. Remove haze before it hardens. When cured, excess can be carefully trimmed or sanded. For painted finishes, allow the adhesive to fully cure before priming. Test paint on a small area to confirm compatibility and drying behaviour. Coverage guide Coverage varies with bead size, surface porosity, and technique. As a general guide, a 3 mm bead yields approximately 10 to 12 linear meters per 310 mL cartridge. Smaller packs scale proportionally. Gaps, rough edges, and highly absorbent materials will reduce coverage. Plan an extra margin for offcuts and practice passes. Tips for best results Work within the recommended open time so the adhesive can properly wet the surfaces. Use light clamping pressure to keep parts aligned while maintaining a film thickness for strength. For very porous substrates, apply a thin precoat as a primer layer and allow it to tack before final assembly. Keep joint lines clean by masking edges with painter tape and removing it before the adhesive skins. Where movement or vibration is expected, design the joint to share load across a large area. Troubleshooting Poor adhesion: Check for oil, release agents, or surface dust. Reclean and lightly abrade if necessary. Slow cure: Low temperature and low humidity extend cure time. Maintain moderate conditions for best results. Visible squeeze out: Wipe fresh material with a suitable solvent and a soft cloth. Once cured, trim carefully. Bond line prints through paint: Allow a full cure, then prime and apply thin coats of paint, allowing proper drying between coats. Storage and shelf life Keep the bag closed and dry between uses. Always check the pack for a lot code and use by guidance. Reseal immediately after use and store upright. Dispose of empty containers responsibly. Safety Read the label before use. Wear gloves when handling uncured material. Provide ventilation in enclosed areas. Avoid contact with skin and eyes. Keep out of reach of children and pets. If sensitivity occurs, stop use and seek advice. Do not ingest. First aid directions and detailed handling information are available on the package and the safety data sheet. Frequently asked questions Can I bond dissimilar materials? Yes, provided each surface is clean and sound. Differences in expansion are managed by the adhesive film thickness and the inherent flexibility after cure. Is clamping required? Light clamping improves alignment and final strength. Excessive pressure can starve the joint of adhesive which reduces performance. Is the bond water resistant? Once cured the bond resists splash water and routine humidity. For permanent immersion choose an adhesive designed for underwater service and follow the manufacturer guidance. Planning your job Measure twice and cut once. Dry assemble parts so you can confirm squareness and alignment before adhesive is involved. Keep rags, clamps, and spacers ready. If you are new to the product, test on offcuts to get a feel for bead size and squeeze out. A consistent 1 to 2 mm bond line is a good starting point for most rigid materials. Thicker lines help when surfaces are uneven. Avoid starving the joint by pressing too hard without giving the adhesive a place to reside. Responsible use Choose an adhesive that suits the materials and the environment the finished piece will face. If a joint will be submerged, carry structural loads, or be exposed to strong chemicals, check the technical data sheet for specific guidance. Many general purpose products are perfect for day to day work, while specialised tasks call for a system designed and tested for that environment. Using the right product first saves time, money, and rework. Aftercare and maintenance Adhesive joints are remarkably strong when used correctly. Design repairs so that routine loads are shared across a generous area. Where heavy vibration is present, pair the adhesive bond with appropriate mechanical fasteners. Keep cleaning chemicals mild, and avoid abrasive pads on visible joints. If a bond will be repainted, choose flexible paint where movement is expected, and keep edges sealed to prevent dirt tracking along the bond line. Recycling and disposal Allow empty containers to cure before disposal. Check local council guidance for recycling of plastics and metal cartridges. Never pour uncured product into drains or soil. Wipe tools on scrap material and let residue harden before placing in general waste. Smart handling keeps the workspace clean and reduces environmental impact.

    In Stock  Express Post: 1-3 Days | Standard Post: 2-5 Days

    $26.38

  • Packshot of Dunlop Floorfix Professional Tile Adhesive 15 kg

    Dunlop Dunlop Floorfix Professional Tile Adhesive 15 kg

    In Stock  Express Post: 1-3 Days | Standard Post: 2-5 Days

    Dunlop Floorfix Professional Tile Adhesive 15 kg is a reliable cement based floor tile adhesive for porcelain and ceramic tiles chosen for home repairs, trade work, and craft builds when you want a bond you can trust. Designed for Australian conditions, it balances strength, ease of use, and clean application so you can get professional results without special tools. The 15 kg pack is ideal for general work and keeps neatly in a toolbox or caddy. Why choose Dunlop Floorfix for your next project Everyday jobs often involve mixed materials and imperfect surfaces. Dunlop Floorfix Professional Tile Adhesive 15 kg has been formulated to wet out well, grab quickly, and cure to a tough finish that resists movement and contact stress. It maintains bond integrity across common temperature swings and has dependable resistance to moisture and most household chemicals. Whether you are fixing, building, sealing, or assembling, this product gives you confidence from first squeeze through final set. Best for General floor tiling High traffic residential areas Back buttering dense porcelain tiles Suitable surfaces The adhesive works well on the following surface types when properly prepared: Concrete slabs and screeds Cement sheet underlay Existing tiles that are clean and sound Surface preparation Good preparation is the key to a long lasting repair. Remove loose material, dust, and grease. Wipe glossy areas with methylated spirits or an approved cleaner and allow to dry. On very smooth plastics and metals, lightly roughen with fine abrasive paper to give the adhesive a mechanical key. Dry fit parts first and mark alignment points so you can assemble accurately within the open time. If bonding porous materials, ensure both faces are dry and free of surface chalking. How to use Check fit and plan clamping. Do a trial run without adhesive so you know the order of steps. Apply a thin, continuous bead to one surface. For wide pieces, use a zig zag pattern to maximise wetting. Bring surfaces together within the stated open time of as indicated on the bag for best wetting and transfer. Reseat once if needed, then hold steady. Apply even pressure using clamps, tape, weights, or temporary fasteners. Avoid squeezing all adhesive out of the joint. Allow to cure undisturbed. Initial handling strength will develop as the adhesive sets, with a full cure reached based on the chemistry described below. Cure profile Respect open time and bed thickness. Allow adequate set before grouting and opening to traffic. Temperature and environmental performance Apply in suitable ambient conditions for predictable cure. Avoid application to very cold, sweating, or waterlogged surfaces. For outdoor use protect fresh bonds from rain until the skin has formed and the core has progressed in cure. Once fully cured, the bond resists normal weathering, splash water, and intermittent UV exposure based on the substrate and paint systems used. Clean up and finishing Damp sponge on fresh residue, water clean-up for tools. When cured, excess can be carefully trimmed or sanded. For painted finishes, allow the adhesive to fully cure before priming. Test paint on a small area to confirm compatibility and drying behaviour. Coverage guide Coverage varies with bead size, surface porosity, and technique. As a general guide, a 3 mm bead yields approximately 10 to 12 linear meters per 310 mL cartridge. Smaller packs scale proportionally. Gaps, rough edges, and highly absorbent materials will reduce coverage. Plan an extra margin for offcuts and practice passes. Tips for best results Work within the recommended open time so the adhesive can properly wet the surfaces. Use light clamping pressure to keep parts aligned while maintaining a film thickness for strength. For very porous substrates, apply a thin precoat as a primer layer and allow it to tack before final assembly. Keep joint lines clean by masking edges with painter tape and removing it before the adhesive skins. Where movement or vibration is expected, design the joint to share load across a large area. Troubleshooting Poor adhesion: Check for oil, release agents, or surface dust. Reclean and lightly abrade if necessary. Slow cure: Low temperature and low humidity extend cure time. Maintain moderate conditions for best results. Visible squeeze out: Wipe fresh material with a suitable solvent and a soft cloth. Once cured, trim carefully. Bond line prints through paint: Allow a full cure, then prime and apply thin coats of paint, allowing proper drying between coats. Storage and shelf life Store sealed and dry to prevent lumping. Always check the pack for a lot code and use by guidance. Reseal immediately after use and store upright. Dispose of empty containers responsibly. Safety Read the label before use. Wear gloves when handling uncured material. Provide ventilation in enclosed areas. Avoid contact with skin and eyes. Keep out of reach of children and pets. If sensitivity occurs, stop use and seek advice. Do not ingest. First aid directions and detailed handling information are available on the package and the safety data sheet. Frequently asked questions Can I bond dissimilar materials? Yes, provided each surface is clean and sound. Differences in expansion are managed by the adhesive film thickness and the inherent flexibility after cure. Is clamping required? Light clamping improves alignment and final strength. Excessive pressure can starve the joint of adhesive which reduces performance. Is the bond water resistant? Once cured the bond resists splash water and routine humidity. For permanent immersion choose an adhesive designed for underwater service and follow the manufacturer guidance. Planning your job Measure twice and cut once. Dry assemble parts so you can confirm squareness and alignment before adhesive is involved. Keep rags, clamps, and spacers ready. If you are new to the product, test on offcuts to get a feel for bead size and squeeze out. A consistent 1 to 2 mm bond line is a good starting point for most rigid materials. Thicker lines help when surfaces are uneven. Avoid starving the joint by pressing too hard without giving the adhesive a place to reside. Responsible use Choose an adhesive that suits the materials and the environment the finished piece will face. If a joint will be submerged, carry structural loads, or be exposed to strong chemicals, check the technical data sheet for specific guidance. Many general purpose products are perfect for day to day work, while specialised tasks call for a system designed and tested for that environment. Using the right product first saves time, money, and rework. Aftercare and maintenance Adhesive joints are remarkably strong when used correctly. Design repairs so that routine loads are shared across a generous area. Where heavy vibration is present, pair the adhesive bond with appropriate mechanical fasteners. Keep cleaning chemicals mild, and avoid abrasive pads on visible joints. If a bond will be repainted, choose flexible paint where movement is expected, and keep edges sealed to prevent dirt tracking along the bond line. Recycling and disposal Allow empty containers to cure before disposal. Check local council guidance for recycling of plastics and metal cartridges. Never pour uncured product into drains or soil. Wipe tools on scrap material and let residue harden before placing in general waste. Smart handling keeps the workspace clean and reduces environmental impact.

    In Stock  Express Post: 1-3 Days | Standard Post: 2-5 Days

    $18.53

  • Packshot of Bastion Superlite Lightweight Tile Adhesive 11 kg

    Bastion Bastion Superlite Lightweight Tile Adhesive 11 kg

    In Stock  Express Post: 1-3 Days | Standard Post: 2-5 Days

    Bastion Superlite Lightweight Tile Adhesive 11 kg is a reliable lightweight polymer modified tile adhesive with excellent spread chosen for home repairs, trade work, and craft builds when you want a bond you can trust. Designed for Australian conditions, it balances strength, ease of use, and clean application so you can get professional results without special tools. The 11 kg pack is ideal for general work and keeps neatly in a toolbox or caddy. Why choose Bastion Superlite for your next project Everyday jobs often involve mixed materials and imperfect surfaces. Bastion Superlite Lightweight Tile Adhesive 11 kg has been formulated to wet out well, grab quickly, and cure to a tough finish that resists movement and contact stress. It maintains bond integrity across common temperature swings and has dependable resistance to moisture and most household chemicals. Whether you are fixing, building, sealing, or assembling, this product gives you confidence from first squeeze through final set. Best for Large format wall and floor tiles Substrates where reduced slump is beneficial Renovations that require easy trowelling Suitable surfaces The adhesive works well on the following surface types when properly prepared: Concrete and screeds Fibre cement sheet Existing tiles suitably prepared Surface preparation Good preparation is the key to a long lasting repair. Remove loose material, dust, and grease. Wipe glossy areas with methylated spirits or an approved cleaner and allow to dry. On very smooth plastics and metals, lightly roughen with fine abrasive paper to give the adhesive a mechanical key. Dry fit parts first and mark alignment points so you can assemble accurately within the open time. If bonding porous materials, ensure both faces are dry and free of surface chalking. How to use Check fit and plan clamping. Do a trial run without adhesive so you know the order of steps. Apply a thin, continuous bead to one surface. For wide pieces, use a zig zag pattern to maximise wetting. Bring surfaces together within the stated open time of per data on the bag for open time and adjust for ambient conditions. Reseat once if needed, then hold steady. Apply even pressure using clamps, tape, weights, or temporary fasteners. Avoid squeezing all adhesive out of the joint. Allow to cure undisturbed. Initial handling strength will develop as the adhesive sets, with a full cure reached based on the chemistry described below. Cure profile Observe recommended open time and bed thickness. Allow the adhesive to set before grouting and traffic. Temperature and environmental performance Install in mild weather to ensure predictable curing. Avoid application to very cold, sweating, or waterlogged surfaces. For outdoor use protect fresh bonds from rain until the skin has formed and the core has progressed in cure. Once fully cured, the bond resists normal weathering, splash water, and intermittent UV exposure based on the substrate and paint systems used. Clean up and finishing Clean trowels and buckets with water before the mix hardens. When cured, excess can be carefully trimmed or sanded. For painted finishes, allow the adhesive to fully cure before priming. Test paint on a small area to confirm compatibility and drying behaviour. Coverage guide Coverage varies with bead size, surface porosity, and technique. As a general guide, a 3 mm bead yields approximately 10 to 12 linear meters per 310 mL cartridge. Smaller packs scale proportionally. Gaps, rough edges, and highly absorbent materials will reduce coverage. Plan an extra margin for offcuts and practice passes. Tips for best results Work within the recommended open time so the adhesive can properly wet the surfaces. Use light clamping pressure to keep parts aligned while maintaining a film thickness for strength. For very porous substrates, apply a thin precoat as a primer layer and allow it to tack before final assembly. Keep joint lines clean by masking edges with painter tape and removing it before the adhesive skins. Where movement or vibration is expected, design the joint to share load across a large area. Troubleshooting Poor adhesion: Check for oil, release agents, or surface dust. Reclean and lightly abrade if necessary. Slow cure: Low temperature and low humidity extend cure time. Maintain moderate conditions for best results. Visible squeeze out: Wipe fresh material with a suitable solvent and a soft cloth. Once cured, trim carefully. Bond line prints through paint: Allow a full cure, then prime and apply thin coats of paint, allowing proper drying between coats. Storage and shelf life Store the bag sealed in a dry place off the ground. Always check the pack for a lot code and use by guidance. Reseal immediately after use and store upright. Dispose of empty containers responsibly. Safety Read the label before use. Wear gloves when handling uncured material. Provide ventilation in enclosed areas. Avoid contact with skin and eyes. Keep out of reach of children and pets. If sensitivity occurs, stop use and seek advice. Do not ingest. First aid directions and detailed handling information are available on the package and the safety data sheet. Frequently asked questions Can I bond dissimilar materials? Yes, provided each surface is clean and sound. Differences in expansion are managed by the adhesive film thickness and the inherent flexibility after cure. Is clamping required? Light clamping improves alignment and final strength. Excessive pressure can starve the joint of adhesive which reduces performance. Is the bond water resistant? Once cured the bond resists splash water and routine humidity. For permanent immersion choose an adhesive designed for underwater service and follow the manufacturer guidance. Planning your job Measure twice and cut once. Dry assemble parts so you can confirm squareness and alignment before adhesive is involved. Keep rags, clamps, and spacers ready. If you are new to the product, test on offcuts to get a feel for bead size and squeeze out. A consistent 1 to 2 mm bond line is a good starting point for most rigid materials. Thicker lines help when surfaces are uneven. Avoid starving the joint by pressing too hard without giving the adhesive a place to reside. Responsible use Choose an adhesive that suits the materials and the environment the finished piece will face. If a joint will be submerged, carry structural loads, or be exposed to strong chemicals, check the technical data sheet for specific guidance. Many general purpose products are perfect for day to day work, while specialised tasks call for a system designed and tested for that environment. Using the right product first saves time, money, and rework. Aftercare and maintenance Adhesive joints are remarkably strong when used correctly. Design repairs so that routine loads are shared across a generous area. Where heavy vibration is present, pair the adhesive bond with appropriate mechanical fasteners. Keep cleaning chemicals mild, and avoid abrasive pads on visible joints. If a bond will be repainted, choose flexible paint where movement is expected, and keep edges sealed to prevent dirt tracking along the bond line. Recycling and disposal Allow empty containers to cure before disposal. Check local council guidance for recycling of plastics and metal cartridges. Never pour uncured product into drains or soil. Wipe tools on scrap material and let residue harden before placing in general waste. Smart handling keeps the workspace clean and reduces environmental impact.

    In Stock  Express Post: 1-3 Days | Standard Post: 2-5 Days

    $41.95

  • Dunlop Ready-to-Go Coloured Grout, Anti-Mould No-Mix - 800g Dunlop Ready-to-Go Coloured Grout, Anti-Mould No-Mix - 800g

    Dunlop Dunlop Ready-to-Go Coloured Grout, Anti-Mould No-Mix - 800g

    In Stock  Express Post: 1-3 Days | Standard Post: 2-5 Days

    Dunlop Ready-to-Go Coloured Grout is a premium, pre-mixed grout for fast, clean results on walls and floors. No mixing, no mess, just open, apply, and buff for a smooth, long-lasting finish. The formula includes Grout Shield for anti-mould and anti-bacterial protection to help surfaces stay cleaner for longer. Suitable for interior and exterior applications, and available in a wide colour range to match or contrast your tiles. Ready-mixed convenience, apply straight from the tub Contains Grout Shield for mould and bacteria resistance Use on walls & floors, indoors & outdoors* Ideal for joint widths from 1–5 mm Great for rejuvenating old grout (min. removal depth: 1 mm walls, 2 mm floors) *Always follow the data sheet guidance for your specific area and exposure. Where to Use Ceramic, porcelain and most glazed tiles Bathrooms, kitchens, splashbacks, laundries, living areas Light-duty exterior tiled areas (check exposure & substrate) This grout is designed for typical domestic and light commercial tiling where a smooth, uniform finish is desired. Colours & Finish Available in a contemporary colour palette (e.g. whites and greys) to complement most tile styles. Use Dunlop’s colour selector to visualise combinations before you start. Coverage Coverage varies by tile size, joint width and depth. As a guide (per kg) of grout: Tile size (L×W×Thickness) Joint width 1.5 mm Joint width 3 mm Joint width 5 mm 25×25×4 mm mosaics ≈1.04 m²/kg ≈0.52 m²/kg ≈0.31 m²/kg 100×100×8 mm ≈2.08 m²/kg ≈1.04 m²/kg ≈0.63 m²/kg 200×200×8 mm ≈4.17 m²/kg ≈2.08 m²/kg ≈1.25 m²/kg Tip: Allow an extra 10–15% for wastage due to technique, tile type and site conditions. Directions (Summary) Prep: Ensure joints are clean, dry, and free from dust, adhesive residue and contaminants. For rejuvenation, remove at least 1 mm (walls) or 2 mm (floors) of old grout. Apply: Using a rubber grout float, force grout firmly into joints at a 45° angle. Strike & shape: Allow grout to firm in the joint (~15 mins). Shape joints as required. Clean: Wipe diagonally with a dense, damp sponge, rinsing frequently. Use minimal water to reduce shade variation and shrinkage. Buff: When touch-dry (typically 6–24 hrs), buff tile faces with a clean, dry cloth. Drying & Use Initial set at ~24 hrs at 23 °C / 50% RH Shower walls can be exposed to water after ~24 hrs Clean-Up & Storage Clean tools and residue with water while the grout is still wet. Reseal the tub between uses to prevent skinning. Store upright in a cool, dry place. Safety Read the Safety Data Sheet before use and follow PPE guidance. Avoid contact with eyes and prolonged skin contact. Keep out of reach of children.

    In Stock  Express Post: 1-3 Days | Standard Post: 2-5 Days

    $16.30 $0.02/g

  • Earl’s Powder Putty – Mix-to-Use Interior & Exterior Filler (No Waste, Easy Sand) Earl’s Powder Putty – Mix-to-Use Interior & Exterior Filler (No Waste, Easy Sand)

    Timbermate Earl’s Powder Putty – Mix-to-Use Interior & Exterior Filler (No Waste, Easy Sand)

    In Stock  Express Post: 1-3 Days | Standard Post: 2-5 Days

    Earl’s Powder Putty – Mix-to-Use Interior & Exterior Filler Earl’s Powder Putty is a multi-purpose powder filler for professional and DIY repairs. Just add water, mix only what you need, and achieve a tough, easy-sand finish with no waste and no shrinking. Brand: Earl’s Interior and exterior use* Mix-on-demand convenience Non-shrinking, smooth finish Easy sanding and shaping Indefinite shelf life in dry powder form Proudly made in Australia *Exterior applications must be sealed/painted and used on stable substrates. About Earl’s Powder Putty Earl’s Powder Putty delivers reliable, high-quality filling for timber, walls, masonry and metal. Because it’s supplied as a dry powder, you can tailor the mix to your task—stiffer for knife-grade filling and sculpting, or looser for fine skim work. The result is a hardwearing repair that sands easily and accepts coatings beautifully. Where Earl’s Powder Putty Works Timber & woodwork: doors, frames, skirting, architraves, furniture, cabinetry Walls & panels: plasterboard and cement sheeting patching and feathering Masonry & concrete: chips, small holes and surface imperfections Metals: minor dents and irregularities prior to priming and painting Floor preparation: quick patching of distressed boards prior to covering Craft & hobby: architectural details, mouldings and small sculpting tasks Why Choose Earl’s No shrink: Formulated to dry without shrinking for flush, invisible repairs. Mix what you need: Reduce waste and always work with a fresh batch. Shapes perfectly: Once dry, Earl’s Powder Putty can be cut, carved, sanded or sawn. Paint-ready: Accepts primers and topcoats after proper dry and prep. Economical & dependable: Indefinite shelf life in powder form when stored dry. Directions for Earl’s Powder Putty Surface prep: Ensure the area is clean, dry and sound. Remove loose material, dust, grease and contaminants. Key glossy surfaces for better adhesion. Mix: In a clean container, add Earl’s Powder Putty and slowly incorporate clean water. Stir to a smooth, lump-free paste. Adjust water to suit the task. Apply: Press the mix firmly into the repair with a putty knife or trowel. Slightly overfill to allow for sanding back flush. Build: For deep repairs, apply in layers, allowing each to firm before adding the next. Finish: Once dry, sand smooth. The cured filler can be carved or sawn to refine edges and profiles. Coat: Prime/seal and paint after full dry. For exterior use, always seal with suitable coatings. Clean-up: Clean tools with water while the product is still wet. Dry and recoat times vary with temperature, humidity and film thickness. Allow extra time in cool or damp conditions and for deep fills. Good to Know About Earl’s Not waterproof by itself: Water and weather resistance requires sealing/painting. Not flexible: Avoid use where movement, vibration or structural flexing is expected. Stable substrates only: Ensure exterior bases are sound and well prepared. Storage: Keep Earl’s Powder Putty dry and tightly closed. Moisture exposure can reduce performance after opening. Safety: Avoid dust during mixing and sanding. Use PPE and adequate ventilation. Typical Earl’s Applications Filling nail and screw holes, chips and minor cracks Skim patching and feathering edges prior to painting Rebuilding small decorative profiles and mouldings Levelling minor surface imperfections before finishing Specifications Brand Earl’s Product Name Earl’s Powder Putty Product Type Multi-purpose powder filler Format Dry powder; mix with clean water Colour (dry) Off-white to white; paintable Use Areas Interior and exterior* (exterior must be sealed/painted; stable substrates only) Substrate Compatibility Wood, plasterboard, cement sheeting, concrete, masonry, properly prepared metal Shrinkage Non-shrinking when used as directed Sandability Easy sanding once fully dry Paintability Prime/seal and paint after full dry Water Resistance Requires sealing; product itself is not waterproof Shelf Life (powder) Indefinite when stored cool, dry and sealed Clean-up Water while wet Tools Putty knife, trowel, mixing stick or paddle, sanding block Country of Origin Australia Limitations of Earl’s Powder Putty Do not use as a flexible gap filler or where structural movement is expected. Always prime/seal before exposure to moisture or exterior weather. Deep repairs may require multiple layers with adequate drying between coats. Not for permanently wet, submerged or high-movement joints. FAQs – Earl’s Powder Putty Can I mix a large batch and store it?Mix only what you can use within the working time. Discard any mix that begins to stiffen or set. Can I screw or nail into it?For non-structural tasks, light fixings may be possible in sufficiently thick, fully cured areas. Pre-drill as needed and test first. Is it paintable?Yes. Once dry and sanded, prime or seal the repair and finish with your chosen coating system. Always follow label directions. Test on a small, inconspicuous area to confirm compatibility and finish.

    In Stock  Express Post: 1-3 Days | Standard Post: 2-5 Days

    $10.50 - $81.00

  • Agnews Water Putty - Multi-Purpose Filler & Floor Leveler (Interior/Exterior Grade) Agnews Water Putty - Multi-Purpose Filler & Floor Leveler (Interior/Exterior Grade)

    Timbermate Agnews Water Putty - Multi-Purpose Filler & Floor Leveler (Interior/Exterior Grade)

    In Stock  Express Post: 1-3 Days | Standard Post: 2-5 Days

    Agnews Water Putty - Hard-Setting Filler for Wood, Plasterboard, Concrete & More Agnews Water Putty is a professional, powder-based repair and levelling compound for durable, long-lasting results. Mix only what you need with clean water, then patch, level or rebuild surfaces with confidence. Once cured, it sets rock hard, bonds permanently, and can be sawn, drilled and sanded to a smooth, paint-ready finish. Key features Brand: Agnews Unlimited shelf life when stored dry Non cracking, non shrinking, non sinking Won't fall out – adheres firmly and fills to any depth Interior & exterior grade (seal exterior applications after full dry) Non flammable and no VOCs Mix what you need for minimal waste Suitable substrates Plasterboard, concrete, wood/timber, cement sheet, masonry. Also suitable for minor floor levelling and feathering on concrete, timber and ceramic tile substrates. Typical applications Fill holes in wood: knotholes, nail and screw holes, dents, edge build-ups Wall patching: cracks and cavities in plasterboard and cement sheet Furniture repair: tighten loose joints, reset fasteners, rebuild profiles Floor levelling: ramp or smooth minor level variations before floor coverings Trim and fixtures: refit loose door bumpers and trims with reliable hold Architectural & hobby moulding: casting and shaping durable components Why choose Agnews Agnews Water Putty cures to a dense, stone-hard finish that resists shrinkage and cracking even in deep fills. It bonds securely, stays put, and finishes cleanly, delivering a stable base for sanding, priming and painting. From small touch-ups to larger restorations, it provides consistent, professional results. Directions (general guide) Surface prep: Ensure the area is clean, dry, sound and free of dust, oil or loose material. For very porous substrates, lightly dampen to reduce rapid suction. Mix: Add powder to clean water and blend to a smooth, lump-free paste. Adjust water to suit application (thicker for filling, looser for fairing/skim). Apply: Press firmly into cracks or voids with a putty knife or trowel. Overfill slightly so you can sand back flush. Cure: Allow to dry thoroughly. Dry time varies with thickness, temperature and humidity. Finish: Sand to profile. Prime and paint or seal. For exterior applications, always seal after full dry. Exterior use guidance This is a hard-setting, non-flexible compound. For exterior use, only apply over stable substrates with minimal expansion and contraction from temperature changes. Ensure the putty is fully dry before sealing with a suitable exterior-grade coating. Finishing & compatibility Paintable and sealable after full dry; prime as required for best results. Can be cut, carved, drilled and sanded after cure without crumbling. For stained timber finishes, test a small area first for colour and absorption. Pro tips Mix small batches and use promptly. For deep voids, apply in layers if needed, allowing each layer to firm before the next. Store powder in a cool, dry place to maintain its unlimited shelf life. Clean tools with water before material cures. At a glance Substrates: plasterboard, concrete, wood/timber, cement sheet, masonry Uses: patching, levelling, rebuilding, moulding Properties: non cracking, non shrinking, non sinking, non flammable, no VOCs Finish: hard, dense, smooth and paint-ready after sanding/priming

    In Stock  Express Post: 1-3 Days | Standard Post: 2-5 Days

    $7.00 - $40.00

  • Sika Sikaflex Pro+ Sealant For Concrete and Masonry Facades 600ml [White]

    Sika Sika Sikaflex Pro+ Sealant For Concrete and Masonry Facades 600ml

    In Stock  Express Post: 1-3 Days | Standard Post: 2-5 Days

    Sikaflex® Pro+ - Solvent-Free, Highly Flexible Sealant & Adhesive All new solvent-free, highly flexible, primer-less sealant and adhesive is the one-stop product for any tradesman and handyman's home building or renovation. Sikaflex® Pro+ is a 1-component moisture curing polyurethane elastic sealant and adhesive that is formulated with Sika’s newly engineered i-Cure technology to provide higher performance, more movement capability, and improved bubble-free curing. Sika’s new i-Cure technology is user and eco-friendly, with no solvents and a low environmental impact, while maintaining the performance of traditional polyurethane. It is suitable for overpainting with traditional paint coatings. The i-Cure® technology has an early initial set and overcomes bubbling in the sealant while curing, even in extreme conditions. Sikaflex® Pro+ is a high-performance, interior and exterior elastic joint sealant with excellent water, weather, and ageing resistance. It has many uses, including: Expansion joints in walls and cladding Sealing around doors and window frames Sealing penetrations in walls and floors for pipes Sealing joints in concrete and masonry elements Sealant for draught-proofing and general sealing and filling applications Pro+ can be used on a multitude of applications and common building substrates. It has good adhesion to damp substrates. To name a few, Pro+ can be used on: Aluminium Steel Powder-coated metals or glazed tiles Concrete, aerated concrete, cement-based renders, mortars, and bricks Application of Sikaflex® Pro+ Ensure all surfaces are structurally sound, clean, dry, and free from any grease, etc. (The surface can be damp but not wet. If uncertain, apply masking tape to test adhesion. If masking tape sticks to the surface, it's OK to proceed.) Movement joints must have a minimum width and depth of 5mm. Apply a bond-breaker tape, or backing rod to the base of the joint to prevent 3-sided adhesion. To keep the work clean, apply masking tape to the top edge of the joint on each face. Cut the nozzle to the required width and gun sealant into the joint. Avoid voids or air entrapment in the joint when applying. Before the sealant has skinned, tool off with an appropriate spatula to give a smooth finish. Remove the masking tape and clean up immediately.

    In Stock  Express Post: 1-3 Days | Standard Post: 2-5 Days

    $0.00 - $28.00

  • Sika Sikaflex Pro+ Sealant 310ml [White]

    Sika Sika Sikaflex Pro+ Sealant 310ml

    In Stock  Express Post: 1-3 Days | Standard Post: 2-5 Days

    Sikaflex® Pro+ - Solvent-Free, Highly Flexible Sealant & Adhesive All new solvent-free, highly flexible, primer-less sealant and adhesive is the one-stop product for any tradesman and handyman's home building or renovation. Sikaflex® Pro+ is a 1-component moisture curing polyurethane elastic sealant and adhesive that is formulated with Sika’s newly engineered i-Cure technology to provide higher performance, more movement capability, and improved bubble-free curing. Sika’s new i-Cure technology is user and eco-friendly, with no solvents and a low environmental impact, while maintaining the performance of traditional polyurethane. It is suitable for overpainting with traditional paint coatings. The i-Cure® technology has an early initial set and overcomes bubbling in the sealant while curing, even in extreme conditions. Sikaflex® Pro+ is a high-performance, interior and exterior elastic joint sealant with excellent water, weather, and ageing resistance. It has many uses, including: Expansion joints in walls and cladding Sealing around doors and window frames Sealing penetrations in walls and floors for pipes Sealing joints in concrete and masonry elements Sealant for draught-proofing and general sealing and filling applications Pro+ can be used on a multitude of applications and common building substrates. It has good adhesion to damp substrates. To name a few, Pro+ can be used on: Aluminium Steel Powder-coated metals or glazed tiles Concrete, aerated concrete, cement-based renders, mortars, and bricks Application of Sikaflex® Pro+ Ensure all surfaces are structurally sound, clean, dry, and free from any grease, etc. (The surface can be damp but not wet. If uncertain, apply masking tape to test adhesion. If masking tape sticks to the surface, it's OK to proceed.) Movement joints must have a minimum width and depth of 5mm. Apply a bond-breaker tape, or backing rod to the base of the joint to prevent 3-sided adhesion. To keep the work clean, apply masking tape to the top edge of the joint on each face. Cut the nozzle to the required width and gun sealant into the joint. Avoid voids or air entrapment in the joint when applying. Before the sealant has skinned, tool off with an appropriate spatula to give a smooth finish. Remove the masking tape and clean up immediately.

    In Stock  Express Post: 1-3 Days | Standard Post: 2-5 Days

    $24.00

  • Weldbond Steel Tough Welbond Universal Adhesive Bottle 420ml

    Weldbond Weldbond Steel Tough Welbond Universal Adhesive Bottle 420ml

    Sold Out  Express Post: 1-3 Days | Standard Post: 2-5 Days

    Weldbond is a universal adhesive for gluing a variety of materials. Wood, tile, glass, plaster, cork, slate, brick, concrete block, linoleum, clay tile, ceramics, fabrics, and more. About the product Works as a sealer, bonding agent, or primer Completely non-toxic Dries to a clear, flexible bond Works on porous and non-porous surfaces UL approved Will not dissolve hard foam Safe for Styrofoam Works well with Plastics and expanded polystyrene Frequently Asked Questions Can I keep my weldbond bottle outside in the garage? Will it freeze? Weldbond should be protected from the cold as it will freeze. Once frozen, this product loses all adhesive capabilities. It should be stored above 50°f/ 10°c at all times. Also, after the container has been opened, ensure it is closed tightly after each use. What is the shelf life of weldbond? Weldbond typically has a shelf life of 5 years. If the product is starting to solidify, it can be restored by adding just a little bit of water. We advise the consumer to give the container a good shake prior to every use. Is weldbond non-toxic? Weldbond has been tested to be non-toxic. Weldbond conforms to astm d4236. Is weldbond tested on animals or created with any animal by-products? Weldbond is not tested on animals and does not contain any animal by-products. This product is vegan-friendly.

    Sold Out  Express Post: 1-3 Days | Standard Post: 2-5 Days

    $24.43

  • Weldbond Steel Tough Universal Adhesive Bottle 160ml

    Weldbond Weldbond Steel Tough Universal Adhesive Bottle 160ml

    In Stock  Express Post: 1-3 Days | Standard Post: 2-5 Days

    Weldbond is a universal adhesive for gluing a variety of materials. Wood, tile, glass, plaster, cork, slate, brick, concrete block, linoleum, clay tile, ceramics, fabrics, and more. About the product Works as a sealer, bonding agent, or primer Completely non-toxic Dries to a clear, flexible bond Works on porous and non-porous surfaces UL approved Will not dissolve hard foam Safe for Styrofoam Works well with Plastics and expanded polystyrene Frequently Asked Questions Can I keep my weldbond bottle outside in the garage? Will it freeze? Weldbond should be protected from the cold as it will freeze. Once frozen, this product loses all adhesive capabilities. It should be stored above 50°f/ 10°c at all times. Also, after the container has been opened, ensure it is closed tightly after each use. What is the shelf life of weldbond? Weldbond typically has a shelf life of 5 years. If the product is starting to solidify, it can be restored by adding just a little bit of water. We advise the consumer to give the container a good shake prior to every use. Is weldbond non-toxic? Weldbond has been tested to be non-toxic. Weldbond conforms to astm d4236. Is weldbond tested on animals or created with any animal by-products? Weldbond is not tested on animals and does not contain any animal by-products. This product is vegan-friendly.

    In Stock  Express Post: 1-3 Days | Standard Post: 2-5 Days

    $12.75

  • Tricleanium Ultra Concentrated Cleaner Sugar Soap makes 100 Lts 1Kg Tricleanium Ultra Concentrated Cleaner Sugar Soap makes 100 Lts 1Kg

    Tricleanium Tricleanium Ultra Concentrated Cleaner Sugar Soap makes 100 Lts 1Kg

    In Stock  Express Post: 1-3 Days | Standard Post: 2-5 Days

    USE TRICLEANIUM: •Before painting or wallpapering •On internal or external walls, floors, bench tops, tiles, slate, stainless steel, baths, glass, stove tops, range hoods, fridges, cupboards, shelves, greasy oven trays, home brewing equipment. •To clean musty washing machines •Outside on greasy driveways or garage floors, boats or BBQ's. •In the factory, commercial kitchen, where concentrated cleaning power or degreasing is needed. TRICLEANIUM is a wholly Australian owned family business and has been in the market place for more than 50 years. TRICLEANIUM is a concentrated cleaning product in crystal form (100% alkaline salts). It is not diluted by fillers or water. TRICLEANIUM’s ultra concentrated power means it can tackle the toughest jobs that other products won’t touch including BBQs, range hoods, greasy driveways, cleaning in engineering works and the like. TRICLEANIUM can be used on almost any washable surface (floors, walls, concrete, kitchen appliances, fibreglass, tiles etc) but prolonged contact with exposed aluminium and brass should be avoided.

    In Stock  Express Post: 1-3 Days | Standard Post: 2-5 Days

    $18.48

  • Tricleanium Ultra Concentrated Cleaner Sugar Soap 400g

    Tricleanium Tricleanium Ultra Concentrated Cleaner Sugar Soap 400g

    In Stock  Express Post: 1-3 Days | Standard Post: 2-5 Days

    USE TRICLEANIUM: •Before painting or wallpapering •On internal or external walls, floors, bench tops, tiles, slate, stainless steel, baths, glass, stove tops, range hoods, fridges, cupboards, shelves, greasy oven trays, home brewing equipment. •To clean musty washing machines •Outside on greasy driveways or garage floors, boats or BBQ's. •In the factory, commercial kitchen, where concentrated cleaning power or degreasing is needed. TRICLEANIUM is a wholly Australian owned family business and has been in the market place for more than 50 years. TRICLEANIUM is a concentrated cleaning product in crystal form (100% alkaline salts). It is not diluted by fillers or water. TRICLEANIUM’s ultra concentrated power means it can tackle the toughest jobs that other products won’t touch including BBQs, range hoods, greasy driveways, cleaning in engineering works and the like. TRICLEANIUM can be used on almost any washable surface (floors, walls, concrete, kitchen appliances, fibreglass, tiles etc) but prolonged contact with exposed aluminium and brass should be avoided.

    In Stock  Express Post: 1-3 Days | Standard Post: 2-5 Days

    $9.70

  • Tricleanium Ultra Concentrated Cleaner Sugar Soap 2Kg Tricleanium Ultra Concentrated Cleaner Sugar Soap 2Kg

    Tricleanium Tricleanium Ultra Concentrated Cleaner Sugar Soap 2Kg

    In Stock  Express Post: 1-3 Days | Standard Post: 2-5 Days

    USE TRICLEANIUM: •Before painting or wallpapering •On internal or external walls, floors, bench tops, tiles, slate, stainless steel, baths, glass, stove tops, range hoods, fridges, cupboards, shelves, greasy oven trays, home brewing equipment. •To clean musty washing machines •Outside on greasy driveways or garage floors, boats or BBQ's. •In the factory, commercial kitchen, where concentrated cleaning power or degreasing is needed. TRICLEANIUM is a wholly Australian owned family business and has been in the market place for more than 50 years. TRICLEANIUM is a concentrated cleaning product in crystal form (100% alkaline salts). It is not diluted by fillers or water. TRICLEANIUM’s ultra concentrated power means it can tackle the toughest jobs that other products won’t touch including BBQs, range hoods, greasy driveways, cleaning in engineering works and the like. TRICLEANIUM can be used on almost any washable surface (floors, walls, concrete, kitchen appliances, fibreglass, tiles etc) but prolonged contact with exposed aluminium and brass should be avoided.

    In Stock  Express Post: 1-3 Days | Standard Post: 2-5 Days

    $28.21

  • Tricleanium Ultra Concentrated Cleaner Sugar Soap 110g

    Tricleanium Tricleanium Ultra Concentrated Cleaner Sugar Soap 110g

    Sold Out  Express Post: 1-3 Days | Standard Post: 2-5 Days

    USE TRICLEANIUM: •Before painting or wallpapering •On internal or external walls, floors, benchtops, tiles, slate, stainless steel, baths, glass, stovetops, range hoods, fridges, cupboards, shelves, greasy oven trays, home brewing equipment. •To clean musty washing machines •Outside on greasy driveways or garage floors, boats or BBQs. •In the factory, commercial kitchen, where concentrated cleaning power or degreasing is needed. TRICLEANIUM is a wholly Australian owned family business and has been in the market place for more than 50 years. TRICLEANIUM is a concentrated cleaning product in crystal form (100% alkaline salts). It is not diluted by fillers or water. TRICLEANIUM’s ultra-concentrated power means it can tackle the toughest jobs that other products won’t touch including BBQs, range hoods, greasy driveways, cleaning in engineering works and the like. TRICLEANIUM can be used on almost any washable surface (floors, walls, concrete, kitchen appliances, fibreglass, tiles etc) but prolonged contact with exposed aluminium and brass should be avoided.

    Sold Out  Express Post: 1-3 Days | Standard Post: 2-5 Days

    $5.33

  • Sikaflex®-111 Stick & Seal Grey: The Ultimate 1-Part Adhesive & Sealant for Internal & External Projects

    Sika Sika Sikaflex 111 Stick & Seal 1-Part Adhesive & Sealant 290ml [Grey]

    In Stock  Express Post: 1-3 Days | Standard Post: 2-5 Days

    Sikaflex®-111 Stick & Seal is a high-performance 1-part multipurpose adhesive and sealant that bonds and seals a wide range of construction materials for both internal and external applications. Its advanced silane-terminated polymer technology delivers exceptional adhesion without surface pre-treatment, even on damp substrates. Key Features Bonds well to a wide variety of substrates without surface pre-treatment Adheres to damp concrete and other porous materials Compatible with most construction materials, including EPS/XPS and building wraps Excellent mechanical strength and weathering resistance Low VOC, LEED v4 EQc 2 compliant, and EC 1PLUS certified Ideal for bonding and sealing in indoor and outdoor environments Where to Use Designed for professional and DIY use across construction and renovation projects. Perfect for bonding or sealing: Concrete and masonry Wood and timber components Ceramic, stone, and tiles Metal surfaces Glass and plastic materials such as PVC, PA, PET, and EPS/XPS Applications Adhesive for bonding construction components Sealant for vertical and horizontal joints Repairs, renovations, and installations in building and civil works Technical Information Composition Silane-terminated polymer Density ~1.40 kg/L (ISO 1183-1) Shore A Hardness ~36 (after 28 days) Tensile Strength ~1.5 N/mm² (ISO 37) Elastic Recovery ~75 % (ISO 7389) Service Temperature −50 °C to +80 °C Curing Rate ~3 mm per 24 h (at 23 °C / 50 % r.h.) Skinning Time ~35 minutes (at 23 °C / 50 % r.h.) Colour Options Available in White, Concrete Grey, and Black. Packaging 290 ml cartridge | 12 cartridges per box Storage & Shelf Life Store unopened in a cool, dry place between +5 °C and +25 °C. Shelf life 12 months from production date. Certifications CE Marking – EN 15651-1 (Facade elements Class F EXT-INT CC 20HM) GEV-EMICODE EC 1PLUS (Very Low Emissions) LEED v4 EQc 2 Low-Emitting Materials compliant French VOC Regulation Class A+ Why Choose Sikaflex®-111 Stick & Seal This versatile adhesive-sealant provides superior adhesion on most construction materials, making it the go-to solution for professionals and renovators who need reliable bonding and sealing performance. Whether you are working on concrete, metal, or plastic, Sikaflex®-111 Stick & Seal ensures a flexible, durable, and weather-resistant joint every time.

    In Stock  Express Post: 1-3 Days | Standard Post: 2-5 Days

    $23.00


You have seen 48 out of 77 products

A wooden floor

Trowel/roller-applied adhesives and repair compounds for vinyl, timber, laminate and tile systems. Match notch size and spread rate; confirm open time, rolling requirements and return-to-service timing. For subfloor patching, pick sandable, fast-set fillers. Use filters to refine by chemistry and method. Always follow the product page and TDS/SDS.

Login

Forgot your password?

Don't have an account yet?
Create account