
Fillers and repair compounds that sand smooth for paint-ready results. Choose fast-set for quick turnarounds or extended open time for shaping. Use filters to refine by chemistry and set speed. Always check the product page and TDS/SDS.
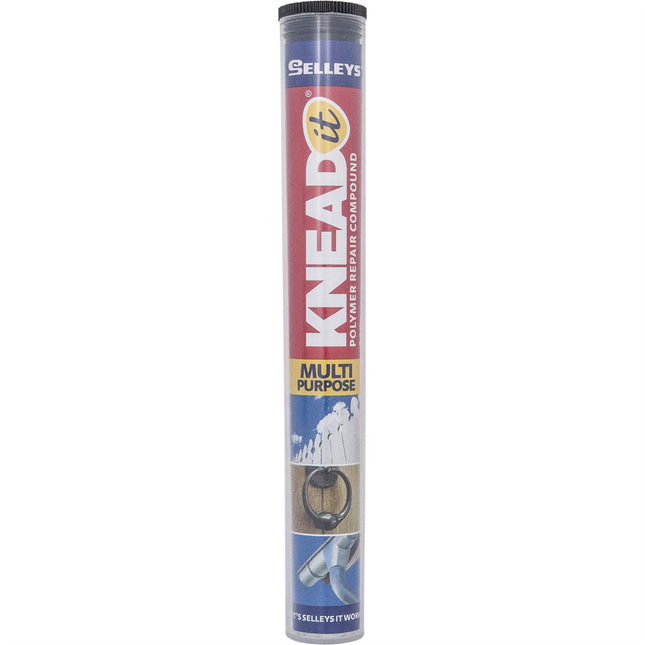
A versatile, hand kneadable fast setting epoxy putty that is ideal for repairing, rebuilding, reshaping or restoring almost anything. It can be drilled, filed, machined, screwed, sawn, sanded and painted. Packaged in a handy roll so you can just cut off what you require and save the rest for another day, it hardens in 5-10 minutes, after mixing. Approved for contact with drinking water. Features Will not sag, run or drip Easy to use – no mess Can be drilled, sawed, sanded, filed, tapped, machined or painted one hour after mixing Good adhesive strength Can be used to reshape, rebuild and repair a multitude of surfaces and applications Good gap filling properties Long-lasting, durable solution Heat resistant to 120°C continuously or 140°C intermittently Can be used underwater. (but dry surfaces for application are best and recommended) Rapid set time (<10 minutes) Suitable for contact with drinking water. Complies with AS/NZS 4020, QAS Type Test Certificate No.: 8649 Excellent anchoring properties Where can this product be used? Repair and replacement – timber, metal, masonry, many plastics, ceramics Mending – toys, appliances, lawn mowers, sports equipment etc Sealing – leaks in gutters and downpipes Patching – chipped concrete, floors, bricks, blocks etc Attaching – fixtures, machine tags, signs etc Anchoring – bolts, screws, housings etc Moulding – to reform-reshape damaged timber, metal, masonry, plastics, ceramics Moulding to rebuild – wrought iron fencing Forming knobs and missing parts Balancing – table legs etc Fixing a damaged roof tile Repairing a water (drinking) tank Lost the head off your hammer? Make a new one with knead it Replace chip in golf club (woods) Not recommended for filling or sealing joints/cracks subject to movement as the cured product is extremely hard and inflexible Does not adhere to polyethylene, polypropylene or Polytetrafluoroethylene (Teflon?) or silicone rubber Pot life (working life) decreases above 20°C Set time increases at temperatures below 20°C Approval for Drinking Water Contact to AS/’NZ4020:2005 subject to a maximum surface area: volume ratio of 10,375mm2/L; minimum cure time: 72 hours at 20°C; maximum temperature: 85°C; maximum wet film thickness: 5 – 6mm What materials is this product suitable for? Wood/Timber Concrete Anchoring bolts Metal Masonry Plastics Ceramics How to use this product Clean surface free of grease, dirt and dust. For best results roughen bond area prior to cleaning. Cut off required amount. Replace disc on the remaining portion. Use gloves to avoid messing hands. To mix, knead with fingers to a uniform colour. If mixing is difficult, warm to room temperature. Apply to surface to be repaired (within 2 minutes of mixing) and mould to shape if required. For a smooth appearance, remove excess and hand rub with water or a damp cloth before hardening begins. Trim away any excess before initial hardening. Remove any residues with acetone prior to initial hardening. Hardened excess may be sanded or trimmed away once fully cured. After 5-10 minutes Knead-It Multi-Purpose will harden and begin to form a strong bond. After 60 minutes Knead-It Multi-Purpose may be drilled, sanded, machined, filed, sawed or painted. Wash hands thoroughly with soap and water before product hardens. Handy tips Ensure the putty and hardener are mixed properly. Knead-It will become warm as it is mixed, A good indication its mixed properly is when you have a uniform colour and feel a mild heat radiating from the knead-it. To help determine when your knead it has set, keep a small piece off to check- when it is hard, it indicates your job is done. Use Knead-It Aqua for applications in wet/ submerged areas. Use Knead-It Steel for applications on metal or fuel contact For cleaning surfaces prior to application of adhesive, if the surface is porous, we would recommend using SELLEYS Liquid Sugar Soap. If the surface is non-porous eg glass or metal, firstly clean the surface with mineral turpentine and then again with methylated spirits. If there is old, difficult to remove residue such as old paint, we recommend using paint stripper such as SELLEYS Kwik Strip Smart. Ensure the surface is dry before applying the product Keep a canister of SELLEYS Sugar Soap Wipes nearby for a quick and effective cleanup Safety tips Where possible wear protective gloves when using Knead-It Multi-Purpose. Contact with skin may result in irritation. Epoxy resin is a known skin sensitiser. Repeated or prolonged skin contact may lead to allergic contact dermatitis. If redness or swelling of the skin occurs, wash thoroughly with soap and water. Seek medical attention if in any doubt. Mixed and cured material is not hazardous. Cured material can only be removed by cutting and abrasion. If cured on the skin, it will peel off in a few days without assistance. Soaking in warm water will assist removal. Storage and re-use Replace silver disc to seal ends and keep in a cool dry place.
$26.95
![Timbermate Woodfiller putty crack filler Interior 2Kg [Jarrah]](http://gluesaustralia.com.au/cdn/shop/files/9315284002000.jpg?v=1754811488&width=645)
Timbermate Wood filler is an Interior grade 4 in 1 Wood Putty, Grain Filler, Edge Filler and Crack Filler. When thinned slightly with water can also be used as a sanding sealer. Timbermate does not shrink, sink, crack or fall out and has an indefinite shelf life. It is non-flammable, non-toxic and can be used to the last gram. The secret ingredient of Timbermate is tap water, therefore, containing no Acrylic, Latex or Solvents. Timbermate comes in 13 premixed colours plus Natural Tint Base. Timbermate takes all types of known stains, varnishes and coatings. The Timbermate formula is over 85 years old and is the only genuine water-based formula in the world proving that the formulation has stood the test of time. Features & Benefits of Timbermate No Waste, Usable to the last drop. If tub dries out just add water to soften. Won't Shrink, Sink, Crack or Fall Out. Suitable for use in all Timbers including Particle Board M.D.F. (Custom Wood) *Plaster Board, Flooring, Panelling etc. Can be used as Wood Putty, Sanding Sealer, Prime Coat, Grainfiller, Crackfiller, Undercoat & Edge Filler all in one. Available in 13 Timber Tones plus Natural. Use White for top coats only. Can be tinted in wet state or overstained when dry. Use any type of Colorant i.e. Water Based Spirit based ochers etc. Easy sanding, will not clog paper when DRY Sanded dust can be mixed with water for re-use. Fast drying approx. 20-30 min, but can be heat dried with a heat gun or lamp for faster drying. Temperature can affect drying time. Clean hands or tools with water. Non-Flammable, Non-Toxic, Non-Yellowing. Solvent, Latex and Acrylic Free. Heat Proof and Freezeproof. Provides a strong foundation for all top coats inc. Single & two pack products polyurethane's, oils, acrylics, french polish wax etc. Takes nails, screws, planing, sawing, drilling and routing Can be used on Metal, Plastic, Fibreglass and in Foundries. 100% Australian Made and Owned. Available in pack sizes of 250g, 500g, 2Kg, 8Kg, 20Kg and 200Kg. Interior Grade. Edgefiller Apply TIMBERMATE with a spatula or knife using hand pressure to force into the Edge or End of the grain. For spray gun use stir 10%-15% water into TIMBERMATE fit a 2mm mozzle and set pressure to 60psi. Boards can be stacked for easy spraying. Allow to dry and sand with a fine grit paper and apply topcoat. Woodfiller/Wood Putty Fills cracks, knots, pin and screw holes, splits, blemishes, etc. Fill deep holes in layers allowing time for each layer to dry. Will not blind natural wood grain. Drying time is about 30 minutes. TIMBERMATE dries hard and smooth without shrinking or sinking and can be belt or drum sanded as it is not affected by heat, the hotter it gets the harder and faster it sets and that means less "Down Time." You can speed dry TIMBERMATE by adjusting the surrounding air temperature. This can be done by using either hot air, heat lamps, or kiln ovens.TIMBERMATE can be mixed with any stains before or after the filler is dry. To match medium and darker shades mix with Natural, Pine or other light shades. Use white TIMBERMATE only for white top coats. Grainfiller Mix 10% to 15% water into TIMBERMATE to make a perfect Grainfiller, Sanding Sealer and Prime Coat all in one application. First sand surface and with fine grit sandpaper, then apply Grainfiller to surface with a spray gun, paint roller, hessian or a cloth rolled into a ball, rub across the grain in a circular motion finishing with the grain. Sand, once filler is dry, to perfection with either sandpaper or power sander, using a fine grit paper. Grain filer can be used in a Roller or Curtain Coater or Spray Gun using a 2mm nozzle and 60psi pressure. Can be further thinned down with water if required. MDF Due to the finishing system used to manufacture MDF, it is essential to seal the job with a water-based non-acrylic product before applying top coats. Therefore TIMBERMATE meets your needs. Flooring Preparing old floors: Scrape all dust and waste between boards and surface as well as from knot holes and nail heads, vacuum well and carry out first sanding to prepare for filling and coating. Ensure that floor is stabilised, dry and free of movement. Application new floors and prepared old floors: Fill cracks, knot and nail holes and all blemished with a putty knife. Fill deeper holes in layers of about 6mm allowing each fill to dry. Apply TIMBERMATE to the entire floor, as a sealant, using a squeegee, trowel or paint roller. Allow to dry and sand off with a fine paper - 120 to 150 grit is recommended for best results. The floor can now be stained or varnished. Frequently Asked Questions Question: Is TIMBERMATE toxic, flammable or harmful? Answer: It is advisable to carry out safe work practices, as you would when working with dust. (Use an approved dust mask and safety goggles). TIMBERMATE contains no harmful ingredients and is non-flammable. Question: Can TIMBERMATE be used externally? Answer: No, as TIMBERMATE® is resoluble in water it is not advisable to use it outdoors. TIMBERMATE IS RECOMMENDED FOR INTERIOR USE. For external use, we recommend Earls MulTFill, Powder Putty or Porion Flexible Filler. Question: Can TIMBERMATE be used with stains and other finishes? Answer: Yes, TIMBERMATE® will take all types of known stains, coatings and colourants which can be Water based, Oil based, Solvent or Spirit based and even Acid Catalysed Lacquers. Question: Can TIMBERMATE be grainfilled? Answer: Yes, TIMBERMATE is a non-solvent based filler and is ideal for grainfilling. Mix 10-15% hot water to thin the Timbermate, then rub over the grain or spread thinly (see below for more detailed instructions). TIMBERMATE will: *Not raise the grain *Not damage the grain TIMBERMATE is: *Easy to sand when dry *Easy to stain when dry *Heat proof so you can speed the drying time by heating with a hair dryer, heat gun, lights etc. Question: How is the grainfiller applied? Answer: Take some TIMBERMATE out of the tub and place it in a separate container. Add approximately 10-15% water, (1gm=1ml) and mix into a slurry like paste (like toothpaste). Use a LINT FREE CLOTH AND RUB ACROSS THE GRAIN. When grainfiller goes "whitish" and sands off easily like talc powder, it is dry. TIMBERMATE will not blind the sandpaper (ie. clog up). If sandpaper gets clogged the grainfiller is not dry. Sand off in the same direction as the grain. Stain or coat when dry. Question: When is the stain applied? Answer: You can stain before or after applying TIMBERMATE (see "How do I match colours"). Question: How are the colours matched? Answer: Colour matching is easy. You can do it either of the following ways: Add your colourant to the putty and match the exact colour whilst wet. TIMBERMATE will dry lighter, but coat back to its original wet colour once coated with clear finishes. The final result is what you see (wet) is what you get. You can stain TIMBERMATE once it is dry. To test if dry, just rub sandpaper over putty. If putty clogs the sandpaper the filler is still wet. Wait for TIMBERMATE to dry and then stain. Question: How long does TIMBERMATE take to dry? Answer: Depending on the weather and depth of fill, TIMBERMATE will dry as follows: In hot weather, TIMBERMATE dries quicker. In cold weather, the depth of fill will determine the drying time. You can speed up the drying time by using a heat gun, hair dryer or light. Question: What depth or width can be filled? Answer: Do not fill holes deeper than 6-8mm at a time. TIMBERMATE dries quicker when filled in layers. Allow TIMBERMATE to dry between layers. Question: Why is the tub hard some days and feels dry and soft on other days? Answer: TIMBERMATE is waterbased. It contains no harmful solvents or acrylics and is, therefore, temperature sensitive. The warmer the weather or environment the softer the putty. On hot days it will start to dry in the tub if not properly sealed. Add a few drops of water to re moisten. Question: How is TIMBERMATE softened? Answer: Add a few drops of warm water to the top of the tub. It will soften quite quickly. If tub is frozen, thaw out by standing tub in a tub of hot water or place in a microwave for 20 seconds. TIMBERMATE is freeze thaw stable. Question: Can TIMBERMATE be used for any other purpose other than wood repair? Answer: TIMBERMATE does not shrink, sink, crack or fallout and can, therefore, be used on Plasterboard, Masonry, Fibreglass, Plastic and any other surface. Bearing in mind that steel must be coated with a primer to avoid rusting. Question: Can TIMBERMATE go off or does it have a shelf life? Answer: TIMBERMATE has an unlimited shelf life and will last indefinitely. If contents become dry merely add a few drops of water to reconstitute. DO NOT add more water than is necessary or leave excess water in the tub for a long period of time. The trapped excess water in the tub will cause the putty to become contaminated and will start to degenerate. Question: Why are so many colours available? Answer: We manufacture 13 colours to match almost all shades and types of timber. If you are using a clear coat you must match your putty colour. If staining, use Natural (tinting base). Question: What is Tint Base (Natural) putty and why? Answer: Tint Base (Natural putty) is putty in its natural state uncoloured. You may add the lightest shade of tint to change its colour. Question: Can TIMBERMATE be used on floors? Answer: TIMBERMATE is ideal for filling cracks, gaps, and nail holes in floors. TIMBERMATE will enhance the grain on the floor. As it does not shrink, sink, crack or fall out it is highly recommended for all floors. Question: Can TIMBERMATE be used with French Polish and Waxes? Answer: You can use all types of Waxes, Shellac and Oils on TIMBERMATE. Question: How is an incorrect match or badly filled hole fixed? Answer: Errors can be fixed with ease. If TIMBERMATE is not coated then wash out. If already coated, then break the top coat and then wash out. Refill or rematch if necessary. Question: Is TIMBERMATE Australian owned and manufactured? Answer: Yes. TIMBERMATE is 100% Australian owned and manufactured. An all Australian dedicated workforce does all manufacturing in our Melbourne factory.
$10.29 - $239.00

Earl’s MulTfill is a premium, ready-to-use multi-purpose filler designed for fast, clean, and durable repairs across interior and exterior projects. The heavy-bodied formula spreads smoothly, levels cleanly, and dries hard without shrinking, sinking, cracking, or falling out. With zero VOCs and no acrylics, latex, or solvents, it’s a low-odour choice for homes, workshops, and job sites. Clean-up is simple with water, and once dry MulTfill sands easily to a fine, paint-ready surface. Why you’ll love it Ready from the tub: no mixing, no mess, no wastage — just open, apply, and close. Zero VOCs: stable, low odour and user-friendly. Non-sinking, non-shrinking: fills stay flush and true. Won’t fall out: dries hard for lasting repairs. Paintable finish: accepts most coatings for a seamless result. Sands like a dream: refined finish without clogging when sanded dry. Long shelf life: keep the lid sealed and it’s ready when you are. Where it works Use MulTfill on common building materials including wood (including weathered and damaged sections once sound), masonry, plasterboard, cement sheet, concrete, and primed metal. It’s ideal for nail holes, dents, shallow voids, corner repairs, skim touch-ups, and general surface preparation before painting. Colour options White, Teak (Cypress), Ebony, Grey, Jarrah, Merbau, Walnut. How to use Prep: Ensure the area is clean, dry, and sound. Remove loose material and dust. For best glide, lightly wet your putty knife. Apply: Press firmly to fill the defect and smooth off. For deep voids, apply in layers up to 6 mm per pass, allowing each layer to dry before the next. Sand: Once fully dry, sand with 120 grit or finer to achieve a smooth, level surface. Coat: Prime if required, then paint. For clear finishes, tint the filler with suitable colorants or oxides before application to harmonise with surrounding material. Cleanup & care: Clean tools with water. If product thickens in the tub, add a few drops of clean water and stir until smooth. Always reseal promptly. Pro tips Feather edges wide when blending across boards or wall patches. On exterior jobs, protect from rain during cure and overcoat appropriately for exposure. Tinting before clear coats helps the repair visually disappear on timber substrates. Specifications Brand Earl’s Product Type Multi-purpose paintable putty / filler (water-based) Use Interior and exterior VOC Zero VOC Contains No acrylic, latex, or solvents Substrates Wood, masonry, plasterboard, cement sheet, concrete, primed metal Application Thickness Up to 6 mm per layer; allow to dry between layers Sanding Dry sand; 120 grit or finer Overcoating Accepts most paints; for clear coats, tint filler first for best colour match Clean-up Water Colours White; Teak (Cypress), Ebony, Grey, Jarrah, Merbau, Walnut Pack Sizes 140 g, 600 g, 1 kg, 2 kg, 3 kg (varies by colour) Shelf Life Up to 5 years if sealed and stored correctly Country of Origin Australia Storage Keep container tightly closed when not in use. Store in a cool, dry place out of direct sun. Avoid prolonged freezing. If product thickens, add a few drops of water and mix to restore spreadability. What’s in the tub A smooth-spreading, heavy-bodied filler that levels cleanly, sands easily, and delivers a paint-ready finish across interior and exterior surfaces — with no mixing, no fuss, and no strong odour.
$8.70 - $54.81
![Prep Multipurpose Quick Drying Wood Filler Putty Water Based 250g [Brush-Box]](http://gluesaustralia.com.au/cdn/shop/files/9314261009223_76fac964-6223-45fd-bbba-c5872cc3ed41.png?v=1754723592&width=645)
![Prep Multipurpose Quick Drying Wood Filler Putty Water Based 250g [Cedar]](http://gluesaustralia.com.au/cdn/shop/files/9314261009148.png?v=1754723592&width=645)
Water-based interior wood filler suitable for all timber types and timber by-products. Once set, the wood filler can be sanded, screwed, and nailed. The wood filler is suitable for filling cracks, holes, end grain, and edges. For exterior use, protect with a suitable exterior grade finish (e.g. paint or stain) Features & Benefits Environmentally friendly Dries quickly Water clean up Easy to use Long shelf-life; if filler hardens just add drops of water & mix Multi-purpose, 4 in 1 uses – fills nails holes, takes stain or paint easily, repairs gouges & chips and crack & edge filler
$12.95 - $39.72

Weldbond Universal Adhesive can be used in various applications as a glue, bonding agent, sealer or primer. It’s high solid content means that it can be easily diluted and therefore becomes a very economical alternative to traditional products used for specific applications. Same formula & product you trust, just better looking! Weldbond is a universal adhesive that bonds almost anything! It is non-toxic, non-flammable. Weldbond will dry clear and flexible and is therefore ideal for use with woods and fabrics as no glue lines will show and the glue will bend with movement. It is non-staining and will not become brittle with age. It is non-toxic, non-flammable & Solvent free 3-4 times stronger than standard P.V. High Solid content (51-53%) means more glue and it goes a lot further Does everything a P.V.A does, plus more Dries to a clear, flexible bond and can be used as a sealer, bonding agent or primer.
$103.00


Agnews Water Putty - Hard-Setting Filler for Wood, Plasterboard, Concrete & More Agnews Water Putty is a professional, powder-based repair and levelling compound for durable, long-lasting results. Mix only what you need with clean water, then patch, level or rebuild surfaces with confidence. Once cured, it sets rock hard, bonds permanently, and can be sawn, drilled and sanded to a smooth, paint-ready finish. Key features Brand: Agnews Unlimited shelf life when stored dry Non cracking, non shrinking, non sinking Won't fall out – adheres firmly and fills to any depth Interior & exterior grade (seal exterior applications after full dry) Non flammable and no VOCs Mix what you need for minimal waste Suitable substrates Plasterboard, concrete, wood/timber, cement sheet, masonry. Also suitable for minor floor levelling and feathering on concrete, timber and ceramic tile substrates. Typical applications Fill holes in wood: knotholes, nail and screw holes, dents, edge build-ups Wall patching: cracks and cavities in plasterboard and cement sheet Furniture repair: tighten loose joints, reset fasteners, rebuild profiles Floor levelling: ramp or smooth minor level variations before floor coverings Trim and fixtures: refit loose door bumpers and trims with reliable hold Architectural & hobby moulding: casting and shaping durable components Why choose Agnews Agnews Water Putty cures to a dense, stone-hard finish that resists shrinkage and cracking even in deep fills. It bonds securely, stays put, and finishes cleanly, delivering a stable base for sanding, priming and painting. From small touch-ups to larger restorations, it provides consistent, professional results. Directions (general guide) Surface prep: Ensure the area is clean, dry, sound and free of dust, oil or loose material. For very porous substrates, lightly dampen to reduce rapid suction. Mix: Add powder to clean water and blend to a smooth, lump-free paste. Adjust water to suit application (thicker for filling, looser for fairing/skim). Apply: Press firmly into cracks or voids with a putty knife or trowel. Overfill slightly so you can sand back flush. Cure: Allow to dry thoroughly. Dry time varies with thickness, temperature and humidity. Finish: Sand to profile. Prime and paint or seal. For exterior applications, always seal after full dry. Exterior use guidance This is a hard-setting, non-flexible compound. For exterior use, only apply over stable substrates with minimal expansion and contraction from temperature changes. Ensure the putty is fully dry before sealing with a suitable exterior-grade coating. Finishing & compatibility Paintable and sealable after full dry; prime as required for best results. Can be cut, carved, drilled and sanded after cure without crumbling. For stained timber finishes, test a small area first for colour and absorption. Pro tips Mix small batches and use promptly. For deep voids, apply in layers if needed, allowing each layer to firm before the next. Store powder in a cool, dry place to maintain its unlimited shelf life. Clean tools with water before material cures. At a glance Substrates: plasterboard, concrete, wood/timber, cement sheet, masonry Uses: patching, levelling, rebuilding, moulding Properties: non cracking, non shrinking, non sinking, non flammable, no VOCs Finish: hard, dense, smooth and paint-ready after sanding/priming
$8.77 - $86.00


Sikaflex®-291 Black Marine-Grade Polyurethane Sealant 150mL is a premium, one-component, non-sag adhesive sealant specially formulated for marine environments. It cures on exposure to atmospheric moisture, forming a strong, elastic, and durable bond that resists saltwater, vibration, and weathering. Trusted by boat builders and marine professionals worldwide, Sikaflex®-291 meets International Maritime Organisation (IMO) standards for safety and performance. Features & Benefits Marine-grade polyurethane formula with superior adhesion Excellent weathering and saltwater resistance Elastic and vibration-resistant for long-lasting seals Low odour and non-corrosive composition Can be sanded and overpainted after curing Maintains flexibility across wide temperature ranges Where to Use Sealing and bonding on boats, yachts, and marine structures Deck fittings, hatches, and hardware installations Elastic, vibration-resistant joints above and below deck Bonding wood, metals, primers, coatings, ceramics, and GRP plastics Important Notes Not suitable for plastics prone to stress cracking such as Plexiglas or Polycarbonate Surfaces must be clean, dry, and free from grease or dust before application Recommended application temperature: 5°C to 40°C Technical Details Chemical Base 1-component polyurethane Colour Black Cure Mechanism Moisture-curing Density (uncured) Approx. 1.3 kg/L Shore A Hardness 40 Tensile Strength 1.8 MPa Elongation at Break 500% Temperature Resistance -50°C to +90°C (up to 180°C short term) Skin Time Approx. 60 minutes Shelf Life 12 months (stored below 25°C) Packaging 150 mL Tube For marine sealing and bonding you can trust, Sikaflex®-291 delivers professional-grade strength, flexibility, and durability on every project.
$20.52 $0.14/ml

PC-11® thrives in wet environments. It is resistant to water whether it is fresh or salt. Thick consistency like PC-7® and long open time (30 min). Work horizontal or vertical, indoor or outdoor. Wet, dry or under water. Whether you are working on an area where you just can’t remove water and moisture or you want the white colour for your repair, PC-11® is your choice. Choose PC-11® for ceramic repairs, pools and spas, fibreglass boats, tubs and sinks, stock tanks and thousands of other repairs. It has excellent adhesive properties bonding metals, fibreglass, wood, tile and some plastics such as ABS and rigid PVC. Ample open time allows tooling or positioning in order to tackle larger and challenging jobs. When mixed, the epoxy, part A (white) and the hardener part B (lt. blue) react to form a bond of tremendous strength and flexibility. The PC-11® formulation is slow curing, but slow can be a good thing especially for large tasks. WORKING TIME: 30 MINUTES CURE TIME: 24 HOURS (48 HOURS FOR FULL CURE) PC-11® is thick. Thick is good if you need to work vertically or want to hold an object in place. How thick? Not quite as thick as peanut butter. Here are just a few specific uses (there are hundreds of other uses): Reattach missing swimming pool tiles. Patch a hole in a fibreglass canoe or the fibreglass keel of a fishing boat. Repair cracked or damage swimming pool or hot tub skimmer. Waterproof and Seal cracked fibreglass. Seal screw holes to hatch lids or seating. Attach fish locators to transom. Repair stock tanks. Repair broken refrigerator door shelf fixtures. Repair broken pottery. Repair shower basin or antique bath tub. Seal leaking air conditioner drip pan. Seal underground conduit. How to prepare a surface for bonding with PC-11® Epoxy Paste Remove contaminants such as dust, dirt, oil, barnacles and grime with a solvent such as Denatured Alcohol, Acetone, Rubbing Alcohol (isopropyl alcohol) or Lacquer Thinner. A mild detergent solution in water is also good removing contaminants. Use a clean paper towel or rag for wiping. Do not use Mineral Spirits or Paint Thinner for removing contaminants. For a wet or underwater surface; clean contaminants as best as you can. Solvents will not help you in this situation. Remove rust and loose paint with sandpaper or wire brush. Epoxy typically sticks to most paints. If there is a concern of the paint’s adhesion then remove it with sandpaper or wire brush. Smooth, glossy and shiny surfaces should be roughened using sandpaper to increase adhesion. How to clean-up after PC-11® Epoxy Paste application Use Denatured Alcohol, Acetone, Rubbing Alcohol (isopropyl alcohol) or Lacquer Thinner to clean tools and mixing surface before PC-11® cures. Clean hands and skin with soap and water. Cured epoxy can be removed by applying Paint Remover or Paint Stripper to soften the epoxy surface. Scratch off the softened epoxy. Repeat as needed. Can PC-11® be used in Aquariums? There is the potential for PC-11® part A and part B to harm sea life but properly measured and mixed PC-11® has been used safely in fresh and saltwater aquariums. It is important that part A and B are thoroughly and completely mixed. What plastics does PC-11® stick to? PC-11® has good adhesion to Rigid PVC and CPVC, polyester and fiberglass, polyurethane, ABS and Bakelite. What plastics does PC-11® not stick to? PC-11® does not stick to polyethylene, polypropylene, HDPE, polystyrene, nylon, acrylic, Teflon, and polycarbonate. What rubbers does PC-11® stick to? PC-11® sticks to SBR, Buna, and polyurethane rubbers and does not stick to EPDM, vinyl and neoprene rubbers. What temperatures can PC-11® be applied? PC-11® cures very slowly at temperatures below 50°F (10°C). At or below freezing temperatures the PC-11® will stop curing. In hot conditions, above 95°F (35°C), PC-11® will cure rapidly reducing the working or application time. Can gel coat be applied to PC-11®? Gel coat will not cure properly in direct contact with PC-11®. It is important that repairs made with PC-11® be sealed with a suitable primer/sealer before applying a gel coat. Can PC-11® be painted? Yes. It is good practice to apply a premium stain sealing primer to repairs made with PC-11® prior to the finish coat. Will PC-11® yellow in direct sunlight? Yes, PC-11® yellows in direct sunlight. PC-11® resists ultraviolet light but will still gradually change colour. Prime and paint if the colour is important. Can PC-11® be thinned with solvent? PC-11® does not contain solvents. Acetone and denatured alcohol (ethanol) are compatible but will extend the cure time and decrease the hardness. Other solvents such as mineral spirits, paint thinner and turpentine are not compatible. PC-11® is a simple one to one mix, but how accurately does the measurement need to be? The volume of part A to part B should be close to equal. A slight excess of part A is preferable to an excess of part B. Excess of part B will not accelerate the curing and it may make it softer.
$16.24


PC-Marine™ Epoxy Putty Stick is a specially formulated epoxy putty suitable for wet or underwater applications. Incredibly it has an extended open time (20 – 30 minutes) but cures hard within 60 minutes for a fast return to service and emergency repairs. It sticks great to metals, fibreglass, tile, wood and some plastics such as ABS and rigid PVC. Here are just a few specific uses (there are hundreds of other uses): Seal holes and waterproof fittings Shape and form missing corners or holes in ceramic or fibreglass fixtures Re-attach and secure loose hardware Fill cracks and dings in fibreglass Seal leaks in water tanks How to prepare a surface for bonding with PC-Marine™ Remove contaminants such as dust, dirt, oil and grime with a solvent such as denatured alcohol, acetone, rubbing alcohol (isopropyl alcohol) or lacquer thinner. A mild detergent solution in water is also good removing contaminants. Use a clean paper towel or rag for wiping. Do not use mineral spirits or paint thinner for removing contaminants. Remove rust and loose paint with sandpaper or wire brush. Epoxy typically sticks to most paints. If there is a concern of the paint’s adhesion then remove it with sandpaper or wire brush. Smooth, glossy and shiny surfaces should be roughened using sandpaper to increase adhesion. How to clean-up after PC-Marine™ application Wear disposable gloves to minimize contact with the skin. Use denatured alcohol, acetone, rubbing alcohol (isopropyl alcohol) or lacquer thinner to cleanup before PC-Marine cures. Clean hands and skin with soap and water. Cured epoxy can be removed by applying paint remover or paint stripper to soften the epoxy surface. Scratch off the softened epoxy. Repeat as needed. Can PC-Marine™ be applied underwater? Yes, application underwater is possible. PC-Marine™ will adhere and cure underwater. However, it is preferable to apply it in dry conditions. Is PC-Marine™ suitable for repairing canoes? PC-Marine™ is excellent for repairs to aluminium and fibreglass canoes but not when they are made with Hypalon. How much time does it take for PC-Marine™ to cure? PC-Marine™ has an extended application or open time of 20 minutes. Most repairs made with PC-Marine™ can be returned to service after 60 minutes. Some applications may require a full 24-hour cure. Is PC-Marine™ green? PC-Marine™ Epoxy Putty stick is white on the inside and green on the outside. The green colour disappears when mixed with the white. The result is an off-white colour when it cures. What is the maximum thickness that PC-Marine™ Epoxy Putty can be applied? PC-Marine™ can be applied thick or thin. There isn’t a thickness limit. It cures from the within via a chemical reaction. It does not need to dry or be exposed to air. How much PC-Marine™ can be mixed at a single time? PC-Marine™ is slower curing than other epoxy putties allowing larger portions to be mixed at one time. Small quantities can be mixed more thoroughly and with less effort. Can PC-Marine™ cure in a freezer? PC-Marine™ is not recommended for sub-freezing temperatures. We recommend an application temperature of 2°C or higher. Does PC-Marine shrink? PC-Marine™ does not shrink.
$16.17


PC-11® thrives in wet environments. It is resistant to water whether it is fresh or salt. Thick consistency like PC-7® and long open time (30 min). Work horizontal or vertical, indoor or outdoor. Wet, dry or under water. Whether you are working on an area where you just can’t remove water and moisture or you want the white colour for your repair, PC-11® is your choice. Choose PC-11® for ceramic repairs, pools and spas, fibreglass boats, tubs and sinks, stock tanks and thousands of other repairs. It has excellent adhesive properties bonding metals, fibreglass, wood, tile and some plastics such as ABS and rigid PVC. Ample open time allows tooling or positioning in order to tackle larger and challenging jobs. When mixed, the epoxy, part A (white) and the hardener part B (lt. blue) react to form a bond of tremendous strength and flexibility. The PC-11® formulation is slow curing, but slow can be a good thing especially for large tasks. WORKING TIME: 30 MINUTES CURE TIME: 24 HOURS (48 HOURS FOR FULL CURE) PC-11® is thick. Thick is good if you need to work vertically or want to hold an object in place. How thick? Not quite as thick as peanut butter. Here are just a few specific uses (there are hundreds of other uses): Reattach missing swimming pool tiles. Patch a hole in a fibreglass canoe or the fibreglass keel of a fishing boat. Repair cracked or damage swimming pool or hot tub skimmer. Waterproof and Seal cracked fibreglass. Seal screw holes to hatch lids or seating. Attach fish locators to transom. Repair stock tanks. Repair broken refrigerator door shelf fixtures. Repair broken pottery. Repair shower basin or antique bath tub. Seal leaking air conditioner drip pan. Seal underground conduit. How to prepare a surface for bonding with PC-11® Epoxy Paste Remove contaminants such as dust, dirt, oil, barnacles and grime with a solvent such as Denatured Alcohol, Acetone, Rubbing Alcohol (isopropyl alcohol) or Lacquer Thinner. A mild detergent solution in water is also good removing contaminants. Use a clean paper towel or rag for wiping. Do not use Mineral Spirits or Paint Thinner for removing contaminants. For a wet or underwater surface; clean contaminants as best as you can. Solvents will not help you in this situation. Remove rust and loose paint with sandpaper or wire brush. Epoxy typically sticks to most paints. If there is a concern of the paint’s adhesion then remove it with sandpaper or wire brush. Smooth, glossy and shiny surfaces should be roughened using sandpaper to increase adhesion. How to clean-up after PC-11® Epoxy Paste application Use Denatured Alcohol, Acetone, Rubbing Alcohol (isopropyl alcohol) or Lacquer Thinner to clean tools and mixing surface before PC-11® cures. Clean hands and skin with soap and water. Cured epoxy can be removed by applying Paint Remover or Paint Stripper to soften the epoxy surface. Scratch off the softened epoxy. Repeat as needed. Can PC-11® be used in Aquariums? There is the potential for PC-11® part A and part B to harm sea life but properly measured and mixed PC-11® has been used safely in fresh and saltwater aquariums. It is important that part A and B are thoroughly and completely mixed. What plastics does PC-11® stick to? PC-11® has good adhesion to Rigid PVC and CPVC, polyester and fiberglass, polyurethane, ABS and Bakelite. What plastics does PC-11® not stick to? PC-11® does not stick to polyethylene, polypropylene, HDPE, polystyrene, nylon, acrylic, Teflon, and polycarbonate. What rubbers does PC-11® stick to? PC-11® sticks to SBR, Buna, and polyurethane rubbers and does not stick to EPDM, vinyl and neoprene rubbers. What temperatures can PC-11® be applied? PC-11® cures very slowly at temperatures below 50°F (10°C). At or below freezing temperatures the PC-11® will stop curing. In hot conditions, above 95°F (35°C), PC-11® will cure rapidly reducing the working or application time. Can gel coat be applied to PC-11®? Gel coat will not cure properly in direct contact with PC-11®. It is important that repairs made with PC-11® be sealed with a suitable primer/sealer before applying a gel coat. Can PC-11® be painted? Yes. It is good practice to apply a premium stain sealing primer to repairs made with PC-11® prior to the finish coat. Will PC-11® yellow in direct sunlight? Yes, PC-11® yellows in direct sunlight. PC-11® resists ultraviolet light but will still gradually change colour. Prime and paint if the colour is important. Can PC-11® be thinned with solvent? PC-11® does not contain solvents. Acetone and denatured alcohol (ethanol) are compatible but will extend the cure time and decrease the hardness. Other solvents such as mineral spirits, paint thinner and turpentine are not compatible. PC-11® is a simple one to one mix, but how accurately does the measurement need to be? The volume of part A to part B should be close to equal. A slight excess of part A is preferable to an excess of part B. Excess of part B will not accelerate the curing and it may make it softer.
$21.95

PC-SuperEpoxy® is a non-drip translucent paste epoxy suitable for conventional or static mixing. It has unlimited uses in bonding, assembling, filling and sealing most materials. Unlike conventional liquid epoxies, PC-SuperEpoxy® can be applied via a static mix nozzle vertically and overhead. It cures quickly at room temperature to form a resilient, non-conductive bond or seal that resists most chemicals, fresh and saltwater, gasoline and fuel oil. Works great bonding steel to wood, fibreglass, aluminium, concrete, brick, glass, block, ceramics, hard plastics and much more. PC-SuperEpoxy® is the toughest, highest strength epoxy we manufacture. WORK TIME: 15 MINUTES AND TACK-FREE IN 60 MINUTES CURE TIME: 4 HOURS (12 – 24 HOURS FOR FULL CURE) Here is a product that can take on the most challenging of projects with ease. Adhesion strength in excess of 2500 psi (up to 4000 psi). PC-SuperEpoxy® is a gel with a consistency like Vaseline. Here are just a few specific uses (there are hundreds of other uses): Anchoring or securing railings to wood or fibreglass decking. Seal cracks and holes in decking. Attach chocks, cleats, handles and pulls. Anchor or secure iron balusters to step and handrail. Fill cracked wood beam. Fix broken latch in the car glove box. Attach axe head.
$16.12

A two-part epoxy adhesive that bonds with maximum strength. Mixed product gels in 2 hours. Initial bonding is achieved in 6–8 hours, with maximum bond strength after 3 days. Features Stronger than other glues due to the chemical reaction of the two parts Bonds a variety of surfaces Dries clear Very strong and durable bonding High water resistance (suitable for tiles around pools, but not below the water line for that use Selleys Knead It Aqua) Forms a rigid, durable bond Can be used for gap filling (surfaces need not mate closely) Good chemical resistance Heat resistant Clamping recommended for stronger bond Not suitable for bonding plastics such as Polypropylene and Polyethylene Bond strength weakens above 80°C but is regained when temperature drops Appearance Translucent Where Can This Product Be Used? Load-bearing repairs Gluing the head back on a hammer Fixing loose table or chair legs Bonding aluminium sheeting Bonding timber on boats Repairing splits and cracks in cricket bats Bonding fibreglass sheets Repairing skis Fixing Dynabolts and metal rods into concrete Suitable Materials Glass Metal Wood Fabric Rigid plastics (except Polyethylene and Polypropylene) Crystal Leather How to Use Ensure all surfaces are clean, dry, and free from grease, rust, or paint. For best results, roughen smooth surfaces after solvent cleaning. Dispense equal volumes of Part A and Part B onto a clean disposable surface (e.g. cardboard or polyethylene) and mix thoroughly. Apply adhesive immediately to both surfaces and press together. Clamp the bond for 6–8 hours while setting. Scrape off excess adhesive and clean utensils immediately. Handy Tips Mix in small quantities for longer working time — large mixes cure faster. Replace caps immediately after use and wipe nozzles with acetone or nail polish remover before sealing. Ensure caps are placed on the correct tubes (they are colour-coded). Remove uncured adhesive with acetone or nail polish remover. Once cured, remove by mechanical scraping or sanding — solvents will not dissolve the product. To reposition a cured bond, heat slowly to at least 150°C (if safe for the material), then scrape off excess and reposition carefully. For cleaning surfaces before use: Porous surfaces use Selleys Liquid Sugar Soap Non-porous surfaces (e.g. glass, metal) — clean with methylated spirits For stubborn residue use Selleys Kwik Strip Smart Ensure the surface is dry before applying. Safety Tips Avoid contact with skin and eyes. Avoid breathing vapour. Do not use solvents near eyes or open wounds. In case of eye contact, flush with water for 15 minutes and seek medical attention. Non-toxic when set. Refer to the Material Safety Data Sheet (MSDS) for more information. Storage & Reuse Replace caps tightly after use. Store in a cool, dry place.
$24.50

Prep Interior & Exterior is a dry, plaster based, cement reinforced filler for the repair of common non-flexible wall linings such as plaster, concrete, timber, and wallboard. This product is highly water-resistant and therefore suitable for interior or exterior use. Can be used to fill deep or shallow crevices in one application. Easy to mix and use White finish Non-shrinking Easily sanded Can be nailed or screwed when dry Water-resistant
$7.50

Meet your go to epoxy putty for fast, permanent style repairs. Gorilla All Purpose Epoxy Stick is a hand mixable putty that sets in about 10 minutes and cures in 24 hours to a tough, machinable finish. Once cured it can be drilled, sanded, and painted. It is waterproof, non rusting, and ready for indoor or outdoor jobs around the home, car, boat, and garden. Why you will like it Fast setting. Approximate set time 10 minutes. Paintable after about 1 hour. Full cure in about 24 hours for a hard wearing repair. Works on most common materials including metal, PVC, many rigid plastics, wood, stone, ceramic, brick, concrete, fiberglass, and glass. Non rusting formulation for durable repairs in wet or humid areas. Waterproof when cured. Suitable for indoor and outdoor use. NSF ANSI 61 certified drinking water safe for contact with potable water once cured. Great for Plumbing repairs such as sealing low pressure leaks and patching drainage pipes Automotive trims and general panels that do not exceed service temperature of typical epoxy repairs Household fixes like filling holes, anchoring hardware, rebuilding small parts, and edge repairs DIY and craft projects that need a sculptable, sandable fill Important use notes Not for exhaust systems. For plumbing, use for temporary repair of drainage pipes or low pressure pipes only. Turn water off, apply, then wait at least 1 hour before turning water back on. Bonded wood should not be submerged or soaked after repair. How to use Wear disposable gloves. Work in a well ventilated area. Prepare the surface. Clean off dust, oil, and loose material. Roughen smooth surfaces with sandpaper. Cut the amount you need. Remove the film wrapper and foil sticker. Reseal unused putty to limit air exposure. Knead for 30 to 60 seconds until the colour is uniform. Mix thoroughly or it will not harden completely. Apply within 5 minutes of mixing. Press firmly into place. Smooth with wet gloved fingers if a smooth finish is desired. Remove any squeeze out before hardening. Allow to set about 10 minutes. Paint after about 1 hour. Full cure about 24 hours. Specifications Format Hand mixable epoxy putty stick Size 56.7 g Set time About 10 minutes Paintable After about 1 hour Full cure About 24 hours Indoor or outdoor Yes, waterproof when cured Drill, sand, paint after cure Yes Drinking water contact NSF ANSI 61 certified drinking water safe once cured Clean up and storage While uncured, wipe away with soap and water, acetone, or isopropyl alcohol. For cured material, remove by sanding, scraping, or chiseling. Store the stick in its vial with film and foil sticker re applied. Keep sealed in a cool, dry place. Keep away from children and animals. Safety Wear gloves during mixing and application. Avoid contact with skin and eyes. If in eyes rinse with water for 15 minutes. If on skin wash with soap and water. Use in a well ventilated area. For medical emergencies in Australia call 000.
$37.90


A fast setting strong and durable two part epoxy, general purpose adhesive. Mixed product gels in 5 minutes. Initial bonding is achieved in 20 minutes with maximum bond strength after 16 hours. Features Araldite is stronger than other glues due to the chemical reaction of the two parts Bonds a variety of surfaces Dries Clear Quick setting in 5 minutes No clamping necessary Moderate water resistance Forms a rigid, durable bond Can be used for gap filling (surfaces need not mate closely) Good chemical resistance Appearance Clear with a slight yellow tinge Where can this product be used? Bakelite – joining or repairing Bonding shells, stones or pebbles to decorate bottles, lamps, bricks or garden pots Repairing splits or cracks in a tennis racket Repairing metal toys Not suitable for bonding plastics such as Polypropylene and Polyethylene Bond strength weakens above 65°C but strength is regained when temperature drops What materials is this product suitable for? Glass Metal Wood Fabric Rigid Plastic Crystal Leather How to use this product General Use Before applying the Araldite mixture, all surfaces MUST be thoroughly clean and dry. All traces of grease, rust paint, etc. should be removed. For best results, smooth surfaces should be roughened by mechanical abrasion after solvent cleaning. Onto a clean, disposable surface (e.g. polyethylene or cardboard), dispense equal volumes of Part A and Part B. Thoroughly mix together with a spatula, nail or stick. When using the tubes it is essential to use the correct mixing ratio, i.e. 1 part each Apply adhesive immediately to both surfaces and press together. Clamping is not necessary, but allow bond to remain undisturbed for at least 20 minutes. Scrape off excess adhesive and wipe mixing utensils immediately. When using the Araldite 5ml Everyday tube, ensure correct caps are replaced on each tube or they will harden. To use Selleys Araldite Singles: Fold – the pack in half, so that foil is back to back. Tear – carefully along perforations. Squeeze – bubbles to extrude adhesive. Mix – two parts together until well combined. Apply – mixed adhesive to surfaces and bring together. Wipe off excess adhesive and do not apply undue strain to bond for 30 minutes. Handy tips For maximum working time, mix in small quantities. Large quantities accelerate the curing process and reduce working time. To extend product life replace caps immediately after use. Ensure you wipe excess from nozzle with a tissue dipped in acetone (or nail polish remover) before replacing the caps. When using the tube variant, ensure you replace the correct cap on the correct tube. Placing the wrong cap on the wrong tube will cause the tube to harden. (lids and tubes are colour coded to help) Wipe off any uncured araldite with acetone or nail polish remover. To remove product after cure, mechanical action (scraping or sanding) is recommended. Since the product is chemically resistant solvent will NOT dissolve this product. To reposition the bond once cured, check that the item is heat resistant. If safe, heat the item slowly, e.g. in an oven, to at least 150oC. The product will soften and liquify slightly. Scrape off any excess then reposition the joint carefully using appropriate safety equipment. Allow the item to cool down in the correct position. The product will reharden once returned to room temperature. Clamping is recommended for a stronger bond. Singles are great for those unexpected household breakages, so keep them at home, just in case. Keep a box of Selleys Sugar Soap Wipes around for quick & effective clean up. For cleaning surfaces prior to application of adhesive, if the surface is porous, we would reccomend using Selleys Liquid Sugar Soap. If the surface is non-porous eg glass or metal, firstly clean the surface with Methylated Spirits. If there is old difficult to remove residue such as oold paint, we recommend using paint stripper such as Selleys Kwik Strip Smart. Ensure the surface is dry before applying the product. Safety tips Avoid contact with the skin and eyes. Avoid breathing vapour. Do not use solvents near eyes or open wounds. In case of contact with eyes, flush with water for at least 15 minutes and seek medical attention. Non toxic when set. For further information refer to the Material Safety Data Sheet (MSDS). Storage and re-use Ensure caps are replaced and product stored in a cool dry place.
$18.00


Earl’s Powder Putty – Mix-to-Use Interior & Exterior Filler Earl’s Powder Putty is a multi-purpose powder filler for professional and DIY repairs. Just add water, mix only what you need, and achieve a tough, easy-sand finish with no waste and no shrinking. Brand: Earl’s Interior and exterior use* Mix-on-demand convenience Non-shrinking, smooth finish Easy sanding and shaping Indefinite shelf life in dry powder form Proudly made in Australia *Exterior applications must be sealed/painted and used on stable substrates. About Earl’s Powder Putty Earl’s Powder Putty delivers reliable, high-quality filling for timber, walls, masonry and metal. Because it’s supplied as a dry powder, you can tailor the mix to your task—stiffer for knife-grade filling and sculpting, or looser for fine skim work. The result is a hardwearing repair that sands easily and accepts coatings beautifully. Where Earl’s Powder Putty Works Timber & woodwork: doors, frames, skirting, architraves, furniture, cabinetry Walls & panels: plasterboard and cement sheeting patching and feathering Masonry & concrete: chips, small holes and surface imperfections Metals: minor dents and irregularities prior to priming and painting Floor preparation: quick patching of distressed boards prior to covering Craft & hobby: architectural details, mouldings and small sculpting tasks Why Choose Earl’s No shrink: Formulated to dry without shrinking for flush, invisible repairs. Mix what you need: Reduce waste and always work with a fresh batch. Shapes perfectly: Once dry, Earl’s Powder Putty can be cut, carved, sanded or sawn. Paint-ready: Accepts primers and topcoats after proper dry and prep. Economical & dependable: Indefinite shelf life in powder form when stored dry. Directions for Earl’s Powder Putty Surface prep: Ensure the area is clean, dry and sound. Remove loose material, dust, grease and contaminants. Key glossy surfaces for better adhesion. Mix: In a clean container, add Earl’s Powder Putty and slowly incorporate clean water. Stir to a smooth, lump-free paste. Adjust water to suit the task. Apply: Press the mix firmly into the repair with a putty knife or trowel. Slightly overfill to allow for sanding back flush. Build: For deep repairs, apply in layers, allowing each to firm before adding the next. Finish: Once dry, sand smooth. The cured filler can be carved or sawn to refine edges and profiles. Coat: Prime/seal and paint after full dry. For exterior use, always seal with suitable coatings. Clean-up: Clean tools with water while the product is still wet. Dry and recoat times vary with temperature, humidity and film thickness. Allow extra time in cool or damp conditions and for deep fills. Good to Know About Earl’s Not waterproof by itself: Water and weather resistance requires sealing/painting. Not flexible: Avoid use where movement, vibration or structural flexing is expected. Stable substrates only: Ensure exterior bases are sound and well prepared. Storage: Keep Earl’s Powder Putty dry and tightly closed. Moisture exposure can reduce performance after opening. Safety: Avoid dust during mixing and sanding. Use PPE and adequate ventilation. Typical Earl’s Applications Filling nail and screw holes, chips and minor cracks Skim patching and feathering edges prior to painting Rebuilding small decorative profiles and mouldings Levelling minor surface imperfections before finishing Specifications Brand Earl’s Product Name Earl’s Powder Putty Product Type Multi-purpose powder filler Format Dry powder; mix with clean water Colour (dry) Off-white to white; paintable Use Areas Interior and exterior* (exterior must be sealed/painted; stable substrates only) Substrate Compatibility Wood, plasterboard, cement sheeting, concrete, masonry, properly prepared metal Shrinkage Non-shrinking when used as directed Sandability Easy sanding once fully dry Paintability Prime/seal and paint after full dry Water Resistance Requires sealing; product itself is not waterproof Shelf Life (powder) Indefinite when stored cool, dry and sealed Clean-up Water while wet Tools Putty knife, trowel, mixing stick or paddle, sanding block Country of Origin Australia Limitations of Earl’s Powder Putty Do not use as a flexible gap filler or where structural movement is expected. Always prime/seal before exposure to moisture or exterior weather. Deep repairs may require multiple layers with adequate drying between coats. Not for permanently wet, submerged or high-movement joints. FAQs – Earl’s Powder Putty Can I mix a large batch and store it?Mix only what you can use within the working time. Discard any mix that begins to stiffen or set. Can I screw or nail into it?For non-structural tasks, light fixings may be possible in sufficiently thick, fully cured areas. Pre-drill as needed and test first. Is it paintable?Yes. Once dry and sanded, prime or seal the repair and finish with your chosen coating system. Always follow label directions. Test on a small, inconspicuous area to confirm compatibility and finish.
$10.92 - $175.00

Weldbond is a universal adhesive for gluing a variety of materials. Wood, tile, glass, plaster, cork, slate, brick, concrete block, linoleum, clay tile, ceramics, fabrics, and more. About the product Works as a sealer, bonding agent, or primer Completely non-toxic Dries to a clear, flexible bond Works on porous and non-porous surfaces UL approved Will not dissolve hard foam Safe for Styrofoam Works well with Plastics and expanded polystyrene Frequently Asked Questions Can I keep my weldbond bottle outside in the garage? Will it freeze? Weldbond should be protected from the cold as it will freeze. Once frozen, this product loses all adhesive capabilities. It should be stored above 50°f/ 10°c at all times. Also, after the container has been opened, ensure it is closed tightly after each use. What is the shelf life of weldbond? Weldbond typically has a shelf life of 5 years. If the product is starting to solidify, it can be restored by adding just a little bit of water. We advise the consumer to give the container a good shake prior to every use. Is weldbond non-toxic? Weldbond has been tested to be non-toxic. Weldbond conforms to astm d4236. Is weldbond tested on animals or created with any animal by-products? Weldbond is not tested on animals and does not contain any animal by-products. This product is vegan-friendly.
$12.75

SikaBond® -TechGrip is a high strength multipurpose, polyurethane glue that provides a super strong bond to almost any substrate and is ideal for woodworking and project work. Uses SikaBond® -TechGrip can be used on most substrates due to its excellent adhesion. These include: Wood Stone Metals Glass Ceramics Concrete Brick Masonry Advantages Waterproof Resistant to solvents and chemicals Paintable with water based and solvent based paints High adhesion strength Storage and Shelf Life Store in a cool, dry place with 25C maximum condition. This material will keep for at least twelve (12) months. Instructions for Use Surface Preparation Ensure all surfaces are clean, dry, oil and dust free and that one surface is porous. (SikaBond® -TechGrip works best when both surfaces are porous). Application Apply sparingly to one surface and bring surfaces together within 15 minutes. Secure/clamp for 3-4 hours. Wipe excess away with a cloth to limit sanding after cure. Allow 24 hours for full cure. As glue will foam a little while curing, wipe off excess with a cloth to limit sanding and painting. Slightly dampen dry timber surfaces to improve bond and accelerate cure. Cleaning Wipe nozzle and cap of bottle after use and dispose of any unused material in accordance with local authority regulations. Colour: Brown Density 1.11 kg/litre approx. Bond Strength Tensile Strength - 3030kpa Test Substrate - Timber: End grain to end grain Viscosity 6,000cps Handling Precautions Avoid contact with skin and eyes. Wear protective gloves and eye protection during work. If skin contact occurs, wash skin thoroughly. If in eyes, hold eyes open, flood with warm water, seek medical attention without delay. A full Material Safety Data sheet is available from Sika on request.
$24.20
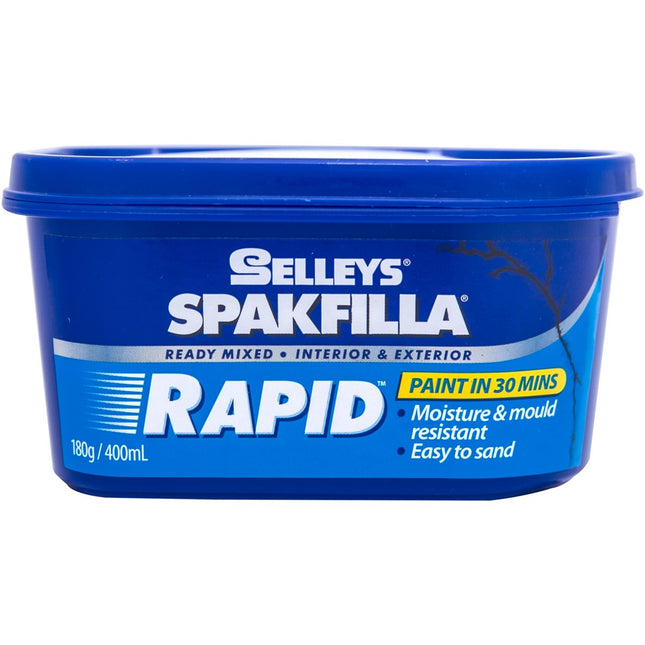
Selleys Spakfilla Rapid is a ready-mixed, lightweight filler designed for fast and easy repairs. It dries quickly, resists cracking and shrinking, and usually requires only one application—making it ideal for quick patching jobs around the home or office. Features Fills cracks and holes in a single application Pre-mixed and ready to use straight from the tub Minimal shrinkage – no need to overfill Fast drying – sand and paint within a short time Includes a convenient filling spatula Water-based formula – easy clean-up with water Paintable with both oil-based and water-based paints Where to Use Cracks and holes on stable, non-moving surfaces Walls, ceilings, doors, and window frames Small repairs in plaster, timber, and masonry surfaces Suitable Materials Wallboard and plasterboard Wood and timber surfaces Masonry and plaster Primed nail heads Product Details Colour: White Technology: Water-based Use: Interior, or exterior when painted How to Use Ensure surfaces are clean, dry, and free of dust or loose material. Using the provided spatula, press filler firmly into the crack or hole and smooth the surface. No need to overfill. Allow to dry (approximately 30 minutes for thin applications), then lightly sand for a smooth finish. Remove dust and paint as desired. For oil-based paints, allow 24 hours before painting. Limitations Not suitable for use on plastic, metal, or exterior timber exposed to moisture. Not flexible – avoid using between surfaces subject to structural movement (use Selleys No More Gaps Coloured Caulk 450g instead). Not designed for load-bearing areas or surfaces under compression (e.g. behind doors). Do not nail through filler. Avoid use below 5°C or in wet conditions. Handy Tips Wait 24 hours before painting with oil-based paints. Water-based paints can be applied once the filler has set. If filler thickens, stir before use. If too dry, add a small amount of water and mix. Clean tools with water after use. Before painting, clean with Selleys Sugar Soap Cleaner Concentrate 1L or Selleys Sugar Soap Wipes x25. For outdoor applications, protect from rain until dry and painted with two coats. Deeper repairs (over 2mm) may require longer drying times. Recommended Accessories For masking before painting: Bear Masking Tape Painter Edge Pro 48mm x 50m For reinforcing plaster joints: Eazy Tape Plasterboard Joint Tape 90m Clean Up Remove uncured product with water. Once cured, remove by scraping or sanding.
$15.56
![Selleys No More Gaps Bricks Mortar [Charcoal]](http://gluesaustralia.com.au/cdn/shop/files/9300697130310_c74acc80-87eb-4da9-9a5a-2847d2d610ab.png?v=1754711847&width=645)
Selleys No More Gaps Bricks and Mortar is a textured, ready to use weather-resistant gap filler available in a range of colours to match your existing mortar. It's mortar like texture allows easy repair of unsightly cracks and gaps in brickwork around the home. Features Ready mixed mortar filler, so is quick and easy to apply with a caulking gun. Has a mortar like texture for a textured finish and match to cement mortar and render. Is more flexible than mortar which will help prevent more damage to the mortar Is weather and UV resistant with a UV stable formula to prevent colour deterioration. Provides a more suitable finish on rendered walls than smooth fillers. Contains a fungicide and algaecide to protect against unsightly mould and algae growth. Has superior adhesion to a broad range of surfaces, making it easy to use. Will not stain building materials Can be painted over with both water and oil based paints, after the surface has skinned. (Approximately 2 hours after application). Is water based, so can be cleaned up with water easily. Is sandable when dry for a rough or smooth finish. Where can this product be used? Repairing cracks and gaps in brickwork and/or cement blocks where mortar has fallen out or eroded. Stationary cracks in pathways. Sealing gaps around windows or between brick wall and roof eaves. Repairing stationary cracks in cement render. Repairing penetration holes around pipe work, ducting, etc. Sealing gaps where mortar has fallen out in ridge capping on tile roofs. What materials is this product suitable for? Brick Concrete Render Fibre cement sheeting Laminated plastics Hardboards Aluminium Ceramics Timber How to Use Ensure the surface is clean, dry and free from dust, grease, flaking/powdery paint and old or crumbling caulk. Cut cartridge tip, fit nozzle and cut to desired opening (5mm) then insert into caulking gun. We recommend Selleys Light Speed Caulking Gun. Apply using caulking gun. Apply with caulking gun, forcing product into gap. Press into cracks and holes using a spatula or wet finger. Clean away excess from surfaces immediately using a damp cloth. For larger cracks & holes, 2 applications may be necessary. Allow first application to dry before applying second. Hardens in 24 hours depending on weather. Protect from rain until firmly skinned. Limitations: Not suitable for areas of continuous water immersion. Not suitable as a substitute for mortar in construction as it does not have the structural properties of mortar. Not suitable for moving cracks. Do not use or store below 5°C. Handy Tips For the best results slightly dampen the surface prior to application. For use in fine cracks, eg. in cement render rub Selleys No More Gaps Bricks and Mortar into cracks or use Selleys No More Cracks Exterior & Brick Render. If painting over the product, apply undercoat before applying a top coat for the best results. Keep a pack of Selleys Sugar Soap Wipes handy to wipe up any spills and for cleaning. They are an easy and effective way to keep clean on the job.
$24.79

A durable, multi-purpose filler that has been designed for filling deep and wide cracks and holes on all surfaces inside and outside the home. Easy to sand, sets to a super hard finish and is highly crack resistant. Filling blade included For use on: Brick, masonary, concrete, plasterboard, wood & metal (INTERIOR & EXTERIOR) Fill depth: Up to 10mm Dries in: 3 hours Ready to use: YES Colour: White Application • Surface to be filled should be clean and dry with no loose or powdery material. • Exterior surfaces and metals (eg. nail heads) should be primed before application. • Using the attached filling blade press filler in firmly and remove excess. • Allow to dry (2-3 hours in thin 2-3mm applications depending on humidity). Allow longer drying times if painting with oil based paints (24 hours minimum) or for deeper applications. • For deeper jobs apply in 10mm layers, allowing each layer to set, before applying the next layer. • Protect from rain until painted over. .• For best results, apply paint undercoat before applying water or oil based paint top coat. • Use Polyfilla Gap filler or silicone sealant where joint movement occurs. • Clean up with water before filler dries FAQ's Q. Is there a filler I can use for both inside and outside? A. Polyfilla Large Cracks is a multipurpose filler designed for filling cracks and holes on all surfaces inside and outside the home.
$20.99

PC-7® is the original tough job epoxy! This paste epoxy was originally formulated more than 60 years ago for the maximum in bonding power. Professionals to the do-it-yourselfers select PC-7® because of its exceptional adhesion to metals, ceramics, masonry and many plastics. PC-7® is designed for permanent repairs. Where other adhesives fail…PC-7® won’t! Choose PC-7® if you want to: seal a crack in a wall, attach a hanger to a ceramic plaque, seal a leak in an oil pan, repair a granite monument, fix a leak in PVC pipe connection, create a multimedia sculpture, and thousands of other repairs. When mixed, part A (gray) and the hardener part B (black) react to form a bond of tremendous strength. The PC-7® formulation is slow curing, but slow can be a good thing especially for large tasks. WORKING TIME: 60 MINUTES CURE TIME: 24 HOURS (48 HOURS FOR FULL CURE) PC-7® is thick. Thick is good if you need to work vertically or want to hold an object in place. How thick? Thicker than peanut butter but not as thick as bubble gum. Here are just a few specific uses (there are hundreds of other uses): Bond metal electrical boxes to concrete wall. Fill cracks in basement walls. Rebuild vintage Bakelite steering wheels. Seal holes in oil and transmission pans or fuel tank. Bond and repair stainless steel. Attach transition strips on concrete floor. Attach firing strips to concrete wall. Bond to and rebuild hard rubber bumper. How to prepare a surface for bonding with PC-7 Epoxy Paste Remove contaminants such as dust, dirt, oil and grime with solvents such as Denatured Alcohol, Acetone, Rubbing Alcohol (isopropyl alcohol) or Lacquer Thinner. Mild detergent solution in water is also good removing contaminants. Use a clean paper towel or rag for wiping. Do not use Mineral Spirits or Paint Thinner for removing contaminants. Remove rust and loose paint with sandpaper or wire brush. Epoxy typically sticks to most paints. If there is a concern of the paint’s adhesion then remove it with sandpaper or wire brush. Smooth, glossy and shiny surfaces should be scuffed using sandpaper to increase adhesion. How to clean-up after PC-7 Epoxy Paste application Use Denatured Alcohol, Acetone, Rubbing Alcohol (isopropyl alcohol) or Lacquer Thinner to clean tools and mixing surface before PC-7® cures. Clean hands and skin with soap and water. Cured epoxy can be removed by applying Paint Remover or Paint Stripper to soften the epoxy surface. Scratch off the softened epoxy. Repeat as needed. How thick can I apply PC-7®? PC-7® can be applied in any thickness. It does not require drying or exposure to air. It will cure from the inside out. I made a repair with PC-7® but need to build the area up more. Can I apply more epoxy? PC-7® sticks to PC-7® Can I use PC-7® for a vertical repair? PC-7® can be applied vertically and overhead. Because of its high viscosity it will not drip or sag. How long does it take PC-7® to harden? Normally, at 70F, PC-7® will cure in 24 hours but full hardness can take up to 48 hours. Cooler conditions will extend the cure time. Working in a garage or outside in temperatures between 50F and 60F may double the length of time needed for full cure. Applying PC-7® to a cool surface such as an exterior facing wall will slow down the cure. Can I paint over PC-7® and if so how? PC-7® should be primed then painted. Use Zinser Bullseye® 1,2,3 Stain Sealing Primer or Kilz® Premium Stain Sealing Primer or INSL-X® Stix Bonding Primer. Priming/sealing is important to separate and protect the finish coat from the epoxy/amine surface. Can I use PC-7® on a finished surface? Smooth, glossy or shiny surfaces should be roughened or scuffed with sandpaper to provide maximum adhesion. Use 80 or 120 grit sandpaper. A roughened surface has much more surface area than a smooth surface. PC-7® is very thick. Can I smooth it out or thin it out? Use a solvent such as Denatured Alcohol, Acetone, Rubbing Alcohol or Lacquer thinner to smooth applied PC-7®. Be-cause PC-7® is very thick and gooey, it is necessary to apply alcohol or acetone to the tool or gloved fingertips in order to lubricate the surface and shape or feather the applied epoxy. Can I use more of one part of PC-7® in order to speed the curing? Adding additional hardener does not make PC-7® cure faster. It is best to mix PC-7® one part of A to one part of B. However, PC-7® is probably the only epoxy that does not require precisely a 1:1 mix ratio. Plus or minus 25% A or B does not affect the performance. Adding additional PC-7® (+50%) part B hardener (black) can improve the adhesion to difficult surfaces such as PVC pipe and fittings. Measure equal volumes of part A epoxy (gray) and part B hardener (black) then measure an additional half portion of hardener (black). This will make the mix ratio (1 : 1.5, A : B). Can I tint PC-7® to match a surrounding color? PC-7® can be tinted with iron oxide or carbon pigments. Powdered pigments are used to color stucco or concrete and can be found at art supply stores. Universal tints that are used to color paint are compatible with PC-7®. Too much tint may affect the performance of PC-7®. I want to do a repair outdoors and the epoxy seems really stiff? PC-7® becomes more viscous in cool temperatures. Set the containers in a warm place prior to mixing. Acetone has been used to reduce the viscosity of PC-7®. The addition of acetone will contribute to shrinking and slow down the cure rate. PC-7® performs best without the addition of solvents. What will PC-7® bond to? It is easier to say what PC-7® will NOT bond to: Wax paper, Teflon, Plexiglass, vinyl and some softer plastics. Test an area if in doubt and always rough up shiny, smooth surfaces with sandpaper.
$17.86


PC-Fahrenheit™ Putty Epoxy is the choice for temperatures up to 260° C. It is supplied as a premeasured stick that you mix with fingers. Fast curing (60 min). Best for steam heat applications. A toolbox must. Great on copper and iron. Here are just a few specific uses (there are hundreds of other uses): Seal cracked steam or hot water radiator Stop leaking steam fittings Fill hole in heat exchanger Attach thermocouple to hot surface Seal chimney ductwork How to prepare a surface for bonding with PC-Fahrenheit™ Remove contaminants such as dust, dirt, oil and grime with a solvent such as denatured alcohol (ethanol), acetone, rubbing alcohol (isopropyl alcohol) or lacquer thinner. A mild detergent solution in water is also good removing contaminants. Use a clean paper towel or rag for wiping. Remove rust and loose paint with sandpaper or wire brush. Epoxy typically sticks to most paints. If there is a concern of the paint’s adhesion then remove it with sandpaper, wire brush or paint stripper. Smooth, glossy and shiny surfaces should be roughened using sandpaper to increase adhesion. Adhesion to wet or damp surfaces can be improved by wiping with alcohol. Do not use mineral spirits or paint thinner for removing contaminants. How to clean-up after PC-Fahrenheit™ application We recommend wearing disposable gloves when mixing and applying epoxy putty. Remove from skin with soap and warm water. Clean up mixed epoxy before it cures with paper towels and solvent. Denatured alcohol (ethanol), acetone, rubbing alcohol (isopropyl alcohol) or lacquer thinner are suitable solvents for removing uncured epoxy. Cured epoxy can be physically removed by prying off with a screwdriver or pliers. It can also be removed with paint stripper or remover. Can PC-Fahrenheit™ repair a leaking steam radiator? PC-Fahrenheit™ resists higher temperatures and is suitable for repairing steam pipes and radiators. Can PC-Fahrenheit™ be used in a fireplace or wood burning stove? PC-Fahrenheit™ will withstand temperatures up to 260°C. A fireplace or wood burning stove creates temperatures exceeding 260°C. Can PC-Fahrenheit™ be used to seal heater chimney duct? PC-Fahrenheit™ is excellent for use on sheet metal and the temperature is within an acceptable range. Can PC-Fahrenheit™ seal a rust hole in barbecue grill? PC-Fahrenheit™ can be used on the barbecue grill exterior but is not recommended for the interior. How long should PC-Fahrenheit™ be mixed before applying? Mix PC-Fahrenheit™ for 45 to 60 seconds then immediately apply. What is the temperature limit? PC-Fahrenheit is not intended to exceed 260°C. - Will PC-Fahrenheit™ burn? PC-Fahrenheit™ is not flame resistant and may burn if exposed to direct flame. Does PC-Fahrenheit™ stick to car radiator? Car radiators are made of various metals and plastic composites. Test for adhesion and test for leaks.
$16.17

Nordsjö Professional Super Filler is an ideal product for indoors and outdoors. Effortlessly fills holes up to 10 cm deep. Does not sag, also suitable for vertical and ceiling repairs. You are always assured of a premium result. Fills cracks and holes up to 10cm in brick, stone, wood, fibre cement, render, concrete, polystyrene, plasterboard, plaster and stucco Ideal for over-head applications (non-slump formula) Excellent adhesion to all cementitious surfaces Suitable for interior and exterior applications Not suitable for use on damp surfaces Tools Needed: Filling Knife Properties: Ready to use Will not shrink or sag Easy to sand Accepts nails and screws Paintable after approx. 2 hours (5 cm layer at 20°C) with a water-based paint Sandable after 24 hours Accepts oil-based paints after 48 hours Maximum layer thickness: 5 cm Maximum depth: 10 cm Colour: Light Grey How to Apply: Substrate must be clean, dry, dust and grease free. Remove all loose material. Mix well before use. Product can be used directly from the pot. Apply the product firmly in to the hole with a filling knife. For a super smooth result, finish with a damp filling knife. For holes deeper than 5 cm, apply in layers, with sufficient drying time between the layers. Replace cover sheet after use and ensure lid is properly closed. Once dry sand to a smooth nish. Clean tools with warm water immediately after use. Do not store or use under 5°C.
$22.66


Loctite Epoxy Instant Mix 5 Minute is a two-part adhesive consisting of an epoxy resin and a hardener. When mixed in equal volumes, the resin and hardener react to produce a tough, rigid, high strength bond, which starts to set in 5 minutes and reaches handling strength in 1 hour. The static mix nozzle delivers a uniform mixture of resin and hardener every time. It can be used as an adhesive for a wide range of materials or as a versatile filler for gap bonding, surface repairs and laminating. Loctite Epoxy Instant Mix 5 Minute does not shrink and is resistant to water and most common solvents. It can be tinted with earth pigments, cement or sand for color matching and can be sanded and drilled. Recommended on: Bonding metal, glass, ceramic, wood, many rigid plastics, china, tile, fibreglass, concrete and stone Can be combined with fibreglass cloth for a durable patch Great for crafting projects Properties Will not crack when drilled Can be tinted to match surrounding materials Water resistant: can be used outdoors Does not shrink One-time application Convenient instant mix syringe Consistently dispenses equal, uniformly mixed amounts of each component Sets in 5 minutes Quick completion of the project How to Use: Step 1: Safety Precautions Well-ventilated area, gloves. Step 2: Preparation Protect work area. Surfaces must be clean, dry and free from oil, wax and paint. For better adhesion, roughen smooth surfaces prior to cleaning. Pre-fit parts to be joined. Remove plastic cap from the centre of the plunger. Turn nozzle end up and pull the plunger back slightly allowing air bubbles to rise to the top. Snap off and discard end of the syringe. Insert nozzle opening and push past prongs. Rotate nozzle 90° to lock into place. Step 3: Application Depress plunger to dispense equal amounts of hardener and resin directly onto the surface to be filled or bonded. Remove and discard nozzle. Wipe syringe tip immediately. Retract plunger slightly and close with the cap provided. Place objects together within 40 seconds of adhesive application. Bond sets in 40 to 60 seconds at 20°C to 25°C. Remove any excess adhesive immediately with mineral spirits. Usable strength is obtained within 5 to 10 minutes. Warmer temperatures will shorten the set time and cooler temperatures will lengthen it. Step 4: Cleanup Clean excess glue immediately with mineral spirits. Cured adhesive may be cut away with caution using a sharp blade. Prolonged immersion in paint stripper will soften the cured adhesive to aid removal.
$19.23

A two part epoxy adhesive that bonds with maximum strength. Mixed product gels in 2 hours. Initial bonding is achieved in 6-8 hours with maximum bond strength strength after 3 days. Features Araldite is stronger than other glues due to the chemical reaction of the two parts Bonds a variety of surfaces Dries Clear Very Strong, durable bonding Very high water resistance (e.g. OK for fixing tiles around pool, but not below the water line. For this use Selleys Knead it Aqua) Forms a rigid, durable bond Can be used for gap filling (surfaces need not mate closely) Good chemical resistance Heat Resistant Clamping is recommended to achieve a stronger bond Not suitable for bonding plastics such as Polypropylene and Polyethylene Bond strength weakens above 80°C but strength is regained when temperature drops Where can this product be used? Load bearing repairs Gluing the head back on your hammer Fixing loose table or chair legs. Bonding solid pieces of Aluminium sheeting Bonding timber on your boat Repairing splits and cracks in Cricket bats Bonding fibreglass sheets Repairing Ski’s Fixing Dynabolts and metal rods into concrete What materials is this product suitable for? Glass Metal Wood Fabric Rigid Plastic – will not bond to Polyethylene or Polypropylene plastics Crystal Leather How to use this product Before applying the Araldite mixture, all surfaces MUST be thoroughly clean and dry. All traces of grease, rust paint, etc. should be removed. For best results smooth surfaces should be roughened by mechanical abrasion after solvent cleaning. Onto a clean, disposable surface (e.g. polyethylene or cardboard), dispense equal volumes of Part A and Part B. Thoroughly mix together with a spatula, nail or stick. When using the tubes it is essential to use the correct mixing ratio, i.e. 1 part each Apply adhesive immediately to both surfaces and press together. Clamping is necessary while bond sets over 6-8 hours. Scrape off excess adhesive and wipe mixing utensils immediately. When using tubes, Ensure correct caps are replaced on each tube or they will harden Handy tips For maximum working time, mix in small quantities. Large quantities accelerate the curing process and reduce working time. To extend product life replace caps immediately after use. Ensure you wipe excess from nozzle with a tissue dipped in acetone (or nail polish remover) before replacing cap. When using the tube variant, ensure you replace the correct cap on the correct tube. Placing the wrong cap on the wrong tube will cause the tube to harden. (lids and tubes are colour coded to help) Wipe off any uncured araldite with acetone or nail polish remover. To remove product after cure, mechanical action (scraping or sanding) is recommended. Since the product is chemically resistant solvent will NOT dissolve this product. To reposition the bond once cured, check that the item is heat resistant. If safe, heat the item slowly, e.g. in an oven, to at least 150oC. The product will soften and liquify slightly. Scrape off any excess then reposition the joint carefully using appropriate safety equipment. Allow the item to cool down in the correct position. The product will reharden once returned to room temperature. Clamping recommended for a stronger bond. For cleaning surfaces prior to application of adhesive, if the surface is porous, we would reccomend using Selleys Liquid Sugar Soap. If the surfact is non-porous eg glass or metal, firstly clean the surface with Methylated Spirits. If there is old difficult to remove residue such as oold paint, we recommend using paint stripper such as Selleys Kwik Strip Smart. Ensure the surface is dry before applying the product.
$29.36

PVA adhesive specially formulated for interior woodworking repairs and projects. White in colour, dries clear and cleans up easily with water. Features No mixing required – Ready to use straight from the pack Suitable for end grain gluing – won’t stain timber, white in colour, but dries clear. Non-toxic Dries Clear Cleans up with water Where can this product be used? School projects and craft Furniture repairs Repair a split trim Fix a broken photo frame Restoring furniture Fix a wobbly chair Gluing cupboard shelves for additional support Repairing a door frame or window Fix a wine rack Re-attach book cover/spine or repair torn bindings Fix a broken drawer Wooden toy repairs Craft projects Unsuitable for use on coated wallpaper overlaps eg vinyl Although Aquadhere is reasonably water resistant, it is not recommended for use in water or weather exposed situations or for any job where maximum water resistance is required (for weather exposed and/or wet areas we recommend Aquadhere exterior or Aquadhere Durabond). Will not take common timber stains Aquadhere is not recommended for joints that are subjected to constant high stress. Instead, use Selleys 308 High Stress wood glue. Do not use on projects that you need to be able to sand, as Aquadhere Interior is not sandable. Will not bond MDF, we recommend using Aquadhere Exterior What materials is this product suitable for? End grain gluing Craftwork Cloth Paper Mosaics Leather Other craft materials How to use this product Surfaces to be bonded must be close fitting, free from dust, dry and clean from grease. Shake bottle before use Apply adhesive liberally to one surface only, position surfaces and press together while still wet. Immediately clamp for 30 minutes for softwoods and 1 hour for hardwoods. Alternatively, low clamping pressures (50lbs/in2) can be used with softwoods; higher pressures are recommended for hardwoods (100 – 150lbs/in2). Do not stress joint for 12 hours. Wipe off excess adhesive while still wet with a damp cloth. If the wood is to be stained, any residual Aquadhere left on the timber surface may prevent the stain from taking to the wood. Maximum strength is achieved after 12 hours, but longer in cold, damp conditions, or when used on dense timbers. Cure slows significantly in humid, cold conditions. Clean all tools with water before adhesive is allowed to dry. If dry, soak in water until adhesive is soft. Handy tips 1L covers approx. 8m2 To fill small gaps, Aquadhere can be mixed with sawdust. Longer clamping times may be required for joints under high stress, or alternatively use Selleys 308 High Stress Wood Glue. Avoid contaminating Aquadhere with iron and steel, eg nails, etc. Aquadhere contaminated with rust (iron oxide) will stain brown/black in the presence of tannins in many woods. On very porous surfaces applying a thin layer to each side and allowing to soaking in before applying a second layer to one side only may result in a stronger bond Cured adhesive can be resoftened by prolonged contact with hot water or steam. Sanding isn’t an effective way to prepare for gluing, as it often leaves an uneven surface and may clog the timber which can stop the glue from penetrating and impact on your result. A straight router can be used to trim the edge, but be sure to only remove as much as required to obtain a suitable edge for gluing. If you are gluing over a larger surface, try using a small roller to aid in application. For cleaning surfaces prior to application of adhesive, if the surface is porous, we would recommend using SELLEYS Liquid Sugar Soap. If the surface is non-porous eg glass or metal, firstly clean the surface with mineral turpentine and then again with methylated spirits. If there is old, difficult to remove residue such as old paint, we recommend using paint stripper such as SELLEYS Kwik Strip Smart. Ensure the surface is dry before applying the product. Keep a canister of SELLEYS Sugar Soap Wipes nearby for a quick and effective cleanup. Safety tips Aquadhere is considered a non-hazardous material. In case of eye contact, hold eye open and flush with plenty of water for 15 minutes. Storage and re-use For maximum shelf life store inside at moderate temperatures. Do not allow to freeze.
$9.00

Crommelin Hybrid MS Polyurethane Flexible Sealant 300ml Take on interior and exterior sealing with a professional grade hybrid MS polyurethane. This single component sealant delivers a flexible, durable seal on common building substrates and is suitable for a wide range of construction and maintenance tasks. Key benefits Very low VOC and isocyanate free UV resistant for long term outdoor performance High flexibility to accommodate joint movement Excellent adhesion on properly prepared porous and non porous surfaces Easy to gun, tool and clean up Typical applications Construction and expansion joints Perimeter sealing around windows and doors Roofing and cladding laps, flashings and penetrations General gap sealing in wet and dry areas Suitable substrates Concrete, masonry, brick and render Timber and fibre cement Metals and coated metals Many plastics* and glass *Always pre test for compatibility and adhesion. Surface preparation Surfaces must be clean, dry, sound and free of dust, oil, release agents and loose material. Remove old sealant and contaminants. Abrade dense or glossy surfaces if required. Use suitable primer if specified for difficult or highly porous substrates. Mask edges for neat joints and install closed cell backing rod where needed to control joint depth. Application Cut nozzle to required bead size and load cartridge into a quality caulking gun. Gun a continuous bead into the joint ensuring full contact with sides and backing. Tool off with a moistened spatula for a smooth finish before skin forms. Protect from water and disturbance during initial cure. Clean up Clean tools and fresh spills promptly. Once cured, remove by mechanical means. Good to know Low odour formulation suitable for indoor use with ventilation. Paintable with many water based coatings once skinned and cured. Always test first. Store upright in a cool, dry place. Keep out of direct sunlight. Safety Wear suitable gloves and eye protection. Avoid contact with skin and eyes. If contact occurs, rinse with clean water. Refer to the product Safety Data Sheet for full precautions. What’s in the box 1 x 300ml cartridge 1 x application nozzle
$15.15

Selleys Araldite Extra Time Epoxy Adhesive 200ml Araldite Extra Time is a strong two part epoxy that gives you an extended working time of up to 60 minutes. It is ideal for complex or multi piece assemblies where accurate positioning matters. Once cured it forms a tough, durable bond that dries translucent. Why you will love it Extended working time of 60 minutes for precise assembly Holds up to 150 kg per cm² when fully cured on clean, abraded steel Dries translucent for a neat finish Versatile bonding across common materials Suitable materials Wood, metal, masonry, china, glass, leather, rubber, and most plastics. Not suitable for PTFE, polyethylene, or polypropylene. Pre test on leather and rubber for suitability. Typical uses Furniture repairs and assemblies Fixing metal or timber components General household, hobby, and craft bonding Repairs on masonry, ceramics, and glass where a clear finish is preferred Directions Surface prep: abrade, clean, and dry both surfaces. Pierce each tube using the spike in the cap. Dispense equal parts onto a clean disposable surface. Mix thoroughly. Leave for 5 minutes, then mix again before applying. Mixed glue is usable for about 1 hour at 20°C. Do not use the plastic blister to mix. Apply to both surfaces and join. Support if needed to prevent movement. Avoid strain for 6 to 8 hours. Full strength develops after 24 to 72 hours depending on conditions. Replace caps on the correct tubes to avoid cross contamination. Clean up Wipe away uncured adhesive with acetone. Once cured, mechanical removal is required. Key specs Technology Two part epoxy Working time Up to 60 minutes Initial handling 6 to 8 hours Full cure 24 to 72 hours Bond strength Up to 150 kg per cm² on abraded steel when fully cured Appearance Dries translucent Temperature resistance Up to 80°C. Bond may soften above this but strength returns when temperature normalises. Pack size 200 ml Good to know Allow longer bonding times in colder weather. Product may discolor with UV exposure. Store in a cool dry place.
$73.08

Selleys Araldite Rapid Epoxy Adhesive 14 mL Fast-setting, two-part epoxy for quick, durable repairs at home, in the workshop, or on site. The self-mixing syringe makes application clean and precise, setting in about 90 seconds and reaching handling strength soon after. Dries translucent for a neat finish. Key benefits Sets in approximately 90 seconds for rapid fixes High strength bond up to 75 kg/cm² when fully cured Dries translucent for low-visibility repairs Self-mixing nozzle for easy, accurate application Versatile bonding across common materials Best for Everyday repairs and small assemblies Fixing chipped ceramics and china Metal, glass, leather, rubber, and many plastics Suitable materials China, metal, glass, leather, rubber, and most plastics. Not suitable for PTFE, polyethylene, or polypropylene. How to use Prep Abrade, clean, and dry both surfaces. Attach nozzle Remove cap, fit and lock the self-mixing nozzle, then purge a small amount until evenly mixed. Apply Spread adhesive on both surfaces and join within 1 minute. Hold Support the bond for about 10 minutes to prevent movement. Cure Maximum strength develops after about 16 hours. Allow longer in cold conditions. Clean up Wipe away uncured adhesive with acetone. Remove and dispose of the used mixing nozzle before the adhesive sets in the tip. Technical details Technology Two-part epoxy Set time About 90 seconds Handling time Approximately 10 minutes Full cure About 16 hours Colour when dry Translucent Temperature resistance Up to 60 °C Pack size 14 mL self-mixing syringe Good to know Bond may soften above 60 °C and regains strength when cooled. Pre-test on leather and rubber to confirm suitability. May discolor with prolonged UV exposure. Store in a cool, dry place. Replace cap after removing the used nozzle. Safety Follow the safety directions on the packaging. Use in a well-ventilated area and avoid skin contact. Keep out of reach of children.
$19.26

Weldbond Universal Adhesive can be used in various applications as a glue, bonding agent, sealer or primer. It’s high solid content means that it can be easily diluted and therefore becomes a very economical alternative to traditional products used for specific applications. Same formula & product you trust, just better looking! Weldbond is a universal adhesive that bonds almost anything! It is non-toxic, non-flammable. Weldbond will dry clear and flexible and is therefore ideal for use with woods and fabrics as no glue lines will show and the glue will bend with movement. It is non-staining and will not become brittle with age. It is non-toxic, non-flammable & Solvent free 3-4 times stronger than standard P.V. High Solid content (51-53%) means more glue and it goes a lot further Does everything a P.V.A does, plus more Dries to a clear, flexible bond and can be used as a sealer, bonding agent or primer.
$8.13
![Sika SikaSeal Gap Filler Acrylic 100 Sandable Paintable [White]](http://gluesaustralia.com.au/cdn/shop/files/9318324010676_f8ac62bc-ef55-4a57-a739-47528a1aae8c.jpg?v=1754711697&width=645)
DESCRIPTION SikaSeal® Acrylic 100 is a flexible, one component, water based acrylic joint sealant and gap filler where low demand of elongation are required, for interior use. USES SikaSeal® Acrylic 100 is suitable for sealing low movement joints around: ? brick ? Concrete ? Plasterboard ? Windows ? Doors ? Ceramic tiles SikaSeal® Acrylic 100 fills cracks and adheres to: ? Glass ? Wood ? Aluminium ? Brick ? Concrete ? Plasterboard ? Ceramic ? Painted surfaces. CHARACTERISTICS / ADVANTAGES Excellent adhesion to most common construction materials. Water clean-up of uncured sealant. Can be sanded back once fully cured if required to give smooth surface finish. Can be painted over using water based paints. Non-toxic
$5.82

SIKA® FILLER-101 | FINE SURFACE FILLER Premium, fine surface filler Very fine consistency for fine surface filling Application thickness up to 3mm per layer Fast drying and easy to sand USE Suitable for indoor filling work on plaster boards, fabrics, old wallpapers, etc. Smooth finish CHARACTERISTICS AND ADVANTAGES Ready to use, no mixing required Easy application High initial tack or grab on plaster and concrete Quick drying COLOUR: White Appearance / Colour White paste Packaging 500 ml plastic tube Storage Storage Conditions / Shelf-Life 12 months from date of production if stored properly in undamaged and unopened original sealed packaging, in cool and dry conditions. Protect from frost. Technical Data Chemical Base Filled styrene-acrylate dispersion. Density ~ 1.100 kg/l Solid Content ~ 55% Grading Dmax : 0.12 mm Layer Thickness 3 mm max. Application Details Consumption This depends on the substrate roughness and thickness of the layer applied. As a guide, ~ 1 l of Sika® Filler-101 can fill ~ 1 m2 per mm thick. Substrate Quality Clean, free from dust, dry and oil. Application Conditions / Limitations Substrate Temperature +5°C min. / +35°C max. Ambient Temperature +5°C min. / +35°C max. Application Instructions Mixing Sika® Filler-101 is supplied ready to use - no mixing is required. Application Method / Tools Sika® Filler-101 can be applied with spatula in layer thicknesses from 0 - 3 mm. When filling deeper holes or cracks the filler must be applied in several layers and must be allowed to almost dry. Holes and cracks from 4 - 15 mm can more easily be filled with Sika® Filler-105. When dried finish the surface with Sika® Filler-101. Cleaning of Tools Clean all tools and application equipment with water immediately after use. Hardened / cured material can only be mechanically removed. Waiting Time / Overcoating Drying Time: ~ 2 hours Paintability: ~ 4 hours Value Base All technical data stated in this Product Data Sheet are based on laboratory tests. Actual measured data may vary due to circumstances beyond our control.
$21.47


PC-Crete™ Epoxy is a hand-mixable, fast-setting epoxy putty that quickly repairs concrete and masonry. After mixing, it forms a concrete repair polymer that cures to a concrete-like color and texture. The mixture readily sticks to concrete and masonry surfaces and is easily shaped. It will stick to ceramics, glass, metals and some plastics. It cures within 60 minutes. Each stick contains pre-measured portions of activator and base — no measuring or mixing tools are necessary. Here are just a few specific uses (there are hundreds of other uses): Quickly rebuild small missing pieces of concrete Fill holes in concrete and masonry Rebuild missing pieces of statues and birdbaths Seal hole for wire or conduit thru cinder block Fill chip or spall in concrete furniture Reattach loose or popped decorative stone Fill crack in stone fireplace Fill holes in brick or concrete walls; Apartment complexes, schools, government buildings etc. Fill cracks in concrete or stucco wall before painting Attach address numbers to brick or stone Attach hardware to brick or stone Fill abandoned screw holes and mounting holes in brick or cinderblock Replace missing mortar Seal rodent hole in cinderblock or concrete How to prepare a surface for bonding with PC-Crete™ Old concrete must be clean and profiled or textured. Surface must be clean and sound. It may be dry or damp, but free of standing water. Remove contaminants such as dust, dirt, oil and grime with a solvent such as denatured alcohol (ethanol), acetone, rubbing alcohol (isopropyl alcohol) or lacquer thinner. Mild detergent solution in water is also good removing contaminants. Use a clean paper towel or rag for wiping. Do not use mineral spirits or paint thinner for removing contaminants. Remove rust and loose paint with sandpaper or wire brush. Epoxy typically sticks to most paints. If there is a concern of the paint’s adhesion then remove it with sandpaper or wire brush. Smooth, glossy and shiny surfaces should be roughened using sandpaper to increase adhesion. How to clean-up after PC-Crete™ application Clean up mixed epoxy before it cures with paper towels and solvent. Denatured alcohol (ethanol), acetone, rubbing alcohol (isopropyl alcohol) or lacquer thinner are suitable solvents for removing uncured epoxy. Cured epoxy can be removed with paint stripper or remover. Can PC-Crete™ be used to repair a crack in a fountain? PC-Crete™ looks like concrete and is excellent for repairing concrete fountains, statues and lawn decorations. Will PC-Crete™ adhere to a concrete step? Can it be shaped to match a corner? PC- Crete™ is excellent to repairs on concrete surfaces such as steps. It shapes easily and can be sanded to match the look and texture of the concrete surface. Is PC-Crete™ suitable for filling a small crack or spall in a sidewalk or deck? Small crack repairs in concrete are easily made with or without the use of tools using PC-Crete™. PC-Crete™ is excellent for replacing missing or loose mortar between bricks and stones. Can PC-Crete™ be used in a fish tank or pond? PC-Crete™ is not recommended for aquatic use. Do not use this product in aquariums or ponds. The PC-Crete™ is not easily grabbing or sticking to the concrete surface. It pulls away lifting loose stones The putty wants to stick to the fingers more than the concrete surface. Wet the fingers with alcohol and then press, shape and smooth the applied putty. Also, loose stones can be wire brushed away to provide a sound surface. PC-Crete™ does not have a smooth texture. It has particles throughout The particles in PC-Crete™ are used to simulate the appearance of concrete.
$16.17

PVA adhesive specially formulated for interior woodworking repairs and projects. White in colour, dries clear and cleans up easily with water. Features No mixing required – Ready to use straight from the pack Suitable for end grain gluing – won’t stain timber, white in colour, but dries clear. Non-toxic Dries Clear Cleans up with water Where can this product be used? School projects and craft Furniture repairs Repair a split trim Fix a broken photo frame Restoring furniture Fix a wobbly chair Gluing cupboard shelves for additional support Repairing a door frame or window Fix a wine rack Re-attach book cover/spine or repair torn bindings Fix a broken drawer Wooden toy repairs Craft projects Unsuitable for use on coated wallpaper overlaps eg vinyl Although Aquadhere is reasonably water resistant, it is not recommended for use in water or weather exposed situations or for any job where maximum water resistance is required (for weather exposed and/or wet areas we recommend Aquadhere exterior or Aquadhere Durabond). Will not take common timber stains Aquadhere is not recommended for joints that are subjected to constant high stress. Instead, use Selleys 308 High Stress wood glue. Do not use on projects that you need to be able to sand, as Aquadhere Interior is not sandable. Will not bond MDF, we recommend using Aquadhere Exterior What materials is this product suitable for? End grain gluing Craftwork Cloth Paper Mosaics Leather Other craft materials How to use this product Surfaces to be bonded must be close fitting, free from dust, dry and clean from grease. Shake bottle before use Apply adhesive liberally to one surface only, position surfaces and press together while still wet. Immediately clamp for 30 minutes for softwoods and 1 hour for hardwoods. Alternatively, low clamping pressures (50lbs/in2) can be used with softwoods; higher pressures are recommended for hardwoods (100 – 150lbs/in2). Do not stress joint for 12 hours. Wipe off excess adhesive while still wet with a damp cloth. If the wood is to be stained, any residual Aquadhere left on the timber surface may prevent the stain from taking to the wood. Maximum strength is achieved after 12 hours, but longer in cold, damp conditions, or when used on dense timbers. Cure slows significantly in humid, cold conditions. Clean all tools with water before adhesive is allowed to dry. If dry, soak in water until adhesive is soft. Handy tips 1L covers approx. 8m2 To fill small gaps, Aquadhere can be mixed with sawdust. Longer clamping times may be required for joints under high stress, or alternatively use Selleys 308 High Stress Wood Glue. Avoid contaminating Aquadhere with iron and steel, eg nails, etc. Aquadhere contaminated with rust (iron oxide) will stain brown/black in the presence of tannins in many woods. On very porous surfaces applying a thin layer to each side and allowing to soaking in before applying a second layer to one side only may result in a stronger bond Cured adhesive can be resoftened by prolonged contact with hot water or steam. Sanding isn’t an effective way to prepare for gluing, as it often leaves an uneven surface and may clog the timber which can stop the glue from penetrating and impact on your result. A straight router can be used to trim the edge, but be sure to only remove as much as required to obtain a suitable edge for gluing. If you are gluing over a larger surface, try using a small roller to aid in application. For cleaning surfaces prior to application of adhesive, if the surface is porous, we would recommend using SELLEYS Liquid Sugar Soap. If the surface is non-porous eg glass or metal, firstly clean the surface with mineral turpentine and then again with methylated spirits. If there is old, difficult to remove residue such as old paint, we recommend using paint stripper such as SELLEYS Kwik Strip Smart. Ensure the surface is dry before applying the product. Keep a canister of SELLEYS Sugar Soap Wipes nearby for a quick and effective cleanup. Safety tips Aquadhere is considered a non-hazardous material. In case of eye contact, hold eye open and flush with plenty of water for 15 minutes. Storage and re-use For maximum shelf life store inside at moderate temperatures. Do not allow to freeze.
$18.70

Dulux Precision Maximum Strength Adhesion Primer Get a tough, reliable bond on hard to paint surfaces with Dulux Precision Maximum Strength Adhesion Primer. This water based, low odour primer works as a primer, sealer and undercoat, creating a strong foundation for acrylic or oil based topcoats on both interior and exterior projects. Why choose this primer Water based with low odour Excellent adhesion on glossy and hard to coat surfaces Suitable as primer, sealer and undercoat Interior and exterior use Fast drying: touch dry in 30 minutes, recoat in 1 to 2 hours Topcoat within 30 days for best results Ideal surfaces Tiles, high gloss enamels, varnished timber, uPVC, fiberglass, aluminium, galvanised steel, Colorbond, glass, glazed brick, laminates and previously painted glossy finishes. Key specs Finish Flat Colour White Coverage Up to 10 m² per litre per coat, depending on surface Dry time Touch dry 30 minutes Recoat time 1 to 2 hours Full strength 7 days after application VOC 30.4 g/L Application temperature Between 10°C and 32°C Clean up Water Pack sizes 1 L and 4 L How to use Prepare the surface so it is clean, dry and free of grease, wax, dust, loose paint and rust. Wash if needed and allow to dry. Stir thoroughly before and during use. Apply 1 even coat with a high quality brush, roller or spray. For very smooth surfaces 1 coat is usually sufficient. Allow 1 to 2 hours before recoating or applying the topcoat. Topcoat within 30 days. Application tips Do not tint for difficult surfaces. Thin only if necessary with a small amount of water. When using solvent based enamel topcoats, lightly sand the primer before applying the enamel. If using under products with strong solvents, let the primer dry 24 hours and test compatibility on a small area first. Where not to use Floors, benchtops or surfaces subject to standing water Below 10°C surface temperature or if conditions may drop below 10°C during drying Clean up and safety Clean tools with water and a mild detergent, then rinse. Ensure good ventilation during use. Wear eye protection and avoid skin and eye contact. Always follow label directions.
$49.88

Tarzan’s Grip Fast-Set 5 Minute Epoxy Adhesive 24 mL is a reliable two part fast setting epoxy adhesive for durable repairs chosen for home repairs, trade work, and craft builds when you want a bond you can trust. Designed for Australian conditions, it balances strength, ease of use, and clean application so you can get professional results without special tools. The 24 mL pack is ideal for general work and keeps neatly in a toolbox or caddy. Why choose Tarzan's Grip Grip for your next project Everyday jobs often involve mixed materials and imperfect surfaces. Tarzan’s Grip Fast-Set 5 Minute Epoxy Adhesive 24 mL has been formulated to wet out well, grab quickly, and cure to a tough finish that resists movement and contact stress. It maintains bond integrity across common temperature swings and has dependable resistance to moisture and most household chemicals. Whether you are fixing, building, sealing, or assembling, this product gives you confidence from first squeeze through final set. Best for Household and workshop repairs that need speed and strength Fixing fixtures, brackets, and hardware Filling chips and rebuilding small edges before sanding Suitable surfaces The adhesive works well on the following surface types when properly prepared: Metal hardware Ceramic tiles Most rigid plastics except polyethylene and polypropylene Timber and MDF Stone and concrete Surface preparation Good preparation is the key to a long lasting repair. Remove loose material, dust, and grease. Wipe glossy areas with methylated spirits or an approved cleaner and allow to dry. On very smooth plastics and metals, lightly roughen with fine abrasive paper to give the adhesive a mechanical key. Dry fit parts first and mark alignment points so you can assemble accurately within the open time. If bonding porous materials, ensure both faces are dry and free of surface chalking. How to use Check fit and plan clamping. Do a trial run without adhesive so you know the order of steps. Apply a thin, continuous bead to one surface. For wide pieces, use a zig zag pattern to maximise wetting. Bring surfaces together within the stated open time of 3 to 5 minutes working time. Reseat once if needed, then hold steady. Apply even pressure using clamps, tape, weights, or temporary fasteners. Avoid squeezing all adhesive out of the joint. Allow to cure undisturbed. Initial handling strength will develop as the adhesive sets, with a full cure reached based on the chemistry described below. Cure profile Initial set is reached in about 5 minutes at 23 C. Sandable after several hours. Achieves high final strength after a full overnight cure. Temperature and environmental performance Performs well across typical domestic temperature ranges after cure. Avoid application to very cold, sweating, or waterlogged surfaces. For outdoor use protect fresh bonds from rain until the skin has formed and the core has progressed in cure. Once fully cured, the bond resists normal weathering, splash water, and intermittent UV exposure based on the substrate and paint systems used. Clean up and finishing Clean uncured excess with acetone on a cloth. Use care on painted substrates. When cured, excess can be carefully trimmed or sanded. For painted finishes, allow the adhesive to fully cure before priming. Test paint on a small area to confirm compatibility and drying behaviour. Coverage guide Coverage varies with bead size, surface porosity, and technique. As a general guide, a 3 mm bead yields approximately 10 to 12 linear meters per 310 mL cartridge. Smaller packs scale proportionally. Gaps, rough edges, and highly absorbent materials will reduce coverage. Plan an extra margin for offcuts and practice passes. Tips for best results Work within the recommended open time so the adhesive can properly wet the surfaces. Use light clamping pressure to keep parts aligned while maintaining a film thickness for strength. For very porous substrates, apply a thin precoat as a primer layer and allow it to tack before final assembly. Keep joint lines clean by masking edges with painter tape and removing it before the adhesive skins. Where movement or vibration is expected, design the joint to share load across a large area. Troubleshooting Poor adhesion: Check for oil, release agents, or surface dust. Reclean and lightly abrade if necessary. Slow cure: Low temperature and low humidity extend cure time. Maintain moderate conditions for best results. Visible squeeze out: Wipe fresh material with a suitable solvent and a soft cloth. Once cured, trim carefully. Bond line prints through paint: Allow a full cure, then prime and apply thin coats of paint, allowing proper drying between coats. Storage and shelf life Keep sealed to prevent crystallisation. Store upright at moderate temperature. Always check the pack for a lot code and use by guidance. Reseal immediately after use and store upright. Dispose of empty containers responsibly. Safety Read the label before use. Wear gloves when handling uncured material. Provide ventilation in enclosed areas. Avoid contact with skin and eyes. Keep out of reach of children and pets. If sensitivity occurs, stop use and seek advice. Do not ingest. First aid directions and detailed handling information are available on the package and the safety data sheet. Frequently asked questions Can I bond dissimilar materials? Yes, provided each surface is clean and sound. Differences in expansion are managed by the adhesive film thickness and the inherent flexibility after cure. Is clamping required? Light clamping improves alignment and final strength. Excessive pressure can starve the joint of adhesive which reduces performance. Is the bond water resistant? Once cured the bond resists splash water and routine humidity. For permanent immersion choose an adhesive designed for underwater service and follow the manufacturer guidance. Planning your job Measure twice and cut once. Dry assemble parts so you can confirm squareness and alignment before adhesive is involved. Keep rags, clamps, and spacers ready. If you are new to the product, test on offcuts to get a feel for bead size and squeeze out. A consistent 1 to 2 mm bond line is a good starting point for most rigid materials. Thicker lines help when surfaces are uneven. Avoid starving the joint by pressing too hard without giving the adhesive a place to reside. Responsible use Choose an adhesive that suits the materials and the environment the finished piece will face. If a joint will be submerged, carry structural loads, or be exposed to strong chemicals, check the technical data sheet for specific guidance. Many general purpose products are perfect for day to day work, while specialised tasks call for a system designed and tested for that environment. Using the right product first saves time, money, and rework. Aftercare and maintenance Adhesive joints are remarkably strong when used correctly. Design repairs so that routine loads are shared across a generous area. Where heavy vibration is present, pair the adhesive bond with appropriate mechanical fasteners. Keep cleaning chemicals mild, and avoid abrasive pads on visible joints. If a bond will be repainted, choose flexible paint where movement is expected, and keep edges sealed to prevent dirt tracking along the bond line. Recycling and disposal Allow empty containers to cure before disposal. Check local council guidance for recycling of plastics and metal cartridges. Never pour uncured product into drains or soil. Wipe tools on scrap material and let residue harden before placing in general waste. Smart handling keeps the workspace clean and reduces environmental impact.
$13.14

Ready to use, hard drying acrylic putty filler Ideal for repairing cracked, broken or uneven surfaces 30 minute fast drying time Includes bonus applicator Suitable for fibrous cement, brick, plaster and wood surface repairs available in 500gm/1.5kg Not suitable for wet areas or where structural movement occurs
$7.64

SikaBond® -TechGrip is a high strength multipurpose, polyurethane glue that provides a super strong bond to almost any substrate and is ideal for woodworking and project work. Uses SikaBond® -TechGrip can be used on most substrates due to its excellent adhesion. These include: Wood Stone Metals Glass Ceramics Concrete Brick Masonry Advantages Waterproof Resistant to solvents and chemicals Paintable with water based and solvent based paints High adhesion strength Storage and Shelf Life Store in a cool, dry place with 25C maximum condition. This material will keep for at least twelve (12) months. Instructions for Use Surface Preparation Ensure all surfaces are clean, dry, oil and dust free and that one surface is porous. (SikaBond® -TechGrip works best when both surfaces are porous). Application Apply sparingly to one surface and bring surfaces together within 15 minutes. Secure/clamp for 3-4 hours. Wipe excess away with a cloth to limit sanding after cure. Allow 24 hours for full cure. As glue will foam a little while curing, wipe off excess with a cloth to limit sanding and painting. Slightly dampen dry timber surfaces to improve bond and accelerate cure. Cleaning Wipe nozzle and cap of bottle after use and dispose of any unused material in accordance with local authority regulations. Colour: Brown Density 1.11 kg/litre approx. Bond Strength Tensile Strength - 3030kpa Test Substrate - Timber: End grain to end grain Viscosity 6,000cps Handling Precautions Avoid contact with skin and eyes. Wear protective gloves and eye protection during work. If skin contact occurs, wash skin thoroughly. If in eyes, hold eyes open, flood with warm water, seek medical attention without delay. A full Material Safety Data sheet is available from Sika on request.
$15.39

SIKA® FILLER-101 | FINE SURFACE FILLER Premium, fine surface filler Very fine consistency for fine surface filling Application thickness up to 3mm per layer Fast drying and easy to sand USE Suitable for indoor filling work on plaster boards, fabrics, old wallpapers, etc. Smooth finish CHARACTERISTICS AND ADVANTAGES Ready to use, no mixing required Easy application High initial tack or grab on plaster and concrete Quick drying COLOUR: White Appearance / Colour White paste Packaging 500 ml plastic tube Storage Storage Conditions / Shelf-Life 12 months from date of production if stored properly in undamaged and unopened original sealed packaging, in cool and dry conditions. Protect from frost. Technical Data Chemical Base Filled styrene-acrylate dispersion. Density ~ 1.100 kg/l Solid Content ~ 55% Grading Dmax : 0.12 mm Layer Thickness 3 mm max. Application Details Consumption This depends on the substrate roughness and thickness of the layer applied. As a guide, ~ 1 l of Sika® Filler-101 can fill ~ 1 m2 per mm thick. Substrate Quality Clean, free from dust, dry and oil. Application Conditions / Limitations Substrate Temperature +5°C min. / +35°C max. Ambient Temperature +5°C min. / +35°C max. Application Instructions Mixing Sika® Filler-101 is supplied ready to use - no mixing is required. Application Method / Tools Sika® Filler-101 can be applied with spatula in layer thicknesses from 0 - 3 mm. When filling deeper holes or cracks the filler must be applied in several layers and must be allowed to almost dry. Holes and cracks from 4 - 15 mm can more easily be filled with Sika® Filler-105. When dried finish the surface with Sika® Filler-101. Cleaning of Tools Clean all tools and application equipment with water immediately after use. Hardened / cured material can only be mechanically removed. Waiting Time / Overcoating Drying Time: ~ 2 hours Paintability: ~ 4 hours Value Base All technical data stated in this Product Data Sheet are based on laboratory tests. Actual measured data may vary due to circumstances beyond our control.
$16.13

Premium, coarse-grained, wide crack filler, Coarse-grained consistency for maximum filling capacity. Application thickness up to 5mm per layer, to a maximum of 30mm. Fast drying and easy to sand Use: Suitable for indoor filling and repair where thicker filling capability is needed A finer grade filler such as Sika® Filler 101 should be used for finishing surfaces before painting Features Ready to use, no mixing required Easy application Thick layer filling and levelling ability High initial tack or grab on plaster and concrete Quick drying Colour: Grey
$88.91

Premium, coarse-grained, wide crack filler, Coarse-grained consistency for maximum filling capacity. Application thickness up to 5mm per layer, to a maximum of 30mm. Fast drying and easy to sand Use: Suitable for indoor filling and repair where thicker filling capability is needed A finer grade filler such as Sika® Filler 101 should be used for finishing surfaces before painting Features Ready to use, no mixing required Easy application Thick layer filling and levelling ability High initial tack or grab on plaster and concrete Quick drying Colour: Grey
$15.46

Selleys Spakfilla Rapid is a ready-mixed lightweight filler that is fast drying, virtually non-shrinking, non-cracking & needs only one application. Features Fill cracks and holes in a single application Pre-mixed and ready to use Minimal shrinkage so no need to overfill Very fast drying allowing sanding and painting in a short time period Comes complete with a filling spatula for ease of use Water-based, so can be cleaned up with water Paintable with oil and water-based paints Where can this product be used? Filling cracks and holes on surfaces where no structural movement occurs Filling cracks in walls, ceilings, doors, windows Repairing holes in walls, ceilings, doors and windows What materials is this product suitable for? Wallboard Wood Masonry Plaster Primed nail heads Plasterboard Colours White Technology Water Based Use Interior Exterior (when painted) How To Use Ensure surfaces are clean, dry and free of loose material. Using the flexible spatula provided on the lid, press the filler firmly into the crack or hole and smooth off surface; there is no need to overfill. Lightly sand back any excess filler from the surface after product dries (30 minutes in thin applications). Dust off any loose dust before painting with water-based paints. For oil-based paints allow 24 hours before painting. Limitations: Not recommended for use on plastic, metal or exterior timber likely to swell/shrink on absorption of water. Product is not flexible so not suitable for use between surfaces that are subject the structural movement - use Selleys No More Gaps Not recommended for use where load or compression occurs as product may be crushed e.g. behind a door if the knob touches against the wall. Nailing this product is not recommended. Avoid using below 5°C or in wet conditions. Handy Tips Painting with oil-based paints is not recommended until 24 hours after filler has been applied. Water based paints may be used immediately after filler has set. If filler is found to have stiffened prior to use, stir product. Product that has actually hardened should be discarded. If still too dry add one teaspoon of water and stir again to desired consistency. Application tools may be cleaned with water. Before painting, clean dust and filler particles using Selleys Sugar Soap or Selleys Super Kleen. In exterior applications, protect from rain until dry and painted over with 2 coats of paint. Some paints may temporarily discolour when applied over the filler, but will revert to the correct colour once dry. For applications more than 2mm deep, or in cold or humid conditions, expect longer drying times. Keep container closed when not in use. Clean Up Uncured product may be removed with water. Cured product can be removed by scraping or sanding.
$25.02

Selleys Spakfilla Heavy Duty is a multi-purpose, tough and durable, light grey ready-mixed filler. Features Suitable for interior and exterior applications Good adhesions to most surfaces Water and weather resistant Fill cracks and holes in a single application Pre-mixed and ready to use Minimal shrinkage so no need to overfill Very fast drying allowing sanding and painting in a short time period Comes complete with a filling spatula for ease of use Water-based, so can be cleaned up with water Paintable with oil and water-based paints Where can this product be used? Filling holes, dents, cracks or chips in interior and exterior applications where no structural movement occurs What materials is this product suitable for? Mortar Masonry Concrete Wood Stone Primed metal surfaces Brick Plaster Ensure surfaces are clean, dry and free of loose material. Using the flexible spatula provided on the lid, press the filler firmly into the crack or hole and smooth off surface; there is no need to overfill. For deeper cracks, apply in 6mm layers allowing each layer to dry before applying the next. Lightly sand back any excess filler from the surface after product dries (2-3 hours for 2mm applications). Dust off any loose dust before applying undercoat and painting with water-based paints or oil-based paints. Limitations: Product is not flexible so not suitable for use between surfaces that are subject to the structural movement - use Selleys No More Gaps. Avoid using below 5°C or in wet conditions. Painting with oil-based paints is not recommended until 24 hours after the filler has been applied. Water-based paints may be used immediately after the filler has set. If the filler is found to have stiffened prior to use, stir product. The product that has actually hardened should be discarded. If still too dry add one teaspoon of water and stir again to desired consistency. Application tools may be cleaned with water. Before painting, clean dust and filler particles using Selleys Sugar Soap or Selleys Super Kleen. In exterior applications, protect from rain until dry and painted over with 2 coats of paint. Some paints may temporarily discolour when applied over the filler, but will revert to the correct colour once dry. For applications more than 2mm deep, or in cold or humid conditions, expect longer drying times. Keep container closed when not in use.
$22.66
![Selleys No More Gaps Bricks Mortar [Sandstone]](http://gluesaustralia.com.au/cdn/shop/files/9300697130297_4ba0669c-67f5-40d4-9f47-db82307f921f.png?v=1754711842&width=645)
Selleys No More Gaps Bricks and Mortar is a textured, ready to use weather-resistant gap filler available in a range of colours to match your existing mortar. It's mortar like texture allows easy repair of unsightly cracks and gaps in brickwork around the home. Features Ready mixed mortar filler, so is quick and easy to apply with a caulking gun. Has a mortar like texture for a textured finish and match to cement mortar and render. Is more flexible than mortar which will help prevent more damage to the mortar Is weather and UV resistant with a UV stable formula to prevent colour deterioration. Provides a more suitable finish on rendered walls than smooth fillers. Contains a fungicide and algaecide to protect against unsightly mould and algae growth. Has superior adhesion to a broad range of surfaces, making it easy to use. Will not stain building materials Can be painted over with both water and oil based paints, after the surface has skinned. (Approximately 2 hours after application). Is water based, so can be cleaned up with water easily. Is sandable when dry for a rough or smooth finish. Where can this product be used? Repairing cracks and gaps in brickwork and/or cement blocks where mortar has fallen out or eroded. Stationary cracks in pathways. Sealing gaps around windows or between brick wall and roof eaves. Repairing stationary cracks in cement render. Repairing penetration holes around pipe work, ducting, etc. Sealing gaps where mortar has fallen out in ridge capping on tile roofs. What materials is this product suitable for? Brick Concrete Render Fibre cement sheeting Laminated plastics Hardboards Aluminium Ceramics Timber How to Use Ensure the surface is clean, dry and free from dust, grease, flaking/powdery paint and old or crumbling caulk. Cut cartridge tip, fit nozzle and cut to desired opening (5mm) then insert into caulking gun. We recommend Selleys Light Speed Caulking Gun. Apply using caulking gun. Apply with caulking gun, forcing product into gap. Press into cracks and holes using a spatula or wet finger. Clean away excess from surfaces immediately using a damp cloth. For larger cracks & holes, 2 applications may be necessary. Allow first application to dry before applying second. Hardens in 24 hours depending on weather. Protect from rain until firmly skinned. Limitations: Not suitable for areas of continuous water immersion. Not suitable as a substitute for mortar in construction as it does not have the structural properties of mortar. Not suitable for moving cracks. Do not use or store below 5°C. Handy Tips For the best results slightly dampen the surface prior to application. For use in fine cracks, eg. in cement render rub Selleys No More Gaps Bricks and Mortar into cracks or use Selleys No More Cracks Exterior & Brick Render. If painting over the product, apply undercoat before applying a top coat for the best results. Keep a pack of Selleys Sugar Soap Wipes handy to wipe up any spills and for cleaning. They are an easy and effective way to keep clean on the job.
$24.79
![Selleys No More Gaps Bricks Mortar [Off White]](http://gluesaustralia.com.au/cdn/shop/files/9300697130334_5a88883c-9e8a-4c25-80f6-535ba26ac80d.png?v=1754711844&width=645)
Selleys No More Gaps Bricks and Mortar is a textured, ready to use weather-resistant gap filler available in a range of colours to match your existing mortar. It's mortar like texture allows easy repair of unsightly cracks and gaps in brickwork around the home. Features Ready mixed mortar filler, so is quick and easy to apply with a caulking gun. Has a mortar like texture for a textured finish and match to cement mortar and render. Is more flexible than mortar which will help prevent more damage to the mortar Is weather and UV resistant with a UV stable formula to prevent colour deterioration. Provides a more suitable finish on rendered walls than smooth fillers. Contains a fungicide and algaecide to protect against unsightly mould and algae growth. Has superior adhesion to a broad range of surfaces, making it easy to use. Will not stain building materials Can be painted over with both water and oil based paints, after the surface has skinned. (Approximately 2 hours after application). Is water based, so can be cleaned up with water easily. Is sandable when dry for a rough or smooth finish. Where can this product be used? Repairing cracks and gaps in brickwork and/or cement blocks where mortar has fallen out or eroded. Stationary cracks in pathways. Sealing gaps around windows or between brick wall and roof eaves. Repairing stationary cracks in cement render. Repairing penetration holes around pipe work, ducting, etc. Sealing gaps where mortar has fallen out in ridge capping on tile roofs. What materials is this product suitable for? Brick Concrete Render Fibre cement sheeting Laminated plastics Hardboards Aluminium Ceramics Timber How to Use Ensure the surface is clean, dry and free from dust, grease, flaking/powdery paint and old or crumbling caulk. Cut cartridge tip, fit nozzle and cut to desired opening (5mm) then insert into caulking gun. We recommend Selleys Light Speed Caulking Gun. Apply using caulking gun. Apply with caulking gun, forcing product into gap. Press into cracks and holes using a spatula or wet finger. Clean away excess from surfaces immediately using a damp cloth. For larger cracks & holes, 2 applications may be necessary. Allow first application to dry before applying second. Hardens in 24 hours depending on weather. Protect from rain until firmly skinned. Limitations: Not suitable for areas of continuous water immersion. Not suitable as a substitute for mortar in construction as it does not have the structural properties of mortar. Not suitable for moving cracks. Do not use or store below 5°C. Handy Tips For the best results slightly dampen the surface prior to application. For use in fine cracks, eg. in cement render rub Selleys No More Gaps Bricks and Mortar into cracks or use Selleys No More Cracks Exterior & Brick Render. If painting over the product, apply undercoat before applying a top coat for the best results. Keep a pack of Selleys Sugar Soap Wipes handy to wipe up any spills and for cleaning. They are an easy and effective way to keep clean on the job.
$28.39

A versatile hand kneadable, fast setting, non-rusting co-extruded epoxy repair system that can be used for repairing ferrous and aluminium metal items. It comes in a handy roll form, with the black hardener encapsulated in the grey resin part. The product hardens in 5-10 minutes, after mixing, to a black metal-like material. Features Will not sag, run or drip. Easy to use – no mess. Can be drilled, sawed, sanded, filed, tapped, machined or painted one hour after mixing. Good adhesive strength. Can be used to reshape, rebuild and repair a multitude of surfaces and applications. Good gap filling properties. Long-lasting, durable solution. Heat resistant to 120°C continuously or 140°C intermittently. Can be used under water (but dry surfaces for application are best and recommended). Rapid Set (less than 10 minutes). Can be used for fuel resistant repairs. Appearance Dries Dark Grey/Charcoal Where can this product be used? Rebuilding engine parts and rusted metal etc Repairing a hole in a fuel tank Repair of iron pipes, tools and equipment Repair stripped threads Forming of nuts and bolts in place Attaching fixtures and signs Fixing radiators Repairing holes in cars and boats Patching ducts and tanks Making prototypes Thread locking Repair of down pipes and gutters Anchoring of bolts Repairing your metal outdoor furniture Set time increases at temperatures below 20°C Not recommended for plastic fuel tanks Does not adhere to polyethylene, polypropylene or Polytetrafluoroethylene (Teflon?) or silicone rubber Not tested for drinking water contact to AS/NZ 4020:2005 What materials is this product suitable for? Steel Wide range of terrous metal and aluminium items Most plastics (pre-test required) Glass How to use this product Clean surface free of grease, dirt and dust. For best results roughen bond area prior to cleaning Cut off required amount. Replace disc on remaining portion. Use gloves to avoid messing hands. To mix, knead with fingers to uniform colour. If mixing is difficult, warm to room temperature. Apply with pressure to surface to be repaired (within 2 minutes of mixing) and mould to shape if required. If material sticks to fingers, use the plastic wrapper to press the material in place. For a smooth appearance, remove excess and hand rub with water or a damp cloth before hardening begins. Trim away any excess before initial hardening. Remove any residues with acetone prior to initial hardening. Hardened excess may be sanded or trimmed away once fully cured. After 5-10 minutes Knead-It Steel will harden and begin to form a strong bond. After 60 minutes Knead-It Steel may be drilled, sanded, machined, filed, sawed or painted. Wash hands thoroughly with soap and water after use. Handy tips Ensure the putty and hardener are mixed properly. Knead-It will become warm as it is mixed, A good indication its mixed properly is when you have a uniform colour, and feel a mild heat radiating from thre knead-it. To help determine when your knead it has set, keep a small piece off to check- when it is hard, it indicates your job is done. Store in a cool place for maximum shelf life Use Knead-It Multi Purpous for applications in contact with drinking water. Use Knead-It Aqua for applications in wet/submerged areas. For cleaning surfaces prior to application of adhesive, if the surface is porous, we would recommend using SELLEYS Liquid Sugar Soap. If the surface is non-porous eg glass or metal, firstly clean the surface with mineral turpentine and then again with methylated spirits. If there is old, difficult to remove residue such as old paint, we recommend using paint stripper such as SELLEYS Kwik Strip Smart. Ensure the surface is dry before applying the product. Keep a canister of SELLEYS Sugar Soap Wipes nearby for a quick and effective cleanup. Safety tips Where possible wear protective gloves when using Knead-It Steel. Contact with skin may result in irritation. Epoxy resin is a known skin sensitiser. Repeated or prolonged skin contact may lead to allergic contact dermatitis. If redness or swelling of skin occurs, wash thoroughly with soap and water. Seek medical attention if in any doubt. Mixed and cured material is not hazardous. Cured material can only be removed by cutting and abrasion. If cured on skin, it will peel off in a few days without assistance. Soaking in warm water will assist removal. Storage and re-use Replace siliver disc to seal ends and keep in a cool dry place.
$32.40

A versatile, hand kneadable fast setting epoxy putty that is ideal for repairing, rebuilding, reshaping or restoring almost anything. It can be drilled, filed, machined, screwed, sawn, sanded and painted. Packaged in a handy roll so you can just cut off what you require and save the rest for another day, it hardens in 5-10 minutes, after mixing. Approved for contact with drinking water. Features Will not sag, run or drip Easy to use – no mess Can be drilled, sawed, sanded, filed, tapped, machined or painted one hour after mixing Good adhesive strength Can be used to reshape, rebuild and repair a multitude of surfaces and applications Good gap filling properties Long-lasting, durable solution Heat resistant to 120°C continuously or 140°C intermittently Can be used underwater. (but dry surfaces for application are best and recommended) Rapid set time (<10 minutes) Suitable for contact with drinking water. Complies with AS/NZS 4020, QAS Type Test Certificate No.: 8649 Excellent anchoring properties Where can this product be used? Repair and replacement – timber, metal, masonry, many plastics, ceramics Mending – toys, appliances, lawn mowers, sports equipment etc Sealing – leaks in gutters and downpipes Patching – chipped concrete, floors, bricks, blocks etc Attaching – fixtures, machine tags, signs etc Anchoring – bolts, screws, housings etc Moulding – to reform-reshape damaged timber, metal, masonry, plastics, ceramics Moulding to rebuild – wrought iron fencing Forming knobs and missing parts Balancing – table legs etc Fixing a damaged roof tile Repairing a water (drinking) tank Lost the head off your hammer? Make a new one with knead it Replace chip in golf club (woods) Not recommended for filling or sealing joints/cracks subject to movement as the cured product is extremely hard and inflexible Does not adhere to polyethylene, polypropylene or Polytetrafluoroethylene (Teflon?) or silicone rubber Pot life (working life) decreases above 20°C Set time increases at temperatures below 20°C Approval for Drinking Water Contact to AS/’NZ4020:2005 subject to a maximum surface area: volume ratio of 10,375mm2/L; minimum cure time: 72 hours at 20°C; maximum temperature: 85°C; maximum wet film thickness: 5 – 6mm What materials is this product suitable for? Wood/Timber Concrete Anchoring bolts Metal Masonry Plastics Ceramics How to use this product Clean surface free of grease, dirt and dust. For best results roughen bond area prior to cleaning. Cut off required amount. Replace disc on the remaining portion. Use gloves to avoid messing hands. To mix, knead with fingers to a uniform colour. If mixing is difficult, warm to room temperature. Apply to surface to be repaired (within 2 minutes of mixing) and mould to shape if required. For a smooth appearance, remove excess and hand rub with water or a damp cloth before hardening begins. Trim away any excess before initial hardening. Remove any residues with acetone prior to initial hardening. Hardened excess may be sanded or trimmed away once fully cured. After 5-10 minutes Knead-It Multi-Purpose will harden and begin to form a strong bond. After 60 minutes Knead-It Multi-Purpose may be drilled, sanded, machined, filed, sawed or painted. Wash hands thoroughly with soap and water before product hardens. Handy tips Ensure the putty and hardener are mixed properly. Knead-It will become warm as it is mixed, A good indication its mixed properly is when you have a uniform colour and feel a mild heat radiating from the knead-it. To help determine when your knead it has set, keep a small piece off to check- when it is hard, it indicates your job is done. Use Knead-It Aqua for applications in wet/ submerged areas. Use Knead-It Steel for applications on metal or fuel contact For cleaning surfaces prior to application of adhesive, if the surface is porous, we would recommend using SELLEYS Liquid Sugar Soap. If the surface is non-porous eg glass or metal, firstly clean the surface with mineral turpentine and then again with methylated spirits. If there is old, difficult to remove residue such as old paint, we recommend using paint stripper such as SELLEYS Kwik Strip Smart. Ensure the surface is dry before applying the product Keep a canister of SELLEYS Sugar Soap Wipes nearby for a quick and effective cleanup Safety tips Where possible wear protective gloves when using Knead-It Multi-Purpose. Contact with skin may result in irritation. Epoxy resin is a known skin sensitiser. Repeated or prolonged skin contact may lead to allergic contact dermatitis. If redness or swelling of the skin occurs, wash thoroughly with soap and water. Seek medical attention if in any doubt. Mixed and cured material is not hazardous. Cured material can only be removed by cutting and abrasion. If cured on the skin, it will peel off in a few days without assistance. Soaking in warm water will assist removal. Storage and re-use Replace silver disc to seal ends and keep in a cool dry place.
$13.66
You have seen 48 out of 219 products
Fillers and repair compounds that sand smooth for paint-ready results. Choose fast-set for quick turnarounds or extended open time for shaping. Use filters to refine by chemistry and set speed. Always check the product page and TDS/SDS.