
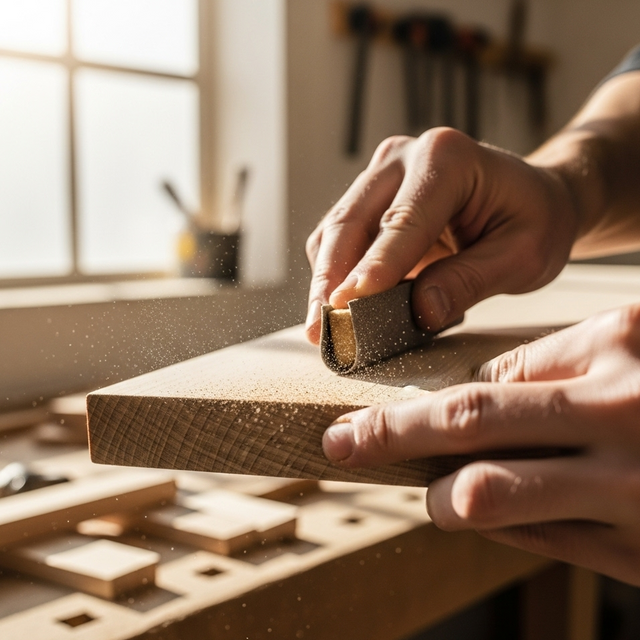
Fillers and repair compounds that sand smooth for paint-ready results. Choose fast-set for quick turnarounds or extended open time for shaping. Use filters to refine by chemistry and set speed. Always check the product page and TDS/SDS.


GORILLA SUPER GLUE GEL Gorilla Super Glue Gel is an easy-to-use, thicker and more controlled formula* great for multiple surfaces and vertical applications. Developed for long-lasting repairs in an instant, the clear glue dries in 10–45 seconds. This super glue gel is specially formulated to absorb drops and impacts. Super glue, also referred to as cyanoacrylate glue, or CA glue, works on a variety of materials, including plastic**, metal, stone, ceramic, paper, rubber and more. In addition to its high performance formula, we’ve added an anti-clog cap with a metal pin inside to ensure an airtight seal for maximum reusability. It’s Gorilla tough, every time. PRODUCT FEATURES NO RUN CONTROL GEL FORMULA ANTI CLOG CAP: Keeps glue from drying out, its Gorilla Tough use after use. IMPACT TOUGH: Increase impact resistance and strength FAST-SETTING: Dries in 10-45 seconds, no clamping required VERSATILE: Bonds plastic*, wood, metal, ceramic, rubber, leather, paper and more! *Not recommended for use on polyethylene or polypropylene plastic or similar materials. DIRECTIONS Protect Work Area From Spills Clean and Dry Surfaces to Be Bonded Prepare Gorilla Super Glue Gel With cap on bottle, shake product, then turn product upside down and tap on hard surface to shake gel into bottle nozzle. Apply Gorilla Super Glue Gel Remove cap and apply a small amount of Gorilla Super Glue Gel to one surface. Only one dab per 25.4mm x 25.4mm area recommended. Set time can vary based on the amount of glue and type of surface glued. Excess glue can cause delayed or failed bond. Secure Press the two surfaces together for about 10–45 seconds. Note that gaps and uneven surfaces may cause delayed bonding. Wait 24 hours for a full cure. TECHNICAL SPECS APPLICATION TEMPERATURE – Room temperature SERVICE TEMPERATURE – -53.9°C to 104.4°C OUTDOOR – No PAINTABLE – No SANDABLE – Yes STAINABLE – No EXPANDS WHEN CURED – No CURED COLOR – Clear STORAGE TIPS – Store in a cool, dry location. Do not store in refrigerator GAP FILLING – No FAQS Why isn’t my bottle of Gorilla Super Glue filled to the top? For high performance and usability, the adhesive needs to be protected from air. One way to keep the air out of the adhesive is by packaging in thick plastic bottles. If the thicker plastic bottle was completely full of adhesive, it would be too hard to squeeze the glue out of the bottle. How is Gorilla Super Glue different than Gorilla Glue? Gorilla Super Glue is a cyanoacrylate adhesive, while Gorilla Glue is a polyurethane. Unlike Gorilla Glue, Gorilla Super Glue does not require extended clamp time or moisture to activate. It does not foam during set up. In addition, Gorilla Super Glue is recommended primarily for indoor applications only and is ideal for smaller repairs that require an instant bond and projects where clamping is not needed. What does Impact Tough mean? Gorilla Super Glue is designed with a reinforced formula to handle bumps and drops with a strong, reliable bond. Will Gorilla Super Glue bond plastic/vinyl/rubber? Gorilla Super Glue has been engineered to achieve excellent results on difficult to bond substrates. It is formulated to bond a wide range of similar and dissimilar materials including most plastics, metals, elastomers, wood, and porous surfaces. Gorilla Super Glue requires some absorbed moisture on the bonding surfaces to cure. Certain difficult to bond plastics, such as polyethylene and polypropylene, have little to no moisture and will not form good bonds. How do I remove Gorilla Super Glue from body/skin or separate bonded body/skin? To remove Gorilla Super Glue from your skin, soak the bonded area in warm, soapy water. Acetone may also be used according to the solvent manufacturer’s instructions (fingernail polish remover works well). The key is to be patient and NEVER pull the area apart. Gently wiggle the bonded area to allow the soapy water or acetone to penetrate the bond. After soaking, the adhesive should come off easily. Keep in mind that acetone can strip your skin of oils, so apply moisturiser after removal. How do I remove Gorilla Super Glue from my surface? To remove uncured Gorilla Super Glue, use a towel dampened with acetone or isopropyl alcohol to blot the area. Several applications may be necessary to completely remove the uncured glue. For removal of cured Gorilla Super Glue from the surface of your project, soak bonded area with warm soapy water or acetone. The adhesive should begin to soften, but many applications may be necessary. Keep in mind that isopropyl alcohol and acetone can damage some surface materials, such as countertops and some plastics. Always test in a small, unseen area first. Is Gorilla Super Glue food safe? Gorilla Super Glue is not intended for any application with direct or indirect food contact and should not be stored near food or in the refrigerator. Gorilla Super Glue contains no solvents, but has a strong odor. To avoid irritation, use in areas that have adequate air movement and ventilation. What should I do if I think a human or animal ingested Gorilla Super Glue? Additional product safety and first aid information can be found here. How is Gorilla Super Glue Gel different than liguid Gorilla Super Glue? Gorilla Super Glue Gel is a thicker and more controllable formula than Gorilla Super Glue. It’s great for projects where precision is key. Why do I need to shake and tap the bottle? Since Gorilla Super Glue Gel is a thicker formula than a liquid super glue, shaking the bottle pushes the glue to the tip of the bottle. This allows for an easy and controlled dispensing.
$14.99


Gorilla takes epoxy to a new level—the Gorilla Tough level. With its superior solvent and water resistance, Gorilla Epoxy adhesive is incredibly strong and durable for household and automotive repairs alike. The easy-to-use syringe keeps the epoxy resin and hardener separate, so it is easy to dispense and won’t harden over time. The two-part, gap-filling formula easily bonds steel, aluminum, glass, wood, ceramic, tile and most plastics. Plus, it dries in an ideal, crystal-clear finish that makes projects look spotless. Features: Dries Clear: Ideal for clean, easy finishing 5 Minute Set: Plenty of repositioning time for the perfect fit. Gap-Filling: Fills voids and bonds uneven and vertical surfaces. Water Resistant: Withstands moderate exposure to water Solvent resistant Non-Toxic once cured Easy-to-use syringe: Separate barrels of epoxy resin and hardener keep epoxy from hardening, plus syringe dispenses evenly and includes a cap for multiple uses. Directions Prepare your work area: It is recommended to use Gorilla Epoxy in a well-ventilated area. Be sure your work area is protected from spills. Gather your mixing tray and stir sticks so that all your supplies are together. Prepare the surface: To improve adhesion, roughen smooth surfaces before gluing. Then clean and dry all surfaces to be bonded. Prepare Your Work Area and the Surface If you’re using Gorilla Epoxy for the first time, or bonding a new type of material, we always recommend trying a test piece first. Prepare your work area: It is recommended to use Gorilla Epoxy in a well-ventilated area. Be sure your work area is protected from spills. Gather your mixing tray and stir sticks so that all your supplies are together. Prepare the surface: To improve adhesion, roughen smooth surfaces before gluing. Then clean and dry all surfaces to be bonded. Mixing Gorilla Epoxy Remove the black cap from the two syringes. With tip pointing upward, cut or snap the end from tip of the syringes. With the tip still pointing upward, eliminate air and ensure even dispensing by slowly pushing the plunger until both the resin and the hardener are at the tip Push the plunger to dispense even amounts of resin and hardener onto a clean, disposable, contained surface. The package itself can be used as a mixing tray. If you flip the plastic blister shell over, you can use the small well as a starter dish to begin dispensing until both the resin and hardener are flowing equally. Once the flow is even, move to the larger mixing well to dispense your even ratio. Mix the two parts for about 20 seconds, until the mixture is uniform. Apply within 5 minutes.As you mix, you will notice that the epoxy warms up. This is a reaction that occurs as the resin and hardener combine. Application After mixing is complete, apply Gorilla Epoxy within 5 minutes. The epoxy mixture will continue to thicken and the bond strength will decrease the longer you wait to apply. Clamping To reach maximum bond strength, clamp project together and leave undisturbed. Important Cure Times Set: 5 minutes to apply and position Handling: Allow to cure for 30 minutes undisturbed (no weight or handling) Final Cure: Allow 24 hours for load-bearing weight Storage: To close, pull plunger slightly back. Wipe tip clean with dry cloth and align notch on tip and cap. Close tightly. Visit our FAQs for more information on what surfaces Gorilla Epoxy will bond, clean up information and more. FAQ Is Gorilla Epoxy gap filling? Yes. Gorilla Epoxy is gap filling. It will fill voids and bond uneven and vertical surfaces. If filling gaps outdoors, note that Gorilla Epoxy may yellow over time with exposure to sunlight. What is the shelf life? Are there storage tips to extend the shelf life? Shelf life for Gorilla Epoxy is a maximum of two years. The adhesive is not activated until the resin and hardener come in contact with one another, so the shelf life is likely to be much longer if the epoxy tip is wiped clean after each use and the cap is securely replaced. Make sure you notice the notch on the cap and be sure to align that with the notch on the syringe tip. This will further ensure the two parts do not accidentally mix. What is the best application temperature? For best results, apply in room temperature situations. Application in cold temperatures will slow the cure time of Gorilla Epoxy, while application in hot temperatures can speed up the cure time. Gorilla Epoxy’s cured bond withstands temperatures ranging from -23° to 82°C Do I need to use clamps with Gorilla Epoxy? How long? Clamps are recommended for use during setup to ensure the bond sets correctly. Set Time: 5 minutes to mix, apply and position Handling Time: Leave 30 minutes undisturbed (clamping is recommended) Full Cure Time: 24 hours for load-bearing weight How much Gorilla Epoxy do I apply? Gorilla Epoxy is a very strong adhesive. It does not take a lot to get a strong bond. Average coverage from our 25 mL epoxy syringe will cover 100 square inches. What can I use as a mixing tray or stir stick? A mixing tray and stir stick will be included in your Gorilla Epoxy package. Other ideas for mixing trays include aluminum foil trays, cardboard, or paper/plastic plates. Try using popsicle sticks, plastic utensils or straws for mixing. What is Gorilla Epoxy? Gorilla Epoxy is a two-part formula that requires equal parts of resin and hardener mixed together for activation. For best strength results, mix a 1-to-1 ratio of resin and hardener. Once mixed, Gorilla Epoxy is capable of bonding many materials and offers high strength results. How do I remove Gorilla Epoxy? Gorilla Epoxy is a very strong adhesive and is solvent resistant. Removing dried adhesive is difficult to do. Acetone will soften the epoxy; however, full removal will require mechanical means, such as scraping, rubbing, or sanding. Uncured Removal: Skin: Acetone, isopropyl alcohol, 2–3 washings with soap and water. Reminder: Cured glue requires mechanical means, such as rubbing or washing with exfoliating soaps. Hair: Isopropyl alcohol Clothes and Carpet: Isopropyl alcohol. For clothes and carpet, avoid acetone, soap and water, and mineral spirits, as they will not work well on fabric. What surfaces will Gorilla Epoxy bond? Gorilla Epoxy is very versatile. It boasts high-strength results for steel, wood, aluminum, ceramic, tile, glass, most plastics, pressure-treated lumber and much more! What surfaces will Gorilla Epoxy bond? Gorilla Epoxy is water resistant, which means it will resist moderate exposure to water but should not be fully submerged. If you need an adhesive that is 100% waterproof, check out our Original Gorilla Glue®. How do I dispense Gorilla Epoxy? Make sure all surfaces are clean, dry and free of oil. To improve adhesion, roughen up smooth surfaces with sandpaper before gluing. Remove black cap from the middle of the plunger. With tip pointing upward, snap end from the tip of the syringe. Slowly push plunger until resin and hardener are at the tip, then dispense evenly. The package blister can be used as a mixing tray. Mix for at least 20 seconds until the mixture is uniform. Apply to surface within 5 minutes. Clamp surfaces together or leave undisturbed for 30 minutes. To close, pull plunger slightly back. Wipe syringe tip with a clean, dry cloth then snap the black cap on tightly.
$21.60

PVA adhesive specially formulated for interior woodworking repairs and projects. White in colour, dries clear and cleans up easily with water. Features No mixing required – Ready to use straight from the pack Suitable for end grain gluing – won’t stain timber, white in colour, but dries clear. Non-toxic Dries Clear Cleans up with water Where can this product be used? School projects and craft Furniture repairs Repair a split trim Fix a broken photo frame Restoring furniture Fix a wobbly chair Gluing cupboard shelves for additional support Repairing a door frame or window Fix a wine rack Re-attach book cover/spine or repair torn bindings Fix a broken drawer Wooden toy repairs Craft projects Unsuitable for use on coated wallpaper overlaps eg vinyl Although Aquadhere is reasonably water resistant, it is not recommended for use in water or weather exposed situations or for any job where maximum water resistance is required (for weather exposed and/or wet areas we recommend Aquadhere exterior or Aquadhere Durabond). Will not take common timber stains Aquadhere is not recommended for joints that are subjected to constant high stress. Instead, use Selleys 308 High Stress wood glue. Do not use on projects that you need to be able to sand, as Aquadhere Interior is not sandable. Will not bond MDF, we recommend using Aquadhere Exterior What materials is this product suitable for? End grain gluing Craftwork Cloth Paper Mosaics Leather Other craft materials How to use this product Surfaces to be bonded must be close fitting, free from dust, dry and clean from grease. Shake bottle before use Apply adhesive liberally to one surface only, position surfaces and press together while still wet. Immediately clamp for 30 minutes for softwoods and 1 hour for hardwoods. Alternatively, low clamping pressures (50lbs/in2) can be used with softwoods; higher pressures are recommended for hardwoods (100 – 150lbs/in2). Do not stress joint for 12 hours. Wipe off excess adhesive while still wet with a damp cloth. If the wood is to be stained, any residual Aquadhere left on the timber surface may prevent the stain from taking to the wood. Maximum strength is achieved after 12 hours, but longer in cold, damp conditions, or when used on dense timbers. Cure slows significantly in humid, cold conditions. Clean all tools with water before adhesive is allowed to dry. If dry, soak in water until adhesive is soft. Handy tips 1L covers approx. 8m2 To fill small gaps, Aquadhere can be mixed with sawdust. Longer clamping times may be required for joints under high stress, or alternatively use Selleys 308 High Stress Wood Glue. Avoid contaminating Aquadhere with iron and steel, eg nails, etc. Aquadhere contaminated with rust (iron oxide) will stain brown/black in the presence of tannins in many woods. On very porous surfaces applying a thin layer to each side and allowing to soaking in before applying a second layer to one side only may result in a stronger bond Cured adhesive can be resoftened by prolonged contact with hot water or steam. Sanding isn’t an effective way to prepare for gluing, as it often leaves an uneven surface and may clog the timber which can stop the glue from penetrating and impact on your result. A straight router can be used to trim the edge, but be sure to only remove as much as required to obtain a suitable edge for gluing. If you are gluing over a larger surface, try using a small roller to aid in application. For cleaning surfaces prior to application of adhesive, if the surface is porous, we would recommend using SELLEYS Liquid Sugar Soap. If the surface is non-porous eg glass or metal, firstly clean the surface with mineral turpentine and then again with methylated spirits. If there is old, difficult to remove residue such as old paint, we recommend using paint stripper such as SELLEYS Kwik Strip Smart. Ensure the surface is dry before applying the product. Keep a canister of SELLEYS Sugar Soap Wipes nearby for a quick and effective cleanup. Safety tips Aquadhere is considered a non-hazardous material. In case of eye contact, hold eye open and flush with plenty of water for 15 minutes. Storage and re-use For maximum shelf life store inside at moderate temperatures. Do not allow to freeze.
$18.70

Industrial grade PVA, especially developed for use by professional woodworkers and craftsmen, for large projects. Off-white in colour, drying to a light coloured clear film. Features Excellent performance properties for repairs or building projects No mixing required Suitable for exterior use in non-structural applications Heat resistant to 110°C (bonds will not weaken in exposure to direct summer sun) Can be chiselled, routed or turned Suitable for end grain gluing – won’t stain timber, cream in colour, but dries clear with a slight yellow tint Non-toxic Sandable – will not clog sandpaper like other PVA emulsion glues More water resistant than Aquadhere interior Has a higher heat resistance than Aquadhere interior Paintable Provides a stronger bond than Aquadhere interior for larger jobs Bonds MDF Weather resistant Cleans up with water Where can this product be used? Cabinet and furniture making Timber letterbox Making a bookshelf Restoring furniture Gluing cupboard shelves for additional support Repairing a door frame or window Repairing or building wooden outdoor furniture Indoor furniture Storage chest for tools Pot plant stand Dog kennel Bed heads Timber joinery Wooden toys Unsuitable for use on coated wallpaper overlaps eg vinyl Will not take common timber stains Not recommended for joints that are subjected to constant high stress. Instead, use Selleys 308 High Stress wood glue Not suitable for below waterline applications or continuous submersion. We recommend Selleys Knead It Aqua for these situations. What materials is this product suitable for? Softwoods Plywood Joinery Hardwoods MDF Laminating Particleboard Dowelling Veneering Chipboard How to use this product Surfaces to be bonded must be close fitting, free from dust, dry and clean from grease. Shake bottle before use Apply adhesive liberally to one surface only, position surfaces and press together while still wet. Immediately clamp for 30 minutes for softwoods and 1 hour for hardwoods. Alternatively, low clamping pressures (50lbs/in2) can be used with softwoods; higher pressures are recommended for hardwoods (100 – 150lbs/in2). Do not stress joint for 12 hours. Wipe off excess adhesive while still wet with a damp cloth. If the wood is to be stained, any residual Aquadhere left on the timber surface may prevent the stain from taking to the wood. Maximum strength is achieved after 12 hours, but longer in cold, damp conditions, or when used on dense timbers. Clean all tools with water before adhesive is allowed to dry. If dry, soak in water until adhesive is soft. Cure slows significantly in humid, cold conditions. Handy tips 1L covers approx. 5m2 To fill small gaps, Aquadhere can be mixed with sawdust. Longer clamping times may be required for joints under high stress, or alternatively use 308 High Stress Wood Glue. Avoid contaminating Aquadhere Exterior with iron and steel, eg nails, etc. Aquadhere contaminated with rust (iron oxide) will stain brown/black in the presence of tannins in many woods. Painting or varnishing constructions made of porous softwoods will improve the resistance of bonds to water exposure. On very porous surfaces applying a thin layer to each side and allowing to soaking in before applying a second layer to one side only may result in a stronger bond. If you are gluing over a larger surface, try using a small roller to aid in application. For cleaning surfaces prior to application of adhesive, if the surface is porous, we would recommend using Selleys Liquid Sugar Soap. If the surface is non-porous eg glass or metal, firstly clean the surface with mineral turpentine and then again with methylated spirits. If there is old, difficult to remove residue such as old paint, we recommend using paint stripper such as Selleys Kwik Strip Smart. Ensure the surface is dry before applying the product. Keep a canister of Selleys Hand Kleen Wipes nearby for a quick and effective cleanup.
$27.94

For best performance, pair with this Loxeal product: Loxeal Cleaner 10 Degreaser: abrade and degrease the surfaces first for a stronger, more durable bond. Loxeal Metalox Metal Repair Epoxy 25ml Bi-Syringe (Single) Loxeal Metalox is a solvent-free, fast-curing, metal-filled two-part epoxy engineered for repairing and bonding metal components. This listing is for a single 25ml bi-syringe supplied with a mixing nozzle, so you can buy exactly what one job needs without committing to a trade pack. Its thixotropic (non-sag) paste works as an adhesive filler, rebuilding metal castings, pipework and flanges, and once cured it can be machined, sanded and painted, typically within a few hours of application. Why choose Loxeal Metalox? Single 25ml bi-syringe with mixing nozzle, accurately proportioned 1:1 dispensing on every repair Fast cure, handling strength in around 15 minutes, sandable in about 5 hours at room temperature Strong on steel, lap shear strength of 21 N/mm² on grit-blasted mild steel Machinable, sandable and paintable after polymerisation, even for outdoor repairs Non-sag thixotropic paste stays put on vertical and overhead surfaces Excellent resistance to water and many chemical agents Heat cure option: 1 hour at +60°C speeds cure and boosts final strength Typical applications Repairing metal castings, pipework and flanges Automotive body repair and panel filling Bonding metal substrates, plus concrete, wood and other rigid materials Maintenance and plant repairs where downtime must be kept short How to use Scratch or abrade the surface, then degrease with Loxeal Cleaner 10 or acetone and allow to dry. Fit the mixing nozzle to the bi-syringe and discard the first 3 to 5 cm of extruded product. Apply the mixed adhesive directly to the repair area; work at temperatures above +15°C. Assemble or shape immediately and leave undisturbed until cured. Once cured (sandable after about 5 hours at +25°C), machine, sand or paint as required. Cure times Pot life: approximately 5 minutes at +25°C Handling strength: approximately 15 minutes Sandable: about 5 hours at +25°C (90% of final hardness) Accelerated cure: 1 hour at +60°C for full resistance sooner Specifications Chemistry Two-part epoxy (resin / amine hardener), metal-filled Colour Part A metallic grey / Part B black Mixing ratio 1:1 by volume Pot life (+25°C) Approx. 5 minutes Handling strength Approx. 15 minutes Lap shear strength (ISO 4587) 21 N/mm² (grit-blasted mild steel); 18 N/mm² (stainless steel) Compression strength (ASTM D695) 60 N/mm² Hardness (ISO 868) Shore D 65 Pack size 1 x 25ml bi-syringe with mixing nozzle Shelf life 24 months unopened at +5°C to +25°C Buying more than one? If you go through Metalox regularly, the Metalox trade pack of 10 x 25ml bi-syringes works out cheaper per syringe. Important notes Apply at temperatures above +15°C; higher temperatures and large mixed quantities reduce pot life Avoid mixing excess product, the curing reaction generates heat Cured adhesive can only be removed mechanically Store in a cool, dry place at no more than +25°C Safety Consult the Safety Data Sheet (SDS) before use. Wear suitable gloves, avoid skin and eye contact, and work in a well-ventilated area. Product information is provided as a general guide only. Always refer to the manufacturer's Technical Data Sheet and Safety Data Sheet, and test the product for suitability in your specific application before use.
$39.95


Selleys Araldite Ultimate Bond is a grey two-part epoxy adhesive engineered for the most demanding repairs, delivering a durable, long-lasting bond that holds up to 200kg/cm² when fully cured on stainless steel. It is the toughest of the Araldite range, designed to be tug and snap proof for fixes that need to stay put. About this adhesive Two-part system of resin (Part A) and hardener (Part B) mixed in a 2:1 ratio. Bonds a wide range of surfaces with a strong, rigid, durable join. Sets in around 5 minutes and is touch-firm fast, with a low-odour formula. Made from 20% bio-based carbon. Working (usable) time of roughly 3-4 minutes at 20°C, so mix only what you can apply. What it bonds China, ceramic and porcelain Metal Glass Leather (pre-test for compatibility) Rubber (pre-test for compatibility) Wood and timber Most rigid plastics Where to use it Indoor: repairing crockery, ornaments and ceramics, refitting loose furniture joints, bonding metal, glass and timber components, and general household fixes. Outdoor: durable repairs on tools, garden and workshop items where a tough, weather-durable bond is required. Bond strength depends on substrate, bond size and surface preparation, and set times lengthen in colder weather. How to use it 1. Abrade, clean and dry both surfaces so they are free of dust, grease and loose oxides. 2. Snap the cap from the plunger and carefully cut the sealed tips at the end of the nozzle. 3. Apply even pressure to the plunger to dispense both liquids onto a clean disposable surface (2:1 ratio) and mix thoroughly with a spatula. 4. Apply the mixed glue to both surfaces, then bring them together. 5. Hold in place with tape or weights if needed and avoid undue strain on the joint for at least 60 minutes. Cures in 24 hours; maximise the bond area (minimum 2.25cm²) for best performance after full cure. Replace the cap on the nozzle for storage and clean up any uncured adhesive with acetone. Important notes Will not bond PTFE, polyethylene or polypropylene plastics. Bond will soften above 60°C but strength is restored once the temperature returns to normal. May discolour if exposed to UV. Full cure takes more than 72 hours. Not recommended where a clear, invisible bond is required, as the cured adhesive is grey. Specifications Brand Selleys Araldite Product Ultimate Bond Epoxy Adhesive Technology Two-part epoxy Colour Grey Size 30mL Mix ratio 2:1 (Part A : Part B) Working time Approx. 3-4 minutes at 20°C Set time Approx. 5 minutes Cure time 24 hours (full cure >72 hours) Holds Up to 200kg/cm² on stainless steel when fully cured Heat resistance Softens above 60°C, strength restored on cooling Clean up Acetone (while uncured) Safety Danger. Part A causes skin and serious eye irritation and may cause an allergic skin reaction. Part B may be corrosive to metals, causes severe skin burns and eye damage, and may cause an allergic skin reaction. Do not swallow and avoid contact with skin and eyes. Wear eye protection and protective gloves when mixing or using, and avoid breathing dust, vapours or spray. Keep out of reach of children and keep in the original packaging. If medical advice is needed, have the product container or label at hand. Refer to the Safety Data Sheet for full handling information.
$22.79

Get pro level finishes without the fuss. Gyprock CSR Less Mess Joint Compound is a pre mixed, easy sanding compound that helps you achieve smooth, paint ready walls with less splatter and minimal clean up. The handy 2.25kg tub is perfect for repairs, patching, jointing, and touch ups around the home or on site. Why you will love it Pre mixed convenience that is ready to use straight from the tub Less mess formula that helps reduce splatter and clean up time Easy to apply, easy to feather, and easy to sand smooth Low shrinkage for fewer repeat passes Paintable finish that accepts most interior paints Great for joints, screw head covering, corner repairs, and small patches Best suited for Interior plasterboard joints and repairs Skim coating small areas to blend texture Covering fasteners and minor cracks DIY touch ups and trade maintenance work How to use Surface prep: Ensure the area is clean, dry, dust free, and sound. Remove loose material and lightly scuff glossy paint. Application: Stir gently. Apply with a broad knife or trowel in thin, even coats. Feather edges well. Drying: Allow each coat to dry fully before recoating. Dry time varies with film thickness, temperature, and humidity. Sanding: Sand lightly with fine paper for a smooth finish. Remove dust before painting. Paint: Seal with a suitable primer then finish with your chosen interior paint. Tips for a flawless finish Work in thin passes rather than one heavy fill Keep your knife clean and slightly flexible for smooth feathering Use a dry sanding block or pole sander and avoid over sanding For deeper holes, build up in multiple coats Frequently asked questions Is it sandable and paintable? Yes. Once fully dry, sand lightly and prime before painting. Can I use it on previously painted walls? Yes, provided the paint is sound, clean, and lightly keyed. Is it suitable for wet areas? Use in dry interior spaces. For wet areas, follow local building guidelines and use appropriate systems. Specifications Brand Gyprock CSR Product Less Mess Joint Compound Pack size 2.25kg tub Colour Off white Use Interior plasterboard jointing and patching Cleanup Water while wet Finish Sandable and paintable Storage Reseal tightly. Store cool and dry. Do not allow to freeze. Good to know Coverage varies with joint size, substrate, and application method Dry times depend on thickness, temperature, and humidity Always test on a small area when working over sensitive or unknown coatings Safety Use in a well ventilated area Avoid breathing sanding dust. Wear a suitable mask and eye protection Keep out of reach of children Why buy from Glues Australia Fast dispatch Australia wide Careful packaging to protect your order Local support when you need advice
$35.43 $29.04

Dulux Precision Maximum Strength Adhesion Primer Get a tough, reliable bond on hard to paint surfaces with Dulux Precision Maximum Strength Adhesion Primer. This water based, low odour primer works as a primer, sealer and undercoat, creating a strong foundation for acrylic or oil based topcoats on both interior and exterior projects. Why choose this primer Water based with low odour Excellent adhesion on glossy and hard to coat surfaces Suitable as primer, sealer and undercoat Interior and exterior use Fast drying: touch dry in 30 minutes, recoat in 1 to 2 hours Topcoat within 30 days for best results Ideal surfaces Tiles, high gloss enamels, varnished timber, uPVC, fiberglass, aluminium, galvanised steel, Colorbond, glass, glazed brick, laminates and previously painted glossy finishes. Key specs Finish Flat Colour White Coverage Up to 10 m² per litre per coat, depending on surface Dry time Touch dry 30 minutes Recoat time 1 to 2 hours Full strength 7 days after application VOC 30.4 g/L Application temperature Between 10°C and 32°C Clean up Water Pack sizes 1 L and 4 L How to use Prepare the surface so it is clean, dry and free of grease, wax, dust, loose paint and rust. Wash if needed and allow to dry. Stir thoroughly before and during use. Apply 1 even coat with a high quality brush, roller or spray. For very smooth surfaces 1 coat is usually sufficient. Allow 1 to 2 hours before recoating or applying the topcoat. Topcoat within 30 days. Application tips Do not tint for difficult surfaces. Thin only if necessary with a small amount of water. When using solvent based enamel topcoats, lightly sand the primer before applying the enamel. If using under products with strong solvents, let the primer dry 24 hours and test compatibility on a small area first. Where not to use Floors, benchtops or surfaces subject to standing water Below 10°C surface temperature or if conditions may drop below 10°C during drying Clean up and safety Clean tools with water and a mild detergent, then rinse. Ensure good ventilation during use. Wear eye protection and avoid skin and eye contact. Always follow label directions.
$49.88

Ready to use, hard drying acrylic putty filler Ideal for repairing cracked, broken or uneven surfaces 30 minute fast drying time Includes bonus applicator Suitable for fibrous cement, brick, plaster and wood surface repairs available in 500gm/1.5kg Not suitable for wet areas or where structural movement occurs
$7.64

SikaBond® -TechGrip is a high strength multipurpose, polyurethane glue that provides a super strong bond to almost any substrate and is ideal for woodworking and project work. Uses SikaBond® -TechGrip can be used on most substrates due to its excellent adhesion. These include: Wood Stone Metals Glass Ceramics Concrete Brick Masonry Advantages Waterproof Resistant to solvents and chemicals Paintable with water based and solvent based paints High adhesion strength Storage and Shelf Life Store in a cool, dry place with 25C maximum condition. This material will keep for at least twelve (12) months. Instructions for Use Surface Preparation Ensure all surfaces are clean, dry, oil and dust free and that one surface is porous. (SikaBond® -TechGrip works best when both surfaces are porous). Application Apply sparingly to one surface and bring surfaces together within 15 minutes. Secure/clamp for 3-4 hours. Wipe excess away with a cloth to limit sanding after cure. Allow 24 hours for full cure. As glue will foam a little while curing, wipe off excess with a cloth to limit sanding and painting. Slightly dampen dry timber surfaces to improve bond and accelerate cure. Cleaning Wipe nozzle and cap of bottle after use and dispose of any unused material in accordance with local authority regulations. Colour: Brown Density 1.11 kg/litre approx. Bond Strength Tensile Strength - 3030kpa Test Substrate - Timber: End grain to end grain Viscosity 6,000cps Handling Precautions Avoid contact with skin and eyes. Wear protective gloves and eye protection during work. If skin contact occurs, wash skin thoroughly. If in eyes, hold eyes open, flood with warm water, seek medical attention without delay. A full Material Safety Data sheet is available from Sika on request.
$15.39

SIKA® FILLER-101 | FINE SURFACE FILLER Premium, fine surface filler Very fine consistency for fine surface filling Application thickness up to 3mm per layer Fast drying and easy to sand USE Suitable for indoor filling work on plaster boards, fabrics, old wallpapers, etc. Smooth finish CHARACTERISTICS AND ADVANTAGES Ready to use, no mixing required Easy application High initial tack or grab on plaster and concrete Quick drying COLOUR: White Appearance / Colour White paste Packaging 500 ml plastic tube Storage Storage Conditions / Shelf-Life 12 months from date of production if stored properly in undamaged and unopened original sealed packaging, in cool and dry conditions. Protect from frost. Technical Data Chemical Base Filled styrene-acrylate dispersion. Density ~ 1.100 kg/l Solid Content ~ 55% Grading Dmax : 0.12 mm Layer Thickness 3 mm max. Application Details Consumption This depends on the substrate roughness and thickness of the layer applied. As a guide, ~ 1 l of Sika® Filler-101 can fill ~ 1 m2 per mm thick. Substrate Quality Clean, free from dust, dry and oil. Application Conditions / Limitations Substrate Temperature +5°C min. / +35°C max. Ambient Temperature +5°C min. / +35°C max. Application Instructions Mixing Sika® Filler-101 is supplied ready to use - no mixing is required. Application Method / Tools Sika® Filler-101 can be applied with spatula in layer thicknesses from 0 - 3 mm. When filling deeper holes or cracks the filler must be applied in several layers and must be allowed to almost dry. Holes and cracks from 4 - 15 mm can more easily be filled with Sika® Filler-105. When dried finish the surface with Sika® Filler-101. Cleaning of Tools Clean all tools and application equipment with water immediately after use. Hardened / cured material can only be mechanically removed. Waiting Time / Overcoating Drying Time: ~ 2 hours Paintability: ~ 4 hours Value Base All technical data stated in this Product Data Sheet are based on laboratory tests. Actual measured data may vary due to circumstances beyond our control.
$16.13

Premium, coarse-grained, wide crack filler, Coarse-grained consistency for maximum filling capacity. Application thickness up to 5mm per layer, to a maximum of 30mm. Fast drying and easy to sand Use: Suitable for indoor filling and repair where thicker filling capability is needed A finer grade filler such as Sika® Filler 101 should be used for finishing surfaces before painting Features Ready to use, no mixing required Easy application Thick layer filling and levelling ability High initial tack or grab on plaster and concrete Quick drying Colour: Grey
$88.91

Premium, coarse-grained, wide crack filler, Coarse-grained consistency for maximum filling capacity. Application thickness up to 5mm per layer, to a maximum of 30mm. Fast drying and easy to sand Use: Suitable for indoor filling and repair where thicker filling capability is needed A finer grade filler such as Sika® Filler 101 should be used for finishing surfaces before painting Features Ready to use, no mixing required Easy application Thick layer filling and levelling ability High initial tack or grab on plaster and concrete Quick drying Colour: Grey
$15.46

Selleys Spakfilla Heavy Duty is a multi-purpose, tough and durable, light grey ready-mixed filler. Features Suitable for interior and exterior applications Good adhesions to most surfaces Water and weather resistant Fill cracks and holes in a single application Pre-mixed and ready to use Minimal shrinkage so no need to overfill Very fast drying allowing sanding and painting in a short time period Comes complete with a filling spatula for ease of use Water-based, so can be cleaned up with water Paintable with oil and water-based paints Where can this product be used? Filling holes, dents, cracks or chips in interior and exterior applications where no structural movement occurs What materials is this product suitable for? Mortar Masonry Concrete Wood Stone Primed metal surfaces Brick Plaster Ensure surfaces are clean, dry and free of loose material. Using the flexible spatula provided on the lid, press the filler firmly into the crack or hole and smooth off surface; there is no need to overfill. For deeper cracks, apply in 6mm layers allowing each layer to dry before applying the next. Lightly sand back any excess filler from the surface after product dries (2-3 hours for 2mm applications). Dust off any loose dust before applying undercoat and painting with water-based paints or oil-based paints. Limitations: Product is not flexible so not suitable for use between surfaces that are subject to the structural movement - use Selleys No More Gaps. Avoid using below 5°C or in wet conditions. Painting with oil-based paints is not recommended until 24 hours after the filler has been applied. Water-based paints may be used immediately after the filler has set. If the filler is found to have stiffened prior to use, stir product. The product that has actually hardened should be discarded. If still too dry add one teaspoon of water and stir again to desired consistency. Application tools may be cleaned with water. Before painting, clean dust and filler particles using Selleys Sugar Soap or Selleys Super Kleen. In exterior applications, protect from rain until dry and painted over with 2 coats of paint. Some paints may temporarily discolour when applied over the filler, but will revert to the correct colour once dry. For applications more than 2mm deep, or in cold or humid conditions, expect longer drying times. Keep container closed when not in use.
$22.66
![Selleys No More Gaps Timber Floors x 380g [Jarrah]](http://gluesaustralia.com.au/cdn/shop/files/42b566f39b234ffeab320faed408b86e.jpg?v=1757753057&width=645)
Selleys No More Gaps Timber Floors is specifically designed to fill and sealing gaps around and between tongue and groove timber flooring and between other timber panels and fittings where extra flexibility is required. Features Superior flexibility and stretch capability to cope with movement Truly sandable to give a smooth clean finish. Contains real wood fibre allowing the filler to receive stains better than standard gap fillers Filler provides an airtight seal, keeping out draughts, dust and pests. Easy water clean up Where can this product be used? For filling and sealing gaps around and between tongue and groove timber floors. Around and between all types of timber panels and fittings eg. Bedroom and kitchen fittings, benchtops, skirting boards and architraves. What materials is this product suitable for? Timber floors Timber match: Jarrah - Jarrah, River Red Gum, Karri Hardwood - Black Butt, Spotted Gum, Brush Box , Tasmanian Oak, Cypress, Beech Walnut - Ironbark, Teak, Dark stained timbers and engineered floors Baltic - Pine, Myrtle, Alpine Ash Size 380g Cartridge Technology Water-Based Use Interior How to Use: The surface to be filled must be clean, dry and free from dust. Cut seal and nozzle to suit the width of the gap. Fit to the cartridge. Insert into a caulking gun such as Selleys Light Speed Caulking gun. Apply with a caulking gun, forcing product into the gap. Press in and smooth off with a spatula. Take care not to drag out applied filler from the gap. Use a spatula to scrape off as much residue as possible from the timber surface, to minimise sanding necessary. Clean up with a damp cloth immediately. Allow drying for at least 24 hours before sanding off any residue from the timber surface. Allow longer time in colder weather or if residue left on timber is excessive. Stain and varnish/paint as desired. Ensure stain/varnish is not allowed to pool in the joint – lightly wipe off while wet if necessary. Limitations: Not for exterior use. Not for gaps greater than 3mm wide in trafficable joints. Tips: Ensure sufficient product is applied into the gap if filling tongue and groove overlaps Coverage: 18 m / 3mm bead Re-apply filler if timber movement is excessive and movement capability is exceeded, or if a flush fill is desired.
$20.87
![Selleys No More Gaps Timber Floors x 380g [Hardwood]](http://gluesaustralia.com.au/cdn/shop/files/5160e944b5d3493cbac2a999232381fa.jpg?v=1757753063&width=645)
Selleys No More Gaps Timber Floors is specifically designed to fill and sealing gaps around and between tongue and groove timber flooring and between other timber panels and fittings where extra flexibility is required. Features Superior flexibility and stretch capability to cope with movement Truly sandable to give a smooth clean finish. Contains real wood fibre allowing the filler to receive stains better than standard gap fillers Filler provides an airtight seal, keeping out draughts, dust and pests. Easy water clean up Where can this product be used? For filling and sealing gaps around and between tongue and groove timber floors. Around and between all types of timber panels and fittings eg. Bedroom and kitchen fittings, benchtops, skirting boards and architraves. What materials is this product suitable for? Timber floors Timber match: Jarrah - Jarrah, River Red Gum, Karri Hardwood - Black Butt, Spotted Gum, Brush Box , Tasmanian Oak, Cypress, Beech Walnut - Ironbark, Teak, Dark stained timbers and engineered floors Baltic - Pine, Myrtle, Alpine Ash Size 380g Cartridge Technology Water-Based Use Interior How to Use: The surface to be filled must be clean, dry and free from dust. Cut seal and nozzle to suit the width of the gap. Fit to the cartridge. Insert into a caulking gun such as Selleys Light Speed Caulking gun. Apply with a caulking gun, forcing product into the gap. Press in and smooth off with a spatula. Take care not to drag out applied filler from the gap. Use a spatula to scrape off as much residue as possible from the timber surface, to minimise sanding necessary. Clean up with a damp cloth immediately. Allow drying for at least 24 hours before sanding off any residue from the timber surface. Allow longer time in colder weather or if residue left on timber is excessive. Stain and varnish/paint as desired. Ensure stain/varnish is not allowed to pool in the joint – lightly wipe off while wet if necessary. Limitations: Not for exterior use. Not for gaps greater than 3mm wide in trafficable joints. Tips: Ensure sufficient product is applied into the gap if filling tongue and groove overlaps Coverage: 18 m / 3mm bead Re-apply filler if timber movement is excessive and movement capability is exceeded, or if a flush fill is desired.
$20.87
![Selleys No More Gaps Bricks Mortar [Sandstone]](http://gluesaustralia.com.au/cdn/shop/files/9300697130297_4ba0669c-67f5-40d4-9f47-db82307f921f.png?v=1754711842&width=645)
Selleys No More Gaps Bricks and Mortar is a textured, ready to use weather-resistant gap filler available in a range of colours to match your existing mortar. It's mortar like texture allows easy repair of unsightly cracks and gaps in brickwork around the home. Features Ready mixed mortar filler, so is quick and easy to apply with a caulking gun. Has a mortar like texture for a textured finish and match to cement mortar and render. Is more flexible than mortar which will help prevent more damage to the mortar Is weather and UV resistant with a UV stable formula to prevent colour deterioration. Provides a more suitable finish on rendered walls than smooth fillers. Contains a fungicide and algaecide to protect against unsightly mould and algae growth. Has superior adhesion to a broad range of surfaces, making it easy to use. Will not stain building materials Can be painted over with both water and oil based paints, after the surface has skinned. (Approximately 2 hours after application). Is water based, so can be cleaned up with water easily. Is sandable when dry for a rough or smooth finish. Where can this product be used? Repairing cracks and gaps in brickwork and/or cement blocks where mortar has fallen out or eroded. Stationary cracks in pathways. Sealing gaps around windows or between brick wall and roof eaves. Repairing stationary cracks in cement render. Repairing penetration holes around pipe work, ducting, etc. Sealing gaps where mortar has fallen out in ridge capping on tile roofs. What materials is this product suitable for? Brick Concrete Render Fibre cement sheeting Laminated plastics Hardboards Aluminium Ceramics Timber How to Use Ensure the surface is clean, dry and free from dust, grease, flaking/powdery paint and old or crumbling caulk. Cut cartridge tip, fit nozzle and cut to desired opening (5mm) then insert into caulking gun. We recommend Selleys Light Speed Caulking Gun. Apply using caulking gun. Apply with caulking gun, forcing product into gap. Press into cracks and holes using a spatula or wet finger. Clean away excess from surfaces immediately using a damp cloth. For larger cracks & holes, 2 applications may be necessary. Allow first application to dry before applying second. Hardens in 24 hours depending on weather. Protect from rain until firmly skinned. Limitations: Not suitable for areas of continuous water immersion. Not suitable as a substitute for mortar in construction as it does not have the structural properties of mortar. Not suitable for moving cracks. Do not use or store below 5°C. Handy Tips For the best results slightly dampen the surface prior to application. For use in fine cracks, eg. in cement render rub Selleys No More Gaps Bricks and Mortar into cracks or use Selleys No More Cracks Exterior & Brick Render. If painting over the product, apply undercoat before applying a top coat for the best results. Keep a pack of Selleys Sugar Soap Wipes handy to wipe up any spills and for cleaning. They are an easy and effective way to keep clean on the job.
$24.79
![Selleys No More Gaps Bricks Mortar [Medium Grey]](http://gluesaustralia.com.au/cdn/shop/files/9300697130327_41339ef1-92ff-417a-bab1-8529f0ee07f6.png?v=1754711845&width=645)
Selleys No More Gaps Bricks and Mortar is a textured, ready to use weather-resistant gap filler available in a range of colours to match your existing mortar. It's mortar like texture allows easy repair of unsightly cracks and gaps in brickwork around the home. Features Ready mixed mortar filler, so is quick and easy to apply with a caulking gun. Has a mortar like texture for a textured finish and match to cement mortar and render. Is more flexible than mortar which will help prevent more damage to the mortar Is weather and UV resistant with a UV stable formula to prevent colour deterioration. Provides a more suitable finish on rendered walls than smooth fillers. Contains a fungicide and algaecide to protect against unsightly mould and algae growth. Has superior adhesion to a broad range of surfaces, making it easy to use. Will not stain building materials Can be painted over with both water and oil based paints, after the surface has skinned. (Approximately 2 hours after application). Is water based, so can be cleaned up with water easily. Is sandable when dry for a rough or smooth finish. Where can this product be used? Repairing cracks and gaps in brickwork and/or cement blocks where mortar has fallen out or eroded. Stationary cracks in pathways. Sealing gaps around windows or between brick wall and roof eaves. Repairing stationary cracks in cement render. Repairing penetration holes around pipe work, ducting, etc. Sealing gaps where mortar has fallen out in ridge capping on tile roofs. What materials is this product suitable for? Brick Concrete Render Fibre cement sheeting Laminated plastics Hardboards Aluminium Ceramics Timber How to Use Ensure the surface is clean, dry and free from dust, grease, flaking/powdery paint and old or crumbling caulk. Cut cartridge tip, fit nozzle and cut to desired opening (5mm) then insert into caulking gun. We recommend Selleys Light Speed Caulking Gun. Apply using caulking gun. Apply with caulking gun, forcing product into gap. Press into cracks and holes using a spatula or wet finger. Clean away excess from surfaces immediately using a damp cloth. For larger cracks & holes, 2 applications may be necessary. Allow first application to dry before applying second. Hardens in 24 hours depending on weather. Protect from rain until firmly skinned. Limitations: Not suitable for areas of continuous water immersion. Not suitable as a substitute for mortar in construction as it does not have the structural properties of mortar. Not suitable for moving cracks. Do not use or store below 5°C. Handy Tips For the best results slightly dampen the surface prior to application. For use in fine cracks, eg. in cement render rub Selleys No More Gaps Bricks and Mortar into cracks or use Selleys No More Cracks Exterior & Brick Render. If painting over the product, apply undercoat before applying a top coat for the best results. Keep a pack of Selleys Sugar Soap Wipes handy to wipe up any spills and for cleaning. They are an easy and effective way to keep clean on the job.
$28.39

A versatile hand kneadable, fast setting co-extruded epoxy repair system that can be used for repairing a multitude of things. It is especially suitable for application to damp, wet or underwater substrates. It comes in a handy roll form, with the white hardener encapsulated in the aqua green resin part. The product hardens in 20 – 30 minutes after mixing, to a white solid material. Features Will not sag, run or drip. Easy to use – no mess. Can be drilled, sawed, sanded, filed, tapped, machined or painted one hour after mixing. Good adhesive strength. Can be used to reshape, rebuild and repair a multitude of surfaces and applications. Good gap filling properties. Long-lasting, durable solution. Heat resistant to 120°C continuously or 140°C intermittently. Can be used under fresh or salt water. Longer set time (less than 20 min). Suitable for contact with drinking water. Complies with AS/NZS 4020, QAS Type Test Certificate No.: 8649. Higher tack for underwater repairs. Where can this product be used? Creating water features/ attaching pebbles under water in a pond Sealing holes in foundations and outer walls Repairing generators, water and fuel pumps Re-setting ceramic tiles in swimming pools etc For fast and permanent repairs to damp and wet substrates, and even for underwater repairs Patching dings, scratches, cuts, gouges and holes in fibreglass, metal and wooden boat decks and hulls Repair of pipes, fittings, electrical connections, water tanks, tubs, sinks, spas, hot tubs, tanks, pools, leaking gaskets Forming custom gaskets etc Ideal for emergency in-water repairs Repairing fishtanks, ponds, pools Approval for Drinking Water Contact to AS/’NZ4020:2005, however, limited to maximum surface area: volume ratio of 648 mm2/L; minimum cure time: 72 hours at 20°C; maximum temperature: 85°C; maximum wet film thickness: 5 – 6mm Not recommended for filling or sealing joints/cracks subject to movement as the cured product is extremely hard and inflexible. Does not adhere to polyethylene, polypropylene or Polytetrafluoroethylene (Teflon?) or silicone rubber Set time increases at temperatures below 20°C Not recommended for use where hydrostatic pressure is present prior to cure What materials is this product suitable for? Fibreglass Wood/Timber Ceramics Metal Concrete Glass Most plastics (pre-test required) Masonry How to use this product Clean surface free of grease, dirt and dust. For best results roughen bond area prior to cleaning. Cut off required amount. Replace disc on the remaining portion. Wear gloves to avoid messing hands. To mix, knead with fingers to a uniform colour. If mixing is difficult, warm to room temperature. Apply to surface to be repaired (within 12 minutes of mixing) and work the material forcefully into the surface applying pressure until adhesion begins to take effect. Mould to shape if required. If material sticks to fingers, use the plastic wrapper to press the material in place. For a smooth appearance, remove excess and hand rub with water or damp cloth before hardening begins. Trim away any excess before initial hardening. Remove any residues with acetone prior to initial hardening. Hardened excess may be sanded or trimmed away once fully cured. After 20-30 minutes Knead-It Aqua will harden and begin to form a strong bond. Allow for longer cure times at lower temperatures. After 60 minutes Knead-It Aqua may be drilled, sanded, machined, filed, sawed or painted. Wash hands thoroughly with soap and water after use. Handy tips Ensure the putty and hardener are mixed properly. Knead-It will become warm as it is mixed, A good indication its mixed properly is when you have a uniform colour and feel a mild heat radiating from the knead-it. To help determine when your knead it has set, keep a small piece off to check- when it is hard, it indicates your job is done. For best results, use Knead-It Multi-Purpose for applications in contact with drinking water. Use Knead-It Steel for applications on metal or fuel contact Store in a cool place for maximum shelf life For cleaning surfaces prior to application of adhesive, if the surface is porous, we would recommend using SELLEYS Liquid Sugar Soap. If the surface is non-porous eg glass or metal, firstly clean the surface with mineral turpentine and then again with methylated spirits. If there is old, difficult to remove residue such as old paint, we recommend using paint stripper such as SELLEYS Kwik Strip Smart. Ensure the surface is dry before applying the product. Keep a canister of SELLEYS Sugar Soap Wipes nearby for a quick and effective cleanup. Safety tips Where possible wear protective gloves when using Knead-It Aqua. Contact with skin may result in irritation. Epoxy resin is a known skin sensitiser. Repeated or prolonged skin contact may lead to allergic contact dermatitis. If redness or swelling of skin occurs, wash thoroughly with soap and water. Seek medical attention if in any doubt. Mixed and cured material is not hazardous. Cured material can only be removed by cutting and abrasion. If cured on skin, it will peel off in a few days without assistance. Soaking in warm water will assist removal. Storage and re-use Replace siliver disc to seal ends and keep in a cool dry place.
$32.40

$79.00

Prep Interior & Exterior is a dry, plaster based, cement reinforced filler for the repair of common non-flexible wall linings such as plaster, concrete, timber, and wallboard. This product is highly water-resistant and therefore suitable for interior or exterior use. Can be used to fill deep or shallow crevices in one application. Easy to mix and use White finish Non-shrinking Easily sanded Can be nailed or screwed when dry Water-resistant
$28.90

Prep Interior & Exterior is a dry, plaster based, cement reinforced filler for the repair of common non-flexible wall linings such as plaster, concrete, timber, and wallboard. This product is highly water-resistant and therefore suitable for interior or exterior use. Can be used to fill deep or shallow crevices in one application. Easy to mix and use White finish Non-shrinking Easily sanded Can be nailed or screwed when dry Water-resistant
$4.43

Polyfilla Rapid 30 340g: Your Go-To Quick-Set Filler for Interior and Exterior Surfaces Quick, Reliable, and Versatile Filler for All Surface Types If speed is of the essence, Polyfilla Rapid 30 340g is your ultimate choice for a high-quality plasterboard filler. Fill cracks, gaps, dents, and holes effortlessly in both interior and exterior surfaces. Key Features: Extremely easy to sand Sets to a hard finish Highly crack-resistant Fills up to 50mm deep holes Dries in as fast as 30 minutes* Suitable for multiple surfaces: plasterboard, brick, timber, and concrete How to Use: Clean and dry the surface, ensuring no loose or powdery material. Press the filler firmly into dents and holes, feathering edges to minimize sanding. Allow 30-60 minutes drying time for thin applications, longer for oil-based paints and deeper applications. For the smoothest finish, top with Poly Small Cracks and apply a paint undercoat before the final top coat. Limitations & Tips: Use Poly Gap filler where joint movement occurs. Do not fill more than 50mm deep. Clean up with water before the filler dries. For quick paint-over solutions, consider using Poly Quick Dry. *Drying time is based on a 2mm application. With Polyfilla Rapid 30 340g, you are not just buying a filler; you are investing in speed, quality, and versatility for your home improvement projects.
$36.88

Polyfilla Rapid 30 140g: Your Go-To Quick-Set Filler for Interior and Exterior Surfaces Quick, Reliable, and Versatile Filler for All Surface Types If speed is of the essence, Polyfilla Rapid 30 140g is your ultimate choice for a high-quality plasterboard filler. Fill cracks, gaps, dents, and holes effortlessly in both interior and exterior surfaces. Key Features: Extremely easy to sand Sets to a hard finish Highly crack-resistant Fills up to 50mm deep holes Dries in as fast as 30 minutes* Suitable for multiple surfaces: plasterboard, brick, timber, and concrete How to Use: Clean and dry the surface, ensuring no loose or powdery material. Press the filler firmly into dents and holes, feathering edges to minimize sanding. Allow 30-60 minutes drying time for thin applications, longer for oil-based paints and deeper applications. For the smoothest finish, top with Poly Small Cracks and apply a paint undercoat before the final top coat. Limitations & Tips: Use Poly Gap filler where joint movement occurs. Do not fill more than 50mm deep. Clean up with water before the filler dries. For quick paint-over solutions, consider using Poly Quick Dry. *Drying time is based on a 2mm application. With Polyfilla Rapid 30 140g, you are not just buying a filler; you are investing in speed, quality, and versatility for your home improvement projects.
$21.59

A durable, multi-purpose filler that has been designed for filling deep and wide cracks and holes on all surfaces inside and outside the home. Easy to sand, sets to a super hard finish and is highly crack resistant. Filling blade included For use on: Brick, masonary, concrete, plasterboard, wood & metal (INTERIOR & EXTERIOR) Fill depth: Up to 10mm Dries in: 3 hours Ready to use: YES Colour: White Application • Surface to be filled should be clean and dry with no loose or powdery material. • Exterior surfaces and metals (eg. nail heads) should be primed before application. • Using the attached filling blade press filler in firmly and remove excess. • Allow to dry (2-3 hours in thin 2-3mm applications depending on humidity). Allow longer drying times if painting with oil based paints (24 hours minimum) or for deeper applications. • For deeper jobs apply in 10mm layers, allowing each layer to set, before applying the next layer. • Protect from rain until painted over. .• For best results, apply paint undercoat before applying water or oil based paint top coat. • Use Polyfilla Gap filler or silicone sealant where joint movement occurs. • Clean up with water before filler dries FAQ's Q. Is there a filler I can use for both inside and outside? A. Polyfilla Large Cracks is a multipurpose filler designed for filling cracks and holes on all surfaces inside and outside the home.
$38.10

A ready-mixed filler that dries hard to a durable finish for deep and wide cracks in mortar, concrete, cement render and brick. Water, weather, UV, algae and mould resistant Can be tooled to a render texture or sanded to a smooth finish. For use on: Bricks, concrete, bare or painted cement render & other masonry surfaces (EXTERIOR & INTERIOR) Fill depth: Up to 10mm Dries in: 3 hours Ready to use: YES Available in: 500g and 2.2kg Colour: Cement grey in colour but can be painted over with both oil and water based paints • Ensure surfaces are clean and free from dust, grease, mould/algae and flaking/powdery paint or material. If necessary wash with Poly Sugar Soap. • Rinse thoroughly and allow surface to dry. • Use flexible filling blade to press filler into hole, or trowel to spread a thin layer over surface, and tool to a feathered edge. • Allow to dry (2–3 hours in thin 2–3mm applications, depending on temperature and humidity) before sanding and painting. Allow longer drying times (24 hours minimum) if painting with oil based paints, for deeper applications or in colder weather. • For deeper jobs apply in 10mm layers, allowing each layer to dry before applying the rest. • Protect from rain until dry. If required, paint with a quality exterior coating. • For a render texture smooth out with trowel or filling blade when applying the product and do not sand. For a smoother texture sand surface after drying. • For best results, apply undercoat before applying water or oil based top coat. • Where joint movement occurs, use a flexible Poly sealant. • Clean up with water before filler dries.
$22.91

A cellulose reinforced plaster-based filler for filling interior cracks and holes that won't shrink. For use on: Plasterboard, brick, masonry & wood. Can be used also for modelling & sculpting (INTERIOR) Fill depth: Dependent on mix ratio Dries in: 2-3 hours Ready to use: NO (mix with water) Available in: 500g, 1kg, 2kg & 6kg Colour: Off-white • Surface to be filled should be clean and dry with no loose or powdery material. Roughen glossy surfaces to provide a key. • Ensure tools and mixing vessels are clean, as dried residue filler will accelerate drying rate. • Add 2.5 parts Polyfilla Interior Powder Filler to 1 part tap water and mix thoroughly into a paste with a clean knife. Once mixed, filler should be used within 1 hour. For deep cracks and holes it is advisable to use a slightly stiffer (less water) mix. • Use a clothes peg to reseal the pack. • Using a filling knife or applicator, press the mixed filler into the crack and smooth off. Slightly overfill and allow to dry before sanding. Use medium grade sandpaper and dust off. Wipe the dusted surface with a damp sponge. • Leave for 2-3 hours before sanding and decorating. • For best results prime repaired surface with paint undercoat paint or sealer prior to repainting the whole area. • Clean up with water before filler dries
$46.15


PC-Metal™ Putty Epoxy replaces metal. Mix with fingers and apply. Quickly PC-Metal™ cures to reattach metal (30 min). Cures hard, fast, nonconductive. Contains metal – sticks to metals such as cast iron, zinc, aluminium, stainless steel, steel and copper. Here are just a few specific uses (there are hundreds of other uses): Replace broken knob on a drill press Insulate wire connections, secure wire nuts Rebuild and repair zinc or aluminium gear housing Fill abandoned drill holes in aluminium or steel Seal stainless steel electrical panel Stop leaking drum How to prepare a surface for bonding with PC-Metal™ Remove contaminants such as dust, dirt, oil and grime with a solvent such as denatured alcohol (ethanol), acetone, rubbing alcohol (isopropyl alcohol) or lacquer thinner. Mild detergent solution in water is also good removing contaminants. Use a clean paper towel or rag for wiping. Remove rust and loose paint with sandpaper or wire brush. Epoxy typically sticks to most paints. If there is a concern of the paint’s adhesion then remove it with sandpaper, wire brush or paint stripper. Smooth, glossy and shiny surfaces should be roughened using sandpaper to increase adhesion. Adhesion to wet or damp surfaces can be improved by wiping with alcohol. Do not use mineral spirits or paint thinner for removing contaminants. How to clean-up after PC-Metal™ application We recommend wearing disposable gloves when mixing and applying epoxy putty. Remove from skin with soap and warm water. Clean up mixed epoxy before it cures with paper towels and solvent. Denatured alcohol (ethanol), acetone, rubbing alcohol (isopropyl alcohol) or lacquer thinner are suitable solvents for removing uncured epoxy. Cured epoxy can be physically removed by prying off with a screwdriver or pliers. It can also be removed with paint stripper or remover. Can PC-Metal™ plug a hole in a 55 gallon drum? PC-Metal™ is an excellent product for quickly plugging a hole made in a drum. PC-Metal™ has a strong odor. Does the smell go away? PC-Metal’s™ odour stops after it cures. PC-Metal™ is dark gray, dense and hard when cured. Is it as strong as metal? PC-Metal™ is a product that is designed to look like and cure hard like metal. It is excellent for bonding and filling metal objects but is not as strong as steel, aluminium and other metals. How fast does it cure? How much should be mixed? PC-Metal™ is very fast curing. It is important to mix small portions for 45 to 60 seconds and immediately apply to the surface. Within 3 to 5 minutes PC-Metal™ cures very hard. In less than 60 minutes PC-Metal™ reaches its full hardness. What kind of metal is in PC-Metal™? Does PC-Metal™ rust? It is an alloy of iron and aluminium. It will not rust. Can PC-Metal™ be machined? Can it be tapped or cut? Cured PC-Metal™ can be drilled and cut. Tapping threads in PC-Metal™ is not advised. It is better to set the bolt or threads in the mixed PC-Metal™. Coat the threaded screw or bolt with release agent if it needs to be removed. Can PC-Metal™ be used to seal a cracked engine block? PC-Metal™ has many automotive uses even repairs to engines.
$16.17

PC-Lumber™ Epoxy Putty is pre-measured and mixed by hand. It is used as a filler where a small amount will solve the problem. Within 60 minutes it is cured and ready. The putty can be easily formed and shaped. Here are just a few specific uses (there are hundreds of other uses): Reset or secure loose hardware in wood (hinges, handles, latches, etc.) Fill abandoned screw and nail holes in cabinets or paneling Fill dings and dents in molding or doors Fill woodpecker and carpenter bee damage to exterior siding and paneling Rebuild display corner in retail store
$14.46

Imagine a liquid epoxy that is clear – A liquid epoxy with strength rivalling that of heavy duty paste epoxies – A liquid epoxy that has flexibility and is shatter resistant – A work time of 4 minutes and 1 hour cure time. Imagine NO LONGER! PC-Clear ™ Epoxy is a medium viscosity liquid epoxy system with greater clarity than other epoxies. This product is excellent for repairs and projects that must be less visible such as art objects or collectibles. PC-Clear™ epoxy is fast curing but allows ample time to apply and position the repair. After curing the epoxy does not become brittle, instead cured PC- Clear™ forms a tough resilient bond. PC-Clear™ can be used on more than just cosmetically critical repairs and in addition, it can be used for automotive, construction and facility repairs. Use PC-Clear™ when you are concerned about the appearance of your repair and a liquid epoxy is what you are looking for. Work time is about 4 minutes and cures in 1 hour. Here are just a few specific uses (there are hundreds of other uses): Fasten galvanized steel to a concrete floor. Bond sheet metal to wood or masonry. Seal and insulate electrical connections and electronic boards. Protect electronic components from vibration and moisture. Repair porcelain or sculptures. Reattach multiple broken pieces in a vase. How to prepare a surface for bonding with PC-Clear™ Epoxy Remove contaminants such as dust, dirt, oil and grime with a solvent such as Denatured Alcohol (ethanol), Acetone, Rubbing Alcohol (isopropyl alcohol) or Lacquer Thinner. A mild detergent solution in water is also good for removing contaminants. Use a clean paper towel or rag for wiping. Do not use Mineral Spirits or Paint Thinner for removing contaminants. Remove rust and loose paint with sandpaper or wire brush. Epoxy typically sticks to most paints. If there is a concern of the paint’s adhesion then remove it with sandpaper, wire brush or paint stripper. Smooth, glossy and shiny surfaces should be roughened using sandpaper to increase adhesion. How to clean-up after PC-Clear™ Epoxy application Clean up mixed epoxy before it cures with paper towels and solvent. Denatured Alcohol (ethanol), Acetone, Rubbing Alcohol (isopropyl alcohol) or Lacquer Thinner are suitable solvents for removing uncured epoxy. Cured epoxy can be removed with paint stripper or remover. FAQ Is PC-Clear™ Epoxy different from other clear epoxies? Some epoxies claim to be clear but they have a strong yellow tint that develops after it cures. PC-Clear™ Epoxy has a very slight hint of yellow that does not increase after curing. How does PC-Clear™ Epoxy’s strength compare to other epoxies? PC-Clear Epoxy™ is a strong adhesive with Lap Shear Adhesion strength on steel of 2500 psi. Is PC-Clear™ Epoxy brittle? PC-Clear™ Epoxy is slightly flexible and more resilient than other liquid epoxies. How does outdoor exposure affect cured PC-Clear™? Ultraviolet light will cause cured PC-Clear’s™ appearance to change and may cause yellowing. What is the best way to mix PC-Clear™? How you mix PC-Clear™ Epoxy will affect the length of working time. Flat surface mixing spreads the epoxy over an area minimizing the exotherm’s effect on the curing reaction and maximizing the length of work life. Mixing in a container concentrates the exotherm contributing to an increased rate of reaction and decreasing the work life. Why does PC-Clear™ Epoxy have a strong odor? The epoxy resin is nearly odorless. The hardener is the smelly part. It has an odor described as smelling like sewer gas or hair treatments. This odor comes from the polymercaptan but goes away upon curing. Does PC-Clear™ Epoxy self-level? PC-Clear Epoxy™ is a liquid and is self-levelling. How many feet of does the PC-Superepoxy® 50 ml cartridge nozzle dispense? PC-Superepoxy® can dispense approximately 20 feet of 1/8 inch bead. Can PC-Clear™ Epoxy be colored or tinted? PC-Clear™ Epoxy can be tinted.
$14.34

Parfix PVA is a PVA based adhesive suitable for general interior woodworking joinery and other craft uses. It is non-toxic, will not stain timber and dries clear. High strength Clear drying Water clean up
$14.76

Sandable Paintable Ready mixed Weather resistant Parfix multipurpose filler is a versatile, ready mixed filler ideal for filling cracks, holes and gaps inside and outside the home. Sandable and paintable, it enables a smooth finish.
$14.41


The product that started it all. Original Gorilla Glue built a name for itself with its incredible, industrial holding power and versatility. Water activated, it expands into materials to form an incredibly strong bond to virtually anything. Gorilla Glue is your solution for almost any project or repair. It’s 100% waterproof, safe for indoor and outdoor use and strong enough to stand up to the elements. Plus, its expansion allows it to penetrate the glued surface for a superior bond. Sand it, paint it, stain it. Simply stated, it’s the Toughest Glue on Planet Earth. Directions: Prepare and Dampen the Surfaces If you’re using Original Gorilla Glue for the first time, or bonding a new type of material, we always recommend trying a test piece first. Prepare your surfaces: All surfaces must be clean, dust free and tight fitting. For shiny surfaces, such as metals, glass and some plastics, roughen up the material to give the glue something to bite into. Damp It: Lightly dampen one surface with water. We recommend using a damp cloth or spraying with water. Do not saturate the surface. For dense hardwoods, lightly dampen both surfaces prior to gluing. Evenly Apply Gorilla Glue Onto the Dry Surface Glue It: Carefully apply onto the dry surface. Do not over apply. We recommend wearing gloves or spreading the glue with a disposable brush. In some instances, Gorilla Glue can be a skin sensitizer. If you are predisposed to skin reactions, please take the extra precaution. If you do get the glue on your skin, try removing it with a dry cloth or paper towel first (particularly if the glue is still tacky). If that doesn’t work, try washing with soap and cold water, or using an exfoliator with a gritty texture. Dry your skin and apply lotion. We do not recommend using any kind of alcohol or acetone. This actually strips the skin of its natural oils, which means the glue is more likely to stick. Clamp the Two Surfaces Together Tightly Clamp It: Make sure the clamping pressure is distributed evenly across the surface. Or, if you don’t have a clamp, use heavy objects or Gorilla Tape® to achieve the appropriate clamping pressure. For lighter objects, try using rubber bands to hold the pieces together tightly. Clamp objects for 1–2 hours. For best results, allow 24 hours to cure. Clean up If you need to remove any uncured “squeeze out” or wet glue, we recommend wiping with a dry cloth or using a standard paint thinner. Make sure to read and follow directions if using a paint thinner. Always wear gloves. Once the glue is dry, it is best removed mechanically: Try sanding, chiselling, scraping or picking. The dried glue will not damage tools.
$10.86


Gorilla Wood Glue is the adhesive that woodworkers, carpenters and hobbyists trust for their woodworking projects. Gorilla Wood Glue, a PVA glue, offers the benefits of an easy-to-use, water-based adhesive, with the holding power Gorilla is known for. The glue is incredibly water-resistant and dries a natural colour that offers an invisible bond line for your projects. Clamp Time: 20-30 Minutes // Open Time: 5-10 Minutes Dry Time: 80% in 1-2 Hours // Dry Color: Natural Wood Color Full Cure: 24 Hours Application For best results, it is essential that the wood surfaces are prepared prior to application of glue. For laminating, the surfaces should be planed smooth, leaving the board surface free from machine marks, tear-out and snipes. Also, be careful to avoid burnishing and end snipes. Just how much Gorilla Wood Glue to apply depends on many factors. In general, apply a generous amount of glue on one of the surfaces. On hard-to-glue woods, apply the glue on both surfaces. Rub together with the other surface to distribute the glue evenly on both surfaces. Enough glue should be applied so that a fine bead of glue squeeze-out will occur when clamping. Coverage: 1 gallon of Gorilla Wood Glue will cover about 200 square feet. 1 fluid ounce will cover approximately 1.6 square feet. Clamping The technique and type of clamp to be used are determined by many factors: the specific type of joint, type of stock or lumber, the moisture content of stock, room temperature, assembly time and surface quality. In general, apply enough pressure that will cause a fine bead of glue to squeeze out when the proper pressure is applied. Clamping Time (amount of time pressure needs to remain applied): 20–30 minutes for room temperature applications. The temperature must be above 55°F. Note that clamping time can be dependent on temperature, humidity, and the porosity of the wood. Cure Time (amount of time for glue to reach total bonding strength): 24 hours Clean Up Clean up while the glue is wet: Use a clean, damp cloth to wipe off excess glue. Make as many passes as needed with the clean area of the cloth to remove all the glue. When areas have completely dried, and as needed. Wash hands, skin and damp cloths with soap and warm water, then rinse. Clean up when the glue has dried: Use a sharp putty knife, razor, or sharp scraper to shave hardened glue from the surface, then sand as needed. Soak hands and skin in soap and warm water, wash, then rinse. Cleaning the bottle tip: Use a clean, damp cloth to wipe off excess glue after closing. If tip becomes clogged with dry glue, remove the cap and push the clog backwards with a toothpick, then rinse cap with warm water. To remove Gorilla Wood Glue from hands, wash with warm soap and water.
$18.73


Its high strength and quick set time make Gorilla Super Glue the go-to for a variety of household projects. Developed for long-lasting repairs in an instant, Gorilla Super Glue dries in 10–30 seconds and is reinforced with rubber for increased impact resistance. We call it Impact-Tough® because it stands up to wear and tear unlike any other instant glue. In addition to its high-performance formula, we’ve added an anti-clog cap with a metal pin inside to ensure an airtight seal for maximum reusability. It’s Gorilla tough, every time. Clamp Time: 10-30 Seconds // Open Time: Not Repositionable Dry Time: Light Handling after 1-5 Minutes // Dry Color: Translucent Full Cure: 24 Hours DIRECTIONS Protect Work Area From Spills Clean and Dry Surfaces to Be Bonded Apply Gorilla Super Glue Apply a small amount of Gorilla® Super Glue to one surface. Excess glue can cause delayed or failed bond. One drop covers one square inch. Secure Press two surfaces together for 10-30 seconds to achieve bond. Note that gaps and uneven surfaces may cause delayed bonding.
$10.60

The product that started it all. Original Gorilla Glue built a name for itself with its incredible, industrial holding power and versatility. Water activated, it expands into materials to form an incredibly strong bond to virtually anything. Gorilla Glue is your solution for almost any project or repair. It’s 100% waterproof, safe for indoor and outdoor use and strong enough to stand up to the elements. Plus, its expansion allows it to penetrate the glued surface for a superior bond. Sand it, paint it, stain it. Simply stated, it’s the Toughest Glue on Planet Earth. Directions Prepare and Dampen the Surfaces If you’re using Original Gorilla Glue for the first time, or bonding a new type of material, we always recommend trying a test piece first. Prepare your surfaces: All surfaces must be clean, dust free and tight fitting. For shiny surfaces, such as metals, glass and some plastics, roughen up the material to give the glue something to bite into. Damp It: Lightly dampen one surface with water. We recommend using a damp cloth or spraying with water. Do not saturate the surface. For dense hardwoods, lightly dampen both surfaces prior to gluing. Evenly Apply Gorilla Glue Onto the Dry Surface Glue It: Carefully apply onto the dry surface. Do not over apply. We recommend wearing gloves or spreading the glue with a disposable brush. In some instances, Gorilla Glue can be a skin sensitizer. If you are predisposed to skin reactions, please take the extra precaution. If you do get the glue on your skin, try removing it with a dry cloth or paper towel first (particularly if the glue is still tacky). If that doesn’t work, try washing with soap and cold water, or using an exfoliator with a gritty texture. Dry your skin and apply lotion. We do not recommend using any kind of alcohol or acetone. This actually strips the skin of its natural oils, which means the glue is more likely to stick. Clamp the Two Surfaces Together Tightly Clamp It: Make sure the clamping pressure is distributed evenly across the surface. Or, if you don’t have a clamp, use heavy objects or Gorilla Tape® to achieve the appropriate clamping pressure. For lighter objects, try using rubber bands to hold the pieces together tightly. Clamp objects for 1–2 hours. For best results, allow 24 hours to cure. Clean up If you need to remove any uncured “squeeze out” or wet glue, we recommend wiping with a dry cloth or using a standard paint thinner. Make sure to read and follow directions if using a paint thinner. Always wear gloves. Once the glue is dry, it is best removed mechanically: Try sanding, chiseling, scraping or picking. The dried glue will not damage tools. Storage Tips After each use, wipe the bottle’s lid and nozzle clean with a dry cloth. For 2 oz. bottles, tightly replace the lid after wiping clean and store in a cool, dry place. For bottle sizes 4 oz. and larger, we suggest squeezing excess air out of the bottle. While still squeezing, tightly replace the cap and then store in a cool, dry place. This helps eliminate moisture in the bottle. You should expect a year shelf life. What is the temperature range for applying the glue? For best results, apply the glue at room temperature. Original Gorilla Glue should be left out of reach of children and animals. Can you speed up the curing process? Original Gorilla Glue should be clamped for 1–2 hours. During this time, it reaches 80% cure. Allow 24 hours for 100% cure. Note that cure time can vary depending on temperature, humidity and the porosity of the bonding materials. Is Gorilla Glue truly 100% waterproof? Yes. Gorilla Glue is 100% waterproof. It passes ANSI/HPVA Types I and II. How do I extend the shelf life of Gorilla Glue? Gorilla Glue is moisture activated. Once the adhesive comes in contact with moisture, it can start to harden. To extend the shelf life, always wipe lid and nozzle clean with a dry cloth and tightly replace the lid. My bottle of glue has formed a dry layer on top; can I still use it? Any glue that is still in liquid form is perfectly usable and reliable. If the dry layer is very thin, use a pointed tool to poke through it and carefully pull the dry layer through the cap. Do not microwave or heat your bottle of Gorilla Glue to soften the top layer. How do I clean up Gorilla Glue? Wipe off excess glue immediately with a dry cloth or standard paint thinner. Do not drag glue over material; instead, make small swipes to remove wet adhesive. Make sure you avoid skin contact. Cured glue can be removed with a chisel, scraper or sandpaper What is the proper clamp time? When using Original Gorilla Glue, clamp objects for 1–2 hours. For best results, leave overnight. What if I don’t have clamps? Gorilla Glue expands as it cures. To ensure the strongest bond, clamping pressure is needed. There are many different ways to clamp the surfaces, but keep in mind the stronger the pressure, the better the bond will be. Professional clamps are ideal, but if those aren’t handy, you can use heavy weight from bricks, books or even Gorilla Tape. The key is to ensure a tight-fitting glue line by applying even distribution of pressure. How much Gorilla Glue should I apply? Apply a thin layer of glue. A little bit goes a long way. As a general guide, use a ½ ounce per square foot. Be careful of uncured “squeeze-out” or wet glue, particularly on finished furniture. If you need to remove any squeeze-out, we recommend wiping with a dry cloth or using a standard paint thinner. Make sure you use the solvent with care in a well-ventilated area. Always wear gloves. Once the glue is dry, it is best removed mechanically: Try sanding, chiseling, scraping or picking. The dried glue will not damage tools. Visit our Gorilla Glue Directions page for more information. Why do I need to add moisture before gluing with Gorilla Glue? Gorilla Glue is moisture activated—this is what causes the chemical reaction in polyurethane adhesives. Therefore, you need to apply a small amount of moisture to one surface. Then apply glue to the dry surface and clamp. For dense hardwoods, lightly dampen both surfaces prior to gluing. Do I need to prepare the surface first? Make sure surfaces are clean and tight fitting. For smooth, shiny surfaces, such as metal and plastic, adhesion can be increased by sanding or abrading the surface. This gives Gorilla Glue more surface area to grip. Is Gorilla Glue really for the Toughest Jobs on Planet Earth? Gorilla Glue is an all-purpose adhesive. If used correctly, it will bond just about anything and for just about forever. It is free of solvents and fillers, which makes it strong and versatile. There are some surfaces and materials that are difficult to glue, such as certain plastics. Aside from a few of these materials, we are certain Gorilla Glue offers an extraordinary, waterproof bond on just about anything.
$17.12

Overview Tired of unreliable glues that fall apart? Meet our game-changing Epoxy Adhesive, a powerhouse in bonding technology. In just a single 25mL package, this epoxy adhesive promises unparalleled durability and convenience. It dispenses effortlessly, ensuring a precise ratio for maximum strength. With a fast-acting formula that's perfect for bonding a variety of materials, your DIY or repair projects just became hassle-free! Features Automatic Self-Mixing Nozzle No more guesswork! Our self-mixing nozzle automatically dispenses epoxy and hardener in the exact ratio for optimal performance. Fast Setting & Long-Lasting Sets in just 5 minutes. Can be safely handled within 30 minutes. Attains full strength after 16 hours. Versatile Usage Ideal for bonding ceramics, glass, leather, wood, plastic, and metal. Your go-to solution for a myriad of projects. Superior Formulation 50% Epoxy Resin 50% Modified Amine Produces a high-strength bond resistant to temperature fluctuations between -40°C and 80°C. How to Use Preparation Safety First: Always wear protective gloves and safety glasses. Surface Preparation: Ensure the surface is clean, dry, and free from dust, oil, and grease. Application Air Removal: Hold the dispenser, nozzle end up, for 30 seconds to release entrapped air. Cut the tip carefully. Dispensing: Press the plunger slowly to dispense equal parts of resin and hardener. Mixing: Mix thoroughly before applying. Bonding: Apply adhesive to the surface and hold until set. Use tape or clamps if necessary. Post-Application Cleanup: Use acetone for cleaning. Storage: Store in a cool, dry place with the nozzle end up.
$9.95

A very fast setting two part epoxy adhesive. Initial bonding achieved in 90 seconds with maximum bond strength after 16 hours. Features Araldite is stronger than other glues due to the chemical reaction of the two parts Bonds a variety of surfaces Dries Clear Very quick setting in 90 seconds No clamping necessary Moderate water resistance Forms a rigid, durable bond Can be used for gap filling Good chemical resistance Where can this product be used? General small household repairs Fixing gemstones to mounts Repairing metal toys Not suitable for bonding plastics such as Polypropylene and Polyethylene Bond strength weakens above 65°C but strength is regained when temperature drops What materials is this product suitable for? Glass Metal Wood Fabric Most Plastics How to use this product General Use Before applying the Araldite mixture, all surfaces MUST be thoroughly clean and dry. All traces of grease, rust paint, etc. should be removed. For best results smooth surfaces should be roughened by mechanical abrasion after solvent cleaning. Onto a clean, disposable surface (e.g. polyethylene or cardboard), dispense equal volumes of Part A and Part B. Thoroughly mix together with a spatula, nail or stick. When using the tubes it is essential to use the correct mixing ratio, i.e. 1 part each Apply adhesive immediately to both surfaces and press together. Scrape off excess adhesive and wipe mixing utensils immediately. Ensure correct caps are replaced on each tube or they will adhere. Handy tips Note: For information on how to identify plastics refer to the Selleys plastics guide. For maximum working time, mix in small quantities. Large quantities accelerate the curing process and reduce working time. To extend product life replace caps immediately after use. Ensure you wipe excess from nozzle with a tissue dipped in acetone (or nail polish remover) before replacing cap. When using the tube variant, ensure you replace the correct cap on the correct tube. Placing the wrong cap on the wrong tube will cause the tube to harden. (lids and tubes are colour coded to help) Wipe off any uncured Araldite with acetone or nail polish remover. To remove product after cure, mechanical action (scraping or sanding) is recommended. Since the product is chemically resistant solvent will NOT dissolve this product. To reposition the bond once cured, check that the item is heat resistant. If safe, heat the item slowly, e.g. in an oven, to at least 150oC. The product will soften and liquify slightly. Scrape off any excess then reposition the joint carefully using appropriate safety equipment. Allow the item to cool down in the correct position. The product will reharden once returned to room temperature. Clamping recommended for a stronger bond. Singles are great for those unexpected household breakages, so keep a couple at home just in case. Keep a box of Selleys Sugar Soap Wipes around for quick & effective clean up For cleaning surfaces prior to application of adhesive, if the surface is porous, we would recommend using Selleys Liquid Sugar Soap. If the surface is non-porous eg glass or metal, firstly clean the surface with Methylated Spirits. If there is old difficult to remove residue such as cold paint, we recommend using paint stripper such as Selleys Kwik Strip Smart. Ensure the surface is dry before applying the product.
$19.26

A fast setting strong and durable two-part epoxy, general purpose adhesive. Mixed product gels in 5 minutes. Initial bonding is achieved in 20 minutes with maximum bond strength after 16 hours. Features: Araldite is stronger than other glues due to the chemical reaction of the two parts Bonds a variety of surfaces Dries Clear Quick setting in 5 minutes No clamping necessary Moderate water resistance Forms a rigid, durable bond Can be used for gap filling (surfaces need not mate closely) Good chemical resistance Appearance: Clear with a slight yellow tinge Where can this product be used? Bakelite – joining or repairing Bonding shells, stones or pebbles to decorate bottles, lamps, bricks or garden pots Repairing splits or cracks in a tennis racket Repairing metal toys Not suitable for bonding plastics such as Polypropylene and Polyethylene Bond strength weakens above 65°C but strength is regained when temperature drops What materials is this product suitable for? Glass Metal Wood Fabric Rigid Plastic Crystal Leather How to use this product: General Use -Before applying the Araldite mixture, all surfaces MUST be thoroughly clean and dry. -All traces of grease, rust paint, etc. should be removed. -For best results, smooth surfaces should be roughened by mechanical abrasion after solvent cleaning. -Onto a clean, disposable surface (e.g. polyethylene or cardboard), dispense equal volumes of Part A and Part B. Thoroughly mix together with a spatula, nail or stick. Safety tips: Avoid contact with the skin and eyes. Avoid breathing vapour. Do not use solvents near eyes or open wounds. In case of contact with eyes, flush with water for at least 15 minutes and seek medical attention. Non toxic when set. For further information refer to the Material Safety Data Sheet (MSDS). Storage and re-use Ensure caps are replaced and product stored in a cool dry place.
$8.00

Industrial grade PVA, especially developed for use by professional woodworkers and craftsmen, for large projects. Off-white in colour, drying to a light coloured clear film. Features Excellent performance properties for repairs or building projects No mixing required Suitable for exterior use in non-structural applications Heat resistant to 110°C (bonds will not weaken in exposure to direct summer sun) Can be chiselled, routed or turned Suitable for end grain gluing – won’t stain timber, cream in colour, but dries clear with a slight yellow tint Non-toxic Sandable – will not clog sandpaper like other PVA emulsion glues More water resistant than Aquadhere interior Has a higher heat resistance than Aquadhere interior Paintable Provides a stronger bond than Aquadhere interior for larger jobs Bonds MDF Weather resistant Cleans up with water Where can this product be used? Cabinet and furniture making Timber letterbox Making a bookshelf Restoring furniture Gluing cupboard shelves for additional support Repairing a door frame or window Repairing or building wooden outdoor furniture Indoor furniture Storage chest for tools Pot plant stand Dog kennel Bed heads Timber joinery Wooden toys Unsuitable for use on coated wallpaper overlaps eg vinyl Will not take common timber stains Not recommended for joints that are subjected to constant high stress. Instead, use Selleys 308 High Stress wood glue Not suitable for below waterline applications or continuous submersion. We recommend Selleys Knead It Aqua for these situations. What materials is this product suitable for? Softwoods Plywood Joinery Hardwoods MDF Laminating Particleboard Dowelling Veneering Chipboard How to use this product Surfaces to be bonded must be close fitting, free from dust, dry and clean from grease. Shake bottle before use Apply adhesive liberally to one surface only, position surfaces and press together while still wet. Immediately clamp for 30 minutes for softwoods and 1 hour for hardwoods. Alternatively, low clamping pressures (50lbs/in2) can be used with softwoods; higher pressures are recommended for hardwoods (100 – 150lbs/in2). Do not stress joint for 12 hours. Wipe off excess adhesive while still wet with a damp cloth. If the wood is to be stained, any residual Aquadhere left on the timber surface may prevent the stain from taking to the wood. Maximum strength is achieved after 12 hours, but longer in cold, damp conditions, or when used on dense timbers. Clean all tools with water before adhesive is allowed to dry. If dry, soak in water until adhesive is soft. Cure slows significantly in humid, cold conditions. Handy tips 1L covers approx. 5m2 To fill small gaps, Aquadhere can be mixed with sawdust. Longer clamping times may be required for joints under high stress, or alternatively use 308 High Stress Wood Glue. Avoid contaminating Aquadhere Exterior with iron and steel, eg nails, etc. Aquadhere contaminated with rust (iron oxide) will stain brown/black in the presence of tannins in many woods. Painting or varnishing constructions made of porous softwoods will improve the resistance of bonds to water exposure. On very porous surfaces applying a thin layer to each side and allowing to soaking in before applying a second layer to one side only may result in a stronger bond. If you are gluing over a larger surface, try using a small roller to aid in application. For cleaning surfaces prior to application of adhesive, if the surface is porous, we would recommend using Selleys Liquid Sugar Soap. If the surface is non-porous eg glass or metal, firstly clean the surface with mineral turpentine and then again with methylated spirits. If there is old, difficult to remove residue such as old paint, we recommend using paint stripper such as Selleys Kwik Strip Smart. Ensure the surface is dry before applying the product. Keep a canister of Selleys Hand Kleen Wipes nearby for a quick and effective cleanup.
$18.30

Durabond is moisture curing, high strength, polyurethane construction adhesive. It has high strength and water resistance making it excellent for jobs requiring extra durability, both interior and exterior.Durabond is sandable, paintable and stainable. It is suitable for bonding wood to almost anything. A superior adhesive, it is also excellent for bonding Features Super Durable High Strength 100% waterproof* – *(not for permanent water immersion) Bonds wood to almost anything Acid & chemical Resistant – PVA’s break down with acid/alkaline contact Versatile can be used to bond surfaces other than wood Heat resistant up to 140 deg Generous working time (10 minutes) Expands as it dries Sandable – easy, will not clog sandpaper like other PVA emulsion glues Paintable Stainable after sanding The product is a brown liquid and turns a light yellow when fully cured Can be used for gap filling Can Also be used to bond surfaces other than wood I.e metal to metal Bonds MDF Non-Toxic (once fully cured) Where can this product be used? Interior and exterior Sauna or cabinet repairs in high heat areas Bonding Timber to other surfaces (metal etc) Cubby House with metal roof & floor lining Planter boxes Steps leading off a verandah Timber letterbox to a metal support frame Window frame Decorative timber to a pergola Interior panels of a boat Repairing wooden boat oars Repairing wooden handles on tools Timber joinery Laminating chopping boards Requires atmospheric moisture to cure, therefore use may be restricted in dry conditions (refer to tips for advice) Cannot be used if application temperature is below 5°C For best results, one surface should be porous Not suitable for below waterline applications or continuous submersion, for this we recommend Knead-It Aqua Not recommended for structural applications Not recommended for vertical projects due to runny consistency While Aquadhere Durabond can adhere to damp surfaces excess moisture can result in increased foaming and a weakened joint. Ensure tight clamping or weighting to reduce foaming Surfaces should be clamped tightly or weighted What materials is this product suitable for? MDF Glass Metal Concrete Ceramic Most plastics (will not adhere to polyethylene or polypropylene, test other plastics first). All timbers How to use this product Surfaces to be bonded must be close fitting, clean, dust and grease free. Wipe very dry porous surfaces with a damp cloth 1 minute before bonding. Apply a thin layer of adhesive evenly to one surface only. Glue expands and foams as it cures. Assemble parts together within 10 minutes and clamp firmly or weight to hold until cured. Wipe nozzle clean and seal container tightly. (to prevent remaining product from hardening in the container). Wipe away any excess adhesive immediately with acetone. After drying, any excess adhesive can only be removed by scraping, sanding, filing or cutting. Clean tools with acetone or white turpetine immediatly after use (before adhesive dries). Handy tips 1L covers approx. 8m2 It is advisable to wear gloves (adhesive bonds to skin and is extremely difficult to remove from skin). For bonding with smooth surface materials such as glass, plastics or metals, we suggested sanding or roughening the surface. The tighter you clamp, the better bond you will obtain (as Durabond expands). Wipe nozzle clean and seal container tightly. (to prevent remaining product from hardening in the container.) Wipe oily timber surfaces with acetone on a clean rag to remove any surface oils & allow to dry before applying adhesive. In extremely dry conditions or for extremely dry surfaces (eg terracotta) wipe surfaces with a damp rag prior to bonding to ensure sufficent moisture is present to cure product. Surfaces should not be wet. It is recommended to use the entire contents of a pack within 6 months of opening. Product may form a hard skin on the surface during this period. Usable material is normally still present beneath this skin and can be accessed by breaking the hardened layer. For cleaning surfaces prior to application of adhesive, if the surface is porous, we would recommend using SELLEYS Liquid Sugar Soap. If the surface is non-porous eg glass or metal, firstly clean the surface with mineral turpentine and then again with methylated spirits. If there is old, difficult to remove residue such as old paint, we recommend using paint stripper such as SELLEYS Kwik Strip Smart. Ensure the surface is dry before applying the product. If glue comes in contact with hands, use acetone or white spirits to remove immediately and then rinse off with soapy water followed by hand creme. Alternatively wipe hands regularly while using Aquadhere Durabond. Once cured, adhesive is extremely difficult to remove from skin. If cured material is discovered on the skin, then rub vegetable oil or Vitamin E cream into the area repeatedly to accelerate the natural process of the skin shedding, which will in turn cause the cured product to fall off. Safety tips Contains organic isocyanate polymers. On contact, uncured adhesive can irritate eyes. If in eyes, flood the eyes for at least 15 minutes and seek medical advice. Avoid contact with skin, if contact occurs, remove contaminated clothing or flush skin and hair with running water. Avoid breathing vapours. Ensure use in a well-ventilated area. Product releases methyl ethyl ketoxime while curing. For advice, contact a Poisons Information Centre (AUS 131 126; NZ 0800 764 766) or a doctor. Warning: this product contains organic isocyanate polymers. This product has been classified as hazardous according to the criteria of NOHSC and HSNO. For further detail on the safe use of this product, please refer to the Material Safety Data Sheet, which can be downloaded from this site. Keep away from children. Storage and re-use Clean tools with acetone or white spirit immediately after use (before adhesive dried). Storage – For maximum shelf life store inside at moderate temperatures in dry conditions. Keep tightly closed to prevent moisture and air contact. It is recommended to use the entire contents of a pack within 6 months of opening. Product may form a hard skin on the surface during this period. Usable material is normally still present beneath this skin and can be accessed by breaking the hardened layer.materials other than wood.
$34.65
![Selleys Plasti-Bond Heavy Duty Bog Two Part Polyester Filler 400g [Off White]](http://gluesaustralia.com.au/cdn/shop/files/Plasti-BondHeavyDutyBog400g_b2b227b8-96d0-4b9a-9dfa-7d64e62b31f5.png?v=1785218520&width=645)
Selleys Plasti-Bond Heavy Duty is a two part polyester filler built for repairs that have to carry load, not simply look tidy. Once the hardener is stirred through, it firms up to a dense, rigid mass in about twenty minutes without the shrinking or cracking that catches out lightweight patching compounds, and it holds its shape well enough to be drilled, tapped and fixed into after curing. The 400g can covers the middle ground jobs that a small pack runs short on. What it is The pack contains an off white polyester putty base and a separate hardener that is mixed in immediately before use. Working time is short, around five minutes at normal room temperature, so the product is mixed in batches rather than all at once. Cured Plasti-Bond can be sawn, drilled, filed, sanded and painted, and the base can be tinted with cement oxides or paint tinters before the hardener goes in if a coloured finish is wanted. Where to use it Indoors: filling holes, cracks and splits in walls, ceilings, floors and doors; rebuilding worn areas around hinges, locks and door handles; making good chipped tiles and ceramics; anchoring bolts and fixtures into masonry; stopping countersunk fastener heads flush in almost any material. Outdoors: patching chipped concrete steps and paths, repairing galvanised guttering and downpipes, and restoring fibreglass, timber and metal on furniture, sporting gear, cars, caravans and boats above the water line. Outdoor repairs should be painted, since the cured filler can discolour if left bare in sunlight. How to use it Prepare the surface so it is clean, dry, unpainted and free of grease or oil. On steel or aluminium panel work that will see vibration, punch or drill the area first to give the filler a positive key. Stir the base thoroughly, then blend in the hardener, working the mix from side to side until the colour is completely uniform. Extra hardener speeds the set in cold weather; less hardener buys time across several separate fills. Apply with a putty knife or spatula, pressing firmly into the repair and slightly overfilling to leave material for sanding. Feather the edges as you go. Take off most of the excess with a Surform or file between roughly twenty and thirty minutes, while it is firm but not yet rock hard. Once fully hard, finish with ordinary files or sandpaper. Paint with water based or oil based paint. Clean tools with mineral turps before the product cures. Important notes Not suitable for continuous immersion or for joints that need to stay flexible. May not adhere to polyethylene, polypropylene or PTFE. Can discolour if left unpainted outdoors. Mix only what you can apply inside the working time; cured material cannot be re-softened. Replace the lid firmly after use and store the can in a cool place. Specifications Brand Selleys Product Plasti-Bond Heavy Duty Bog Pack size 400g Technology Two part polyester putty Appearance Off white paste Working time Approximately 5 minutes at 23 degrees C Cure time Approximately 20 minutes Suitable substrates Metal, timber, brick, fibre cement, fibreglass, concrete, plaster, tiles, ceramics and many plastics Paintable Yes, once cured Clean up Mineral turps before curing Use Indoor and outdoor Safety Polyester fillers and their hardeners are flammable and give off solvent vapour while curing. Work in a well ventilated area, keep the product away from sparks, flames and other heat sources, and wear gloves and eye protection when mixing and applying. Avoid prolonged skin contact and wash any splashes off promptly. Keep out of reach of children, do not allow washings to enter drains or waterways, and dispose of unused material and empty containers in line with local regulations. Consult the current Selleys Safety Data Sheets for the base and the hardener before use.
$42.70

Dunlop Timber Joint Sealant is a flexible sealant developed specifically for wall and floor joints around timber substrates such as laminate, parquet and solid wooden floorboards. It fills expansion gaps, skirting junctions and threshold joints in a timber-toned finish, stopping water and debris from working their way into the joint while still allowing the natural movement of the floor. Once cured it can be sanded and painted over, making it easy to blend into the surrounding surface, and it is available in two distinctive wood-look colours: Beech and Silver Grey Oak.Where to use itUse it on wall and floor joints where timber, laminate or parquet meets another surface — around floor perimeters, stair nosings, skirtings and door thresholds — indoors and outdoors. It also adheres well to ceramic tiles, glass, enamel, anodised aluminium, granite, porcelain and sanitary acrylics, so it handles transitions between timber and tiled areas neatly.How to useEnsure joints are clean, dry and free from dust, oils and loose material. Cut the cartridge tip and nozzle to suit the gap, load it into a caulking gun and apply an even, continuous bead. Smooth the bead with a tooling implement before it skins over, and remove any masking tape immediately. Allow the sealant to cure fully before sanding or painting over the joint.Important notesSuitable for joints up to 30mm wide and 15mm deep. Unlike a silicone, this sealant accepts sanding and paint once cured, which makes it the better choice where the joint needs to disappear into a finished floor or wall.Specifications Size 310ml cartridge Max joint width 30mm wide x 15mm deep Cure type Acrylic, sandable and paintable when cured SafetyApply in a ventilated space, avoid contact with skin and eyes, wash hands after use and keep the product away from children. Review the Safety Data Sheet on the Dunlop Trade website before application.
$30.73

Dunlop Builder's Bond is a high strength, multipurpose, rapid-cure epoxy bonding and repair system that joins almost any building material to almost any other. Dispensed through a self-mixing nozzle from a convenient 254ml dual cartridge, its non-sag formula holds firm on walls and even overhead, and cures stronger than concrete in about 2 hours.Where to use itSuitable for indoor and outdoor use across floor, wall and overhead repairs. Typical jobs include bonding concrete, masonry, stone, metal and timber components, rebuilding broken edges and corners, anchoring fixtures, and general structural gap filling where a fast, very strong bond is required.How to useEnsure both surfaces are clean, dry and free of dust, grease and loose material. Load the cartridge into an applicator gun, fit the self-mixing nozzle and dispense the evenly mixed epoxy directly onto the repair or bond line. Shape and tool it before it stiffens. Once cured, Builder's Bond can be shaped, sanded, drilled and painted, so repairs can be blended invisibly into the surrounding surface.Important notesNew concrete must be fully cured - a minimum of 28 days old - before bonding. The non-sag consistency suits vertical and overhead work but is not a pourable grout. Start a fresh nozzle for each session, as mixed product hardens inside the nozzle.Specifications Size 254ml dual cartridge Coverage Depends on bead size and gap width Substrates Concrete, masonry, stone, metal, timber and most building materials Set time Stronger than concrete in 2 hours Finish Sandable, drillable and paintable once cured SafetyUncured epoxy resins and hardeners can cause skin irritation and sensitisation. Wear nitrile gloves and eye protection, ventilate the work area, avoid skin contact and wash immediately if contact occurs. Keep cartridges sealed and out of reach of children.
$61.79

Dunlop Ardit Feather Finish is a cement-based smoothing compound that skims internal floors to a super-smooth, permanent finish before floor coverings are installed. Powered by ARDEX Ardit technology, it trowels out to a true feather edge and sets so fast that coverings can be applied from just 15 minutes after placement - and it needs no primer on most surfaces, saving a whole step.Where to use itFor indoor use over concrete, existing tiles, sheet timber (plywood and particleboard) and cured Dunlop floor levellers. It is ideal for filling grout joints when covering old tiles with vinyl, smoothing trowel marks in levellers, and taking out minor imperfections before vinyl, carpet or ceramic tiles.How to useEnsure the floor is clean, sound and free of dust, grease and loose material. Mix the powder with clean water to a smooth, creamy paste and apply with a flat steel trowel, working from a feather edge up to 3mm thick. Tight second coats can be applied as the first firms. Any ridges can be shaved or lightly sanded once set for a flawless surface.Important notesIndoor use only and must be covered by a floor covering. Mix small batches to suit the rapid set. No primer is required over common substrates - check the datasheet for unusual surfaces.Specifications Size 3.5kg bag Coverage Approx. 12m² over concrete or 24.5m² over sheet timber (skimcoat) Thickness Feather edge to 3mm Substrates Concrete, tiles, sheet timber, Dunlop floor levellers Walk-on time 15-30 minutes; coverings from 15 minutes SafetyCement powders can irritate eyes, skin and lungs. Wear gloves, safety glasses and a P2 dust mask when mixing, keep the area ventilated, avoid prolonged contact with the wet compound and wash hands after use. Store out of reach of children.
$82.46

Dunlop Ardit Feather Finish in the larger 8kg bag is the go-to smoothing compound for flooring installers tackling bigger areas. This cement-based skimcoat, built on ARDEX Ardit technology, glides out to a genuine feather edge and produces a hard, super-smooth, permanent finish that floor coverings can be laid over from just 15 minutes after application - with no primer required on most substrates.Where to use itFor indoor floors over concrete, existing ceramic tiles, sheet timber (plywood and particleboard) and cured Dunlop floor levellers. Use it to fill grout joints before laying vinyl over tiles, erase trowel marks and minor undulations, and fine-tune levelled floors before vinyl, carpet or new tiles.How to useStart with a clean, sound, dust-free floor. Mix with clean water to a smooth, lump-free paste and spread with a flat steel trowel from a feather edge up to 3mm thick. Because it sets rapidly, mix quantities you can place within a few minutes and apply successive tight coats as needed. Light sanding or shaving once set removes any ridges for a flawless result.Important notesIndoor use only and must be covered by a finished floor covering. The rapid set is a feature - plan batches accordingly. Refer to the technical datasheet for guidance over less common substrates.Specifications Size 8kg bag Coverage Approx. 27m² over concrete or 55m² over sheet timber (skimcoat) Thickness Feather edge to 3mm Substrates Concrete, tiles, sheet timber, Dunlop floor levellers Walk-on time 15-30 minutes; coverings from 15 minutes SafetyWear gloves, safety glasses and a P2 dust mask when handling and mixing the dry powder, ventilate the work area and avoid skin and eye contact with the wet mix. Wash thoroughly after use and keep the bag sealed and away from children.
$125.51

Loctite EA 9235 (Five Minute E-Pox-E, item EFQ5) is a fast-acting two-part epoxy that mixes resin and hardener in equal parts to form a tough, rigid, high-strength bond in about five minutes. Supplied in a dual-barrel syringe that dispenses both components in the correct 1:1 ratio every time, it is ideal for fast permanent repairs and multi-piece projects across a wide range of household, workshop and trade materials. Once cured it resists water and most common solvents, and can be sanded, drilled and machined. It can also be used as a versatile filler for gap filling, surface repairs and laminating. Bonds: metal, glass, ceramic, china, tile, stone, concrete, wood, fibreglass and most rigid plastics. Where to use it Indoor: repairing ceramics, china and glassware, fixing tools and toys, bonding tiles, and general household and hobby repairs. Outdoor: bonding stone, concrete and masonry, plus garden and workshop repairs. Not recommended for continuously wet areas or prolonged water immersion. How to use 1. Make sure surfaces are clean, dry and free of oil, wax, paint and rust. Roughen smooth surfaces by sanding for a stronger grip. 2. Remove the plug and cut the syringe tip at the marked opening. Stand the syringe upright and press the plunger gently to expel any air. 3. Depress the double plunger to dispense equal parts of resin and hardener onto a disposable surface, then mix thoroughly for about one minute. 4. Apply to both surfaces within one to two minutes of mixing and press together. Support the join for around 10 minutes. 5. Usable strength is reached in about 1 hour and the bond fully cures in 24 hours. Wipe the tips clean and replace the plug for storage. Clean uncured adhesive with acetone before it sets. Cured adhesive can be carefully cut away with a sharp blade. Important notes Not recommended for polyethylene, polypropylene, nylon, non-stick coatings or flexible materials. Not suitable for potable (drinking) water systems, prolonged water immersion, or short-term heat above 150°C. Apply between 4°C and 35°C. Specifications Part number Loctite EA 9235 / EFQ5 Size 25ml dual syringe Chemistry Two-part epoxy (epoxy resin / polymercaptan hardener) Mix ratio 1:1 by volume Set time Approx. 5 minutes Usable strength Approx. 1 hour Full cure 24 hours Cured colour Clear amber Hardness 80 Shore D Service temperature -23°C to 49°C continuous (up to 150°C intermittent) Water resistant Yes Sandable / machinable Yes Paintable No Shelf life 24 months unopened Safety Contains epoxy resin and polymercaptan/amine hardeners. Causes skin and eye irritation and may cause an allergic skin or respiratory reaction. Wear gloves, work in a well-ventilated area and avoid breathing vapours. For eye contact, rinse with water for 15 minutes and seek medical advice. If swallowed, do not induce vomiting and seek medical advice. Keep out of reach of children. Always refer to the Safety Data Sheet before use.
$33.75

Achieve smooth, long lasting plasterboard joints with Gyprock CSR FibaFuse Joint Tape. This premium paperless tape bonds beautifully with both setting and drying compounds to reinforce seams, reduce the risk of cracks, and deliver a professional finish on walls and ceilings. Why choose FibaFuse Stronger joints thanks to an open fiber structure that integrates with joint compound for excellent reinforcement. Smooth finishing with feathered edges that sand and paint cleanly. No bubbling when properly embedded in compound for a flat, reliable seam. Works with most compounds including setting type and ready mixed formulas. Ideal for pros and DIY on new installs, repairs, and patchwork. Best for Joining plasterboard sheets on walls and ceilings Butt and tapered edge joints Repairs to cracked or previously patched seams High traffic areas that need extra durability How to use Prep Ensure surfaces are clean, dry, and free of dust. Lightly bevel cut edges if required. Bed coat Apply an even layer of joint compound over the seam at least the width of the tape. Embed Place the FibaFuse tape into the wet compound and press firmly with a taping knife to remove air pockets. Cover Apply a thin coat over the tape to fully conceal the mesh. Allow to dry or set as per the compound directions. Build Apply one or two wider coats, feathering the edges for a flat transition. Let each coat dry before the next. Finish Lightly sand, prime, and paint. Pro tips Keep knife pressure firm during embedding to avoid bubbles. Use a wider knife for second and third coats to reduce sanding. Prime before painting for a consistent sheen across joints and boards. Product details Brand Gyprock CSR Type Paperless joint tape for plasterboard seams Compatibility Setting and ready mixed joint compounds Applications Walls, ceilings, butt joints, tapered edges, repairs Frequently asked questions Do I need to pre soak the tapeNo. Embed the tape directly into wet compound. Can I use it with ready mixed compoundYes. It works with ready mixed and with setting type compounds. Follow the compound instructions for drying or set times. Will it show through paintNot when properly covered with compound, sanded smooth, and primed before painting. Good to know Store flat and dry to maintain tape integrity. Always wear appropriate PPE when sanding joint compound. Glues Australia helps you get a strong, professional finish without the fuss. Why buy new when you can fix
$21.78 $15.70
You have seen 96 out of 220 products
Fillers and repair compounds that sand smooth for paint-ready results. Choose fast-set for quick turnarounds or extended open time for shaping. Use filters to refine by chemistry and set speed. Always check the product page and TDS/SDS.