
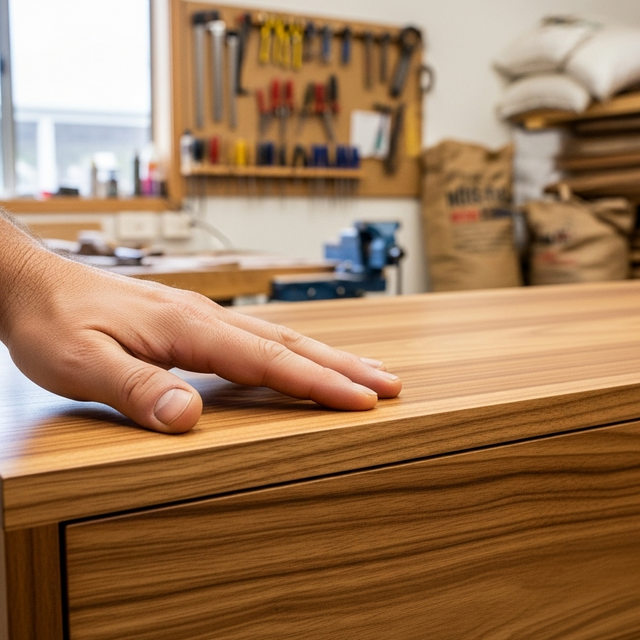
Products that level to a clean, smooth surface with minimal tooling, ideal for visible seams and cosmetic repairs. Use filters to refine by chemistry, viscosity and cure profile. Always review the product page and TDS/SDS.
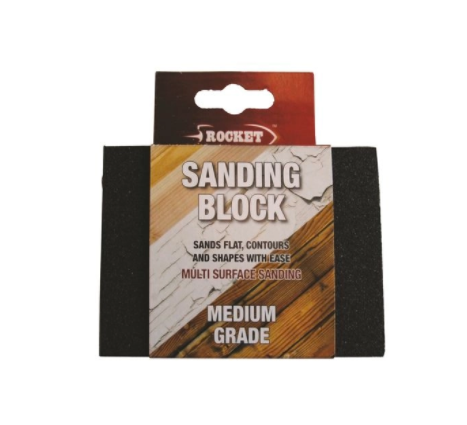
SANDING BLOCKS offer optimal sanding results on flat, contoured and irregular shapes. • Flexible, to conform to contours and irregular shaped objects. • For sanding and cleaning metal, wood, plaster, plastic, fibreglass etc. • Can be used for wet or dry sanding. • Rinse with water to clean.
$2.05
![RiteTack Instant Grab Construction Adhesive 290ml [White]](http://gluesaustralia.com.au/cdn/shop/files/0799439671669_6c8563d0-64cb-499e-a564-d2d4a62e9ce2.png?v=1754712007&width=645)
Eliminates the need for unsightly fixings or tiresome clamping & propping Superior initial grab, up to 1000KGS per SQM horizontally Suits most materials including timber, metal, glass, mirror, plaster, stone, ceramic, concrete, PS, PU, PVC & polystyrene. No solvents & no isocyanate, user-friendly! Proven worldwide Paintable & retains elasticity Ritetack is an odorless and silicone, solvent, phthalate, PVC, and isocyanides-free, high-quality instant grip polymer adhesive designed for the building and construction industry, which performs. There is no need to wait while it cures since you only need to apply Ritetack, position it, and that’s it, no need for any type of braces. Ritetack is DIY and home improvement’s go-to glue. This instant grab adhesive works with most materials from stone and timber to steel and plasterboard, and more, it’s so easy to apply. Use it in with your caulking gun, like the Ritepro, on any job. If you want a glass adhesive, it is your answer. Less hassle, less labor, and fewer fixings. Used for mirror installation by the glass industry. Its coloured, elastic composition is a combination of cutting-edge adhesive technology and our market-leading easy-to-use design.
$9.95
![RiteTack Instant Grab Construction Adhesive 290ml [Grey]](http://gluesaustralia.com.au/cdn/shop/files/0793591712994_c9bef70a-42d0-408c-8b14-e176578d110d.png?v=1754712009&width=645)
Eliminates the need for unsightly fixings or tiresome clamping & propping Superior initial grab, up to 1000KGS per SQM horizontally Suits most materials including timber, metal, glass, mirror, plaster, stone, ceramic, concrete, PS, PU, PVC & polystyrene. No solvents & no isocyanate, user-friendly! Proven worldwide Paintable & retains elasticity Ritetack is an odorless and silicone, solvent, phthalate, PVC, and isocyanides-free, high-quality instant grip polymer adhesive designed for the building and construction industry, which performs. There is no need to wait while it cures since you only need to apply Ritetack, position it, and that’s it, no need for any type of braces. Ritetack is DIY and home improvement’s go-to glue. This instant grab adhesive works with most materials from stone and timber to steel and plasterboard, and more, it’s so easy to apply. Use it in with your caulking gun, like the Ritepro, on any job. If you want a glass adhesive, it is your answer. Less hassle, less labor, and fewer fixings. Used for mirror installation by the glass industry. Its coloured, elastic composition is a combination of cutting-edge adhesive technology and our market-leading easy-to-use design.
$9.95
![RiteTack Instant Grab Construction Adhesive 290ml [Black]](http://gluesaustralia.com.au/cdn/shop/files/0793591712987_0ace0873-9628-42fc-9b06-c64c93c74c40.png?v=1754712010&width=645)
Eliminates the need for unsightly fixings or tiresome clamping & propping Superior initial grab, up to 1000KGS per SQM horizontally Suits most materials including timber, metal, glass, mirror, plaster, stone, ceramic, concrete, PS, PU, PVC & polystyrene. No solvents & no isocyanate, user-friendly! Proven worldwide Paintable & retains elasticity Ritetack is an odorless and silicone, solvent, phthalate, PVC, and isocyanides-free, high-quality instant grip polymer adhesive designed for the building and construction industry, which performs. There is no need to wait while it cures since you only need to apply Ritetack, position it, and that’s it, no need for any type of braces. Ritetack is DIY and home improvement’s go-to glue. This instant grab adhesive works with most materials from stone and timber to steel and plasterboard, and more, it’s so easy to apply. Use it in with your caulking gun, like the Ritepro, on any job. If you want a glass adhesive, it is your answer. Less hassle, less labor, and fewer fixings. Used for mirror installation by the glass industry. Its coloured, elastic composition is a combination of cutting-edge adhesive technology and our market-leading easy-to-use design.
$9.95

In keeping with the traditional formula, PREP Linseed Oil Putty is manufactured to the highest standards for almost all situations where a reliable linseed oil-based putty is required. Applications include; window glazing, filling nail holes in furniture, flooring, and general building applications. Environmentally friendly Non-toxic Tough & flexible Easy to use Weather-resistant
$19.17

In keeping with the traditional formula, PREP Linseed Oil Putty is manufactured to the highest standards for almost all situations where a reliable linseed oil-based putty is required. Applications include; window glazing, filling nail holes in furniture, flooring, and general building applications. Environmentally friendly Non-toxic Tough & flexible Easy to use Weather-resistant
$7.50

Prep Interior & Exterior is a dry, plaster based, cement reinforced filler for the repair of common non-flexible wall linings such as plaster, concrete, timber, and wallboard. This product is highly water-resistant and therefore suitable for interior or exterior use. Can be used to fill deep or shallow crevices in one application. Easy to mix and use White finish Non-shrinking Easily sanded Can be nailed or screwed when dry Water-resistant
$13.50

Discover the strength and versatility of FlexiBond Plasterboard Paper Tape, the premier choice for achieving professional-grade, seamless finishes on all your plasterboard projects. Specifically crafted for both the DIY enthusiast and the professional builder, our paper tape is designed to provide unparalleled support and durability to your wall joints and repairs. FlexiBond Paper Tape stands out with its unique features: Superior Joint Support: Engineered to reinforce plasterboard joints, preventing cracks and ensuring a durable bond. Smooth Application: Its fine texture allows for a seamless blend with plaster, resulting in a smooth, invisible finish upon painting or wallpaper application. Versatile Compatibility: Ideal for use with a wide range of jointing compounds and plaster fillers, FlexiBond adapts to your specific project needs. Ease of Use: With a design focused on user convenience, our paper tape is easy to cut, apply, and embed into jointing compound, making it suitable for all skill levels. Whether you’re tackling a minor repair or embarking on a large-scale construction project, FlexiBond Plasterboard Paper Tape is your go-to for achieving flawless walls with lasting integrity.
$4.00

Discover the strength and versatility of FlexiBond Plasterboard Paper Tape, the premier choice for achieving professional-grade, seamless finishes on all your plasterboard projects. Specifically crafted for both the DIY enthusiast and the professional builder, our paper tape is designed to provide unparalleled support and durability to your wall joints and repairs. FlexiBond Paper Tape stands out with its unique features: Superior Joint Support: Engineered to reinforce plasterboard joints, preventing cracks and ensuring a durable bond. Smooth Application: Its fine texture allows for a seamless blend with plaster, resulting in a smooth, invisible finish upon painting or wallpaper application. Versatile Compatibility: Ideal for use with a wide range of jointing compounds and plaster fillers, FlexiBond adapts to your specific project needs. Ease of Use: With a design focused on user convenience, our paper tape is easy to cut, apply, and embed into jointing compound, making it suitable for all skill levels. Whether you’re tackling a minor repair or embarking on a large-scale construction project, FlexiBond Plasterboard Paper Tape is your go-to for achieving flawless walls with lasting integrity.
$2.00

Introducing Eazy Tape Plasterboard Joint Tape, your ultimate solution for achieving flawless walls and durable repairs. Designed for both the DIY enthusiast and the professional, this self-adhesive fibreglass mesh tape is engineered to simplify your plasterboard wall panel joining or patching tasks. Crafted from high-strength fibreglass mesh, it ensures a robust bond that complements both plaster filler and jointing compounds seamlessly. Why choose Eazy Tape? Here are the benefits: Easy to Use: With its self-adhesive backing, the application is straightforward and mess-free, adhering securely to surfaces without the need for additional glues. DIY-Friendly, Professional Results: Whether you're tackling a home project or a professional job, Eazy Tape guarantees a smooth, professional finish. Strong Bonding & Holding Power: The superior fibreglass mesh material provides exceptional strength, reducing the risk of cracks and ensuring longevity. Quick Results: Speed up your repair or construction projects with a tape that sets quickly, allowing you to move on to the next step without delay. Perfect for a wide range of applications, from repairing cracks to joining new wall panels, Eazy Tape Plasterboard Joint Tape is the dependable choice for achieving seamless results with ease.
$9.50

Introducing Eazy Tape Plasterboard Joint Tape, your ultimate solution for achieving flawless walls and durable repairs. Designed for both the DIY enthusiast and the professional, this self-adhesive fibreglass mesh tape is engineered to simplify your plasterboard wall panel joining or patching tasks. Crafted from high-strength fibreglass mesh, it ensures a robust bond that complements both plaster filler and jointing compounds seamlessly. Why choose Eazy Tape? Here are the benefits: Easy to Use: With its self-adhesive backing, the application is straightforward and mess-free, adhering securely to surfaces without the need for additional glues. DIY-Friendly, Professional Results: Whether you're tackling a home project or a professional job, Eazy Tape guarantees a smooth, professional finish. Strong Bonding & Holding Power: The superior fibreglass mesh material provides exceptional strength, reducing the risk of cracks and ensuring longevity. Quick Results: Speed up your repair or construction projects with a tape that sets quickly, allowing you to move on to the next step without delay. Perfect for a wide range of applications, from repairing cracks to joining new wall panels, Eazy Tape Plasterboard Joint Tape is the dependable choice for achieving seamless results with ease.
$15.00

Specially developed for filling cracks & dents on doors, windows, trim, architraves and skirting boards, sanding to a smooth, hard mirror like finish. The perfect preparation for gloss paints. Easy to sand, sets to a super hard finish and is highly crack resistant. Filling blade included For use on: Plasterboard, concrete, timber & primed metal (INTERIOR & EXTERIOR) Fill depth: Up to 3mm Dries in: 3 hours Ready to use: YES Available in: 330mL & 770mL Colour: White • Surface to be filled should be clean and dry with no loose or powdery material. • Using the attached filling blade press filler in firmly and remove excess. * Allow to dry for 2-3 hours in thin 2-3mm applications, depending on humidity. Allow longer drying times if painting with oil based paint and for deeper applications. • Sand with fine sandpaper. For a perfect finish after initial sanding back, apply another very thin coat of filler, allow to dry and sand lightly with very fine (400grit) sandpaper before painting. • Protect from rain until painted over. • Not for exterior timber likely to absorb excessive amount of water. • Use Polyfilla Gap filler or silicone sealant where joint movement occurs. • Clean up with water before filler dries Q. Why should I use a specialised filler under gloss paints? A. Gloss paints show up every flaw and bump on surfaces. Therefore, a specialised filler that ensures an extremely smooth, hard, "glass-like" finish is preferred for the ultimate flawless, flat surface. Polyfilla Trim and Doors is the ideal filler under gloss paints. It also gives perfect gloss retention so you won't notice a 'dull' spot under the paint. You should also apply an undercoat before the final coat of paint for the best results.
$18.94

Polyfilla Skim Coat 510g: The Ultimate Smooth Surface Maker for a Flawless Paint Job Seamless Filler for Pro-Level Paint Preparations When it comes to ensuring the best possible surface for your painting projects, look no further than Polyfilla Skim Coat 510g. This product excels in filling small cracks, dents, and fine imperfections, setting the stage for a smooth paint application. Key Features: Extremely easy to sand Sets to a super hard finish Highly crack resistant Ready to use, dries in just 2 hours For use exclusively on interior plasterboard & gyprock How to Use: Make sure the surface is clean, dry, and free from loose material. Press the filler firmly into cracks and holes. For larger areas, use a trowel to spread evenly. Let it dry for 2-3 hours depending on the humidity. Sand it for a smooth finish before painting. For optimal results, apply a paint undercoat before using water or oil-based paint top coat. Limitations & Tips: Use Poly Gap filler or silicone sealant for areas with joint movement. Clean up immediately with water before the filler dries. For hairline cracks, consider using Poly Small Cracks filler for a comprehensive solution. Polyfilla Skim Coat 510g is your definitive choice for a crack-free, smooth surface, ready to be painted. It's your gateway to perfection!
$20.22

Polyfilla Skim Coat 1.2kg: The Ultimate Smooth Surface Maker for a Flawless Paint Job Seamless Filler for Pro-Level Paint Preparations When it comes to ensuring the best possible surface for your painting projects, look no further than Polyfilla Skim Coat 1.2kg. This product excels in filling small cracks, dents, and fine imperfections, setting the stage for a smooth paint application. Key Features: Extremely easy to sand Sets to a super hard finish Highly crack resistant Ready to use, dries in just 2 hours For use exclusively on interior plasterboard & gyprock How to Use: Make sure the surface is clean, dry, and free from loose material. Press the filler firmly into cracks and holes. For larger areas, use a trowel to spread evenly. Let it dry for 2-3 hours depending on the humidity. Sand it for a smooth finish before painting. For optimal results, apply a paint undercoat before using water or oil-based paint top coat. Limitations & Tips: Use Poly Gap filler or silicone sealant for areas with joint movement. Clean up immediately with water before the filler dries. For hairline cracks, consider using Poly Small Cracks filler for a comprehensive solution. Polyfilla Skim Coat 1.2kg is your definitive choice for a crack-free, smooth surface, ready to be painted. It's your gateway to perfection!
$35.69

A high grade linseed oil putty with excellent adhesion for repairing and glazing wood and metal frames. For use on: Wood & metal (EXTERIOR & INTERIOR) Dries in: Skins over in 2-3 days depending on weather conditions. Ready to use: YES Colour: Light brown Ensure all surfaces are clean, sound and dry. Remove all old putty, dust off loose and crumbling material. • Bare timber should be primed with an oil-based primer before applying putty. • Knead putty thoroughly for smooth, even consistency in application. • Apply putty to working area with either a thumb or putty knife. When evenly applied, smooth off. • Always allow several days for putty to skin before applying an oil-based undercoat. Can be painted with either water or oil-based topcoat. Q. I used Polyfilla Putty on a window frame and have noticed some wrinkling on the surface. Is something wrong with the product? A. No. When this product is used on metal window frames exposed to heat, some surface wrinkling can occur. This will not affect the performance of the putty in any way.
$46.19

Polyfilla P10 Gap Filler Rapid: The Ultra-Fast Solution for Perfect Fills Features Flexible Smooth Finish Rapid Drying Paintable in 10 minutes* Low Shrinkage Crack-Resistant* Applications Ideal for filling gaps around cornices, wall joints, skirting boards, as well as inside windows and door frames. Usage Instructions *To avoid paint cracking, apply to gaps no larger than 5mm deep and 10mm wide at temperatures above 20°C. Allow the sealant to dry before painting. Avoid applying paint too thickly. When to Use Paintable in just 10 minutes, allowing for fast project completion.
$7.35

A ready to use filler excellent for filling small cracks, dents & fine imperfections to ensure the ultimate smooth surface prior to painting. Extremely easy to sand, sets to a super hard finish and is highly crack resistant. Filling blade included For use on: Plasterboard & gyprock (INTERIOR) Fill depth: Up to 2mm Dries in: 2 hours Ready to use: YES Size: 770mL Colour: White • Surface to be filled should be clean and dry with no loose or powdery material • Using the attached filling blade press filler in firmly, remove excess and feather edges to minimise sanding. Apply with a trowel to spread over larger areas. • Allow to dry for 30-60 minutes for thin 2-3mm applications, depending on humidity. Allow longer drying times if painting with oil based paints (24 hours minimum) or for deeper applications. • Ideal as a topcoat over other fillers for a perfectly smooth finish. • For best results, apply paint undercoat before applying water or oil based paint top coat. • Use Polyfilla Gap filler or silicone sealant where joint movement occurs. • Clean up with water before filler dries Q. What can I do about hairline cracks in my ceiling? It's impossible to cover them up with paint? A. Paint rarely conceals cracks and is more likely to make them more obvious.It is best to use a filler that is easy to apply and sand such as Polyfilla Interior Small Cracks. It's ideal for covering fine cracks over a broad area.
$29.00

A ready to use filler excellent for filling small cracks, dents & fine imperfections to ensure the ultimate smooth surface prior to painting. Extremely easy to sand, sets to a super hard finish and is highly crack resistant. Filling blade included For use on: Plasterboard & gyprock (INTERIOR) Fill depth: Up to 2mm Dries in: 2 hours Ready to use: YES Available in: 330mL & 770mL Colour: White • Surface to be filled should be clean and dry with no loose or powdery material • Using the attached filling blade press filler in firmly, remove excess and feather edges to minimise sanding. Apply with a trowel to spread over larger areas. • Allow to dry for 30-60 minutes for thin 2-3mm applications, depending on humidity. Allow longer drying times if painting with oil based paints (24 hours minimum) or for deeper applications. • Ideal as a topcoat over other fillers for a perfectly smooth finish. • For best results, apply paint undercoat before applying water or oil based paint top coat. • Use Polyfilla Gap filler or silicone sealant where joint movement occurs. • Clean up with water before filler dries Q. What can I do about hairline cracks in my ceiling? It's impossible to cover them up with paint? A. Paint rarely conceals cracks and is more likely to make them more obvious.It is best to use a filler that is easy to apply and sand such as Polyfilla Interior Small Cracks. It's ideal for covering fine cracks over a broad area.
$18.00

Polyfilla Gloss Finish 390g: The Ultimate Surface Perfector for Flawless Gloss Paints The Flawless Base for Glossy Elegance Unlock the perfect preparation for your gloss paint projects with Polyfilla Gloss Finish 390g. Specifically designed for filling cracks and dents on doors, windows, trims, and more. Key Features: Easy to sand Sets to a super hard, mirror-like finish Highly crack resistant Ready to use, dries in just 3 hours For use on various surfaces, both interior and exterior Common Applications: Doors Windows Trim Architraves Skirting boards Compatible Surfaces: Plasterboard Concrete Timber Primed metal How to Use: Ensure the surface is clean and dry. Press filler firmly into dents, holes, or splits. Remove excess and allow to dry for 2-3 hours. For oil-based paint, allow longer drying times. Sand with fine sandpaper for an immaculate finish. For best results, apply a second, thin coat and sand lightly before painting. Limitations & Tips: Not suitable for exterior timber likely to absorb excessive water. Use Poly Gap filler or silicone sealant where joint movement occurs. Clean up with water before the filler dries. Protect from rain until painted over. Do not use below 5°C. For a surface that gloss paints will love, choose Polyfilla Gloss Finish 390g.
$20.22

Moisture and mould resistant, this product has been specially formulated for filling cracks, holes and chips in wet areas of the home. Easy to sand, sets to a super hard finish and is highly crack resistant. Filling blade included For use on Plasterboard, masonry, wood, concrete, mortar & cement board (INTERIOR) Fill depth: Up to 10mm Dries in: 3 hours Ready to use: YES Available in: 330mL & 770mL Colour: White Application Tips • Surface to be filled should be clean and dry with no loose or powdery material. Mould affected areas should be thoroughly cleaned with a suitable mould remover, rinsed and allowed to dry. • Using the attached filling blade press filler in firmly and remove excess. • Allow drying (2-3 hours in thin 2-3mm applications depending on humidity), before sanding. • For deeper jobs apply in 10mm layers, allowing each layer to set, before applying the next layer. Allow longer drying times (24 hours minimum) if painting with oil-based paints or for deeper applications. • Finish off sanding with a fine sandpaper (>300 grit) for a smoother finish. • For best results, apply paint undercoat before applying paint topcoat suitable for bathrooms and kitchens, to maximise water, moisture and mould resistance. • Not for areas that will be immersed in water. • Use a flexible Poly sealant where joint movement occurs. • Clean up with water before filler dries. FAQ's Q. Should I use a different filler in damp areas? A. Yes. Polyfilla Bathroom & Kitchen has been specially formulated to resist water, moisture and mould growth making it perfect for use in damp areas of the home. HOW TO PREPARE A BATHROOM OR KITCHEN FOR PAINTING The key to achieving a flawless paint finish is preparation. A fresh coat of paint can often accentuate imperfections on plaster walls so it's important that small cracks, dents and chips are properly filled and sanded to create a smooth, even surface for a picture-perfect finish. In areas affected by moisture such as bathrooms, kitchens and laundries we recommend using products specially designed to resist mould growth. Before starting on your walls, it's a good idea to clear your bathroom or kitchen of accessories and appliances. Use good quality drop sheets to avoid getting paint and dust on benchtops, sinks and floor surfaces. You'll need: Poly Sugar Soap Polyfilla Bathroom & Kitchen A flexible filling blade Fine sandpaper A soft brush Painters tape Ensure your walls have no remaining nails, pins, etc. With fine sandpaper, remove lumps, bumps and any paint flakes. Brush off excess dust and then wash down the walls thoroughly with Poly Sugar Soap to remove mould, grease and grime. Let the sugar soap dry completely before filling. Apply a small amount of Polyfilla Bathroom & Kitchen to your filling blade and draw it across each imperfection on the wall. For larger areas, a trowel should be used. Using the filling blade, remove excess and skim the filled areas lightly in both directions a few times to ensure a no air bubbles are present in the filled space. Feathering the edges will also minimise sanding. Finish by drawing down with firm pressure. Wait until the application has dried (2-3 hours for thin 2-3mm applications depending on humidity), then lightly sand the filled areas to an even finish. Remove dust with a soft brush. Allow longer drying times for deeper applications or if painting with oil-based paints (24 hours minimum). There is no need to use water or sugar soap to clean dry filled surfaces prior to painting. For deeper jobs, apply in 10mm layers allowing each layer to set before applying the next layer. Taping Invest in a good painterís tape and carefully tape off any skirting, architraves, woodwork, etc. As you apply it, gently rub across the edge of the tape that will be painted to help prevent any paint from seeping underneath Now you've created a smooth, blemish-free surface, youíre ready to paint and achieve a perfect finish! For best results, apply paint undercoat before applying your top coat.
$18.00
![Poly Sandable Gap Filler Sealant [White]](http://gluesaustralia.com.au/cdn/shop/files/9311531002519_39812258-b0e2-4865-b7e0-1b0e830ecab2.jpg?v=1754712198&width=645)
Achieving a super smooth finish along gap filled joints is no longer reliant on caulking technique and experience. Polyfilla Sandable Gap Filler is a flexible gap filler which can be sanded. It's the perfect product to fix potential painting issues or unsightly gap bulges later in your project. Easy to sand Flexible Paintable Can be used both indoors and outdoors
$9.59

A cellulose reinforced plaster-based filler for filling interior cracks and holes that won't shrink. For use on: Plasterboard, brick, masonry & wood. Can be used also for modelling & sculpting (INTERIOR) Fill depth: Dependent on mix ratio Dries in: 2-3 hours Ready to use: NO (mix with water) Available in: 500g, 1kg, 2kg & 6kg Colour: Off-white • Surface to be filled should be clean and dry with no loose or powdery material. Roughen glossy surfaces to provide a key. • Ensure tools and mixing vessels are clean, as dried residue filler will accelerate drying rate. • Add 2.5 parts Polyfilla Interior Powder Filler to 1 part tap water and mix thoroughly into a paste with a clean knife. Once mixed, filler should be used within 1 hour. For deep cracks and holes it is advisable to use a slightly stiffer (less water) mix. • Use a clothes peg to reseal the pack. • Using a filling knife or applicator, press the mixed filler into the crack and smooth off. Slightly overfill and allow to dry before sanding. Use medium grade sandpaper and dust off. Wipe the dusted surface with a damp sponge. • Leave for 2-3 hours before sanding and decorating. • For best results prime repaired surface with paint undercoat paint or sealer prior to repainting the whole area. • Clean up with water before filler dries
$23.38

A cellulose reinforced plaster-based filler for filling interior cracks and holes that won't shrink. For use on: Plasterboard, brick, masonry & wood. Can be used also for modelling & sculpting (INTERIOR) Fill depth: Dependent on mix ratio Dries in: 2-3 hours Ready to use: NO (mix with water) Available in: 500g, 1kg, 2kg & 6kg Colour: Off-white • Surface to be filled should be clean and dry with no loose or powdery material. Roughen glossy surfaces to provide a key. • Ensure tools and mixing vessels are clean, as dried residue filler will accelerate drying rate. • Add 2.5 parts Polyfilla Interior Powder Filler to 1 part tap water and mix thoroughly into a paste with a clean knife. Once mixed, filler should be used within 1 hour. For deep cracks and holes it is advisable to use a slightly stiffer (less water) mix. • Use a clothes peg to reseal the pack. • Using a filling knife or applicator, press the mixed filler into the crack and smooth off. Slightly overfill and allow to dry before sanding. Use medium grade sandpaper and dust off. Wipe the dusted surface with a damp sponge. • Leave for 2-3 hours before sanding and decorating. • For best results prime repaired surface with paint undercoat paint or sealer prior to repainting the whole area. • Clean up with water before filler dries
$28.08
![Poly Coloured Gap Filler Acrylic Sealant Int & Ext [Vanilla]](http://gluesaustralia.com.au/cdn/shop/files/9311531002779_4cf84f13-11fd-4024-84f3-8b146caa7d2b.png?v=1754712210&width=645)
$11.94
![Poly Coloured Gap Filler Acrylic Sealant Int & Ext [Light Grey]](http://gluesaustralia.com.au/cdn/shop/files/9311531002762_be7a4237-355f-47f3-ae09-dabb40913652.png?v=1754712211&width=645)
$11.94
![Poly Coloured Gap Filler Acrylic Sealant Int & Ext [Dark Grey]](http://gluesaustralia.com.au/cdn/shop/files/9311531002755_7e96b58b-9c4a-4693-8cc9-b65123aa898d.jpg?v=1754712213&width=645)
$11.94
![Poly Coloured Gap Filler Acrylic Sealant Int & Ext [Cedar]](http://gluesaustralia.com.au/cdn/shop/files/9311531002731_8a23516e-dc7a-4a74-9fda-5436c7c62091.jpg?v=1754712214&width=645)
$11.94
![Poly Coloured Gap Filler Acrylic Sealant Int & Ext [Brown]](http://gluesaustralia.com.au/cdn/shop/files/9311531002748_2d1b3546-774e-4ede-96e6-fc71fb1dea46.jpg?v=1754712216&width=645)
$11.94
![Poly Coloured Gap Filler Acrylic Sealant Int & Ext [Black]](http://gluesaustralia.com.au/cdn/shop/files/9311531002724_6b56cb9d-718d-4289-8566-b1965f6372f4.webp?v=1754712217&width=645)
$11.94

Sandable Paintable Ready mixed Weather resistant Parfix multipurpose filler is a versatile, ready mixed filler ideal for filling cracks, holes and gaps inside and outside the home. Sandable and paintable, it enables a smooth finish.
$24.94

Nordsjö Professional Fine Filler is an indoor super smooth filler for primed new wood or previously painted clean wooden surfaces and or concrete walls and ceilings. It is ideal for fixing minor imperfections on painted surfaces before repainting. On wood, it is ideal for cracks and joints. For use on interior walls and joinery, including doors, windows, trim, architraves and skirting boards Fill fine cracks up to 2mm, minor blemishes or wood grain for a professional, glass smooth surface for painting Properties Ready to use Sand & paint after 4 hours Super smooth white finish Easy to sand Maximum depth: 2 mm Particle size: Max 0.10 mm How to apply Substrate and crack must be clean, dry and free from loose material. New wood should be primed first. Rub down gloss surfaces for improved adhesion. Metal surfaces such as nails and screws should be treated with an appropriate rust resistant primer. Apply with a filling knife and spread over the surface, pressing in well. Remove any excess filler and leave to dry. For an even smoother finish rub down with fine sand paper. Use appropriate protection when sanding. Do not apply when the surface temperature is below + 5°C. Replace lid after use. Wash tools with warm water.
$13.90

Nordsjö Professional Fine Filler is an indoor super smooth filler for primed new wood or previously painted clean wooden surfaces and or concrete walls and ceilings. It is ideal for fixing minor imperfections on painted surfaces before repainting. On wood, it is ideal for cracks and joints. For use on interior walls and joinery, including doors, windows, trim, architraves and skirting boards Fill fine cracks up to 2mm, minor blemishes or wood grain for a professional, glass smooth surface for painting Properties Ready to use Sand & paint after 4 hours Super smooth white finish Easy to sand Maximum depth: 2 mm Particle size: Max 0.10 mm How to apply Substrate and crack must be clean, dry and free from loose material. New wood should be primed first. Rub down gloss surfaces for improved adhesion. Metal surfaces such as nails and screws should be treated with an appropriate rust resistant primer. Apply with a filling knife and spread over the surface, pressing in well. Remove any excess filler and leave to dry. For an even smoother finish rub down with fine sand paper. Use appropriate protection when sanding. Do not apply when the surface temperature is below + 5°C. Replace lid after use. Wash tools with warm water.
$59.90

Nordsjö Professional Fine Filler is an indoor super smooth filler for primed new wood or previously painted clean wooden surfaces and or concrete walls and ceilings. It is ideal for fixing minor imperfections on painted surfaces before repainting. On wood, it is ideal for cracks and joints. For use on interior walls and joinery, including doors, windows, trim, architraves and skirting boards Fill fine cracks up to 2mm, minor blemishes or wood grain for a professional, glass smooth surface for painting Properties Ready to use Sand & paint after 4 hours Super smooth white finish Easy to sand Maximum depth: 2 mm Particle size: Max 0.10 mm How to apply Substrate and crack must be clean, dry and free from loose material. New wood should be primed first. Rub down gloss surfaces for improved adhesion. Metal surfaces such as nails and screws should be treated with an appropriate rust resistant primer. Apply with a filling knife and spread over the surface, pressing in well. Remove any excess filler and leave to dry. For an even smoother finish rub down with fine sand paper. Use appropriate protection when sanding. Do not apply when the surface temperature is below + 5°C. Replace lid after use. Wash tools with warm water.
$31.11

Nordsjö Professional Light and Smooth Super Filler, fills without the need for sanding. Thanks to our unique lightweight technology, our Light and Smooth filler immediately gives you a smooth finish. It does not sag and is easy to model, making it ideal for ceilings and walls. High performance extra lightweight filler for all general interior and exterior repairs Fills deep cracks and holes up to 10cm in plasterboard, wood, fiber cement, concrete, brick and most other common building materials Ideal for over-head applications (non-slump formula) Properties Ready to use Will not shrink or sag Super smooth finish – no sanding required Paintable with all types of paint Maximum layer thickness: 5 cm Maximum depth: 10 cm Easy to apply and shape Quick drying: paint after approx. 2 hours (5 cm layer at 20°C) with water-based paints How to apply Substrate must be clean, dry, dust and grease free. Remove all loose materials. Before application, metal surfaces such as nails and screws should be treated with an appropriate rust resistant primer. Stir into a smooth paste (if the filler is too dry, just add a few drops of water). Press filler into hole with a filling knife, smoothing off with a wet filling knife. For holes deeper than 5 cm, apply in layers, with sufficient drying time between the layers. No sanding is required. If sanding, wait for 24 hours. If painting over with an oil-based finish, wait 14 days. Must be painted over when used outside (minimum 2 coats). Colour: White. Not suitable for drilling. Clean tools and hands immediately after use with warm water. Do not store or use below 5 ° C.
$15.90

Nordsjö Professional Light and Smooth Super Filler, fills without the need for sanding. Thanks to our unique lightweight technology, our Light and Smooth filler immediately gives you a smooth finish. It does not sag and is easy to model, making it ideal for ceilings and walls. High performance extra lightweight filler for all general interior and exterior repairs Fills deep cracks and holes up to 10cm in plasterboard, wood, fiber cement, concrete, brick and most other common building materials Ideal for over-head applications (non-slump formula) Properties Ready to use Will not shrink or sag Super smooth finish – no sanding required Paintable with all types of paint Maximum layer thickness: 5 cm Maximum depth: 10 cm Easy to apply and shape Quick drying: paint after approx. 2 hours (5 cm layer at 20°C) with water-based paints How to apply Substrate must be clean, dry, dust and grease free. Remove all loose materials. Before application, metal surfaces such as nails and screws should be treated with an appropriate rust resistant primer. Stir into a smooth paste (if the filler is too dry, just add a few drops of water). Press filler into hole with a filling knife, smoothing off with a wet filling knife. For holes deeper than 5 cm, apply in layers, with sufficient drying time between the layers. No sanding is required. If sanding, wait for 24 hours. If painting over with an oil-based finish, wait 14 days. Must be painted over when used outside (minimum 2 coats). Colour: White. Not suitable for drilling. Clean tools and hands immediately after use with warm water. Do not store or use below 5 ° C.
$12.90

Nordsjö Professional Light and Smooth Super Filler, fills without the need for sanding. Thanks to our unique lightweight technology, our Light and Smooth filler immediately gives you a smooth finish. It does not sag and is easy to model, making it ideal for ceilings and walls. High performance extra lightweight filler for all general interior and exterior repairs Fills deep cracks and holes up to 10cm in plasterboard, wood, fiber cement, concrete, brick and most other common building materials Ideal for over-head applications (non-slump formula) Properties Ready to use Will not shrink or sag Super smooth finish – no sanding required Paintable with all types of paint Maximum layer thickness: 5 cm Maximum depth: 10 cm Easy to apply and shape Quick drying: paint after approx. 2 hours (5 cm layer at 20°C) with water-based paints How to apply Substrate must be clean, dry, dust and grease free. Remove all loose materials. Before application, metal surfaces such as nails and screws should be treated with an appropriate rust resistant primer. Stir into a smooth paste (if the filler is too dry, just add a few drops of water). Press filler into hole with a filling knife, smoothing off with a wet filling knife. For holes deeper than 5 cm, apply in layers, with sufficient drying time between the layers. No sanding is required. If sanding, wait for 24 hours. If painting over with an oil-based finish, wait 14 days. Must be painted over when used outside (minimum 2 coats). Colour: White. Not suitable for drilling. Clean tools and hands immediately after use with warm water. Do not store or use below 5 ° C.
$33.35
![Monarch Mini Gap Filler [White]](http://gluesaustralia.com.au/cdn/shop/files/9320090029080_1b178ddb-e3de-4ec1-83bb-8e320595bdb3.jpg?v=1754712311&width=645)
$2.84
![Monarch Mini Gap Filler [Cream]](http://gluesaustralia.com.au/cdn/shop/files/9320090030581_c5a95353-e7ee-4d92-8445-93066291f976.jpg?v=1754712313&width=645)
$6.02
![Monarch Mini Gap Filler [Black]](http://gluesaustralia.com.au/cdn/shop/files/9320090030567_dd3b7bac-a9e5-4986-9275-2bff35fb52de.jpg?v=1754712316&width=645)
$6.02
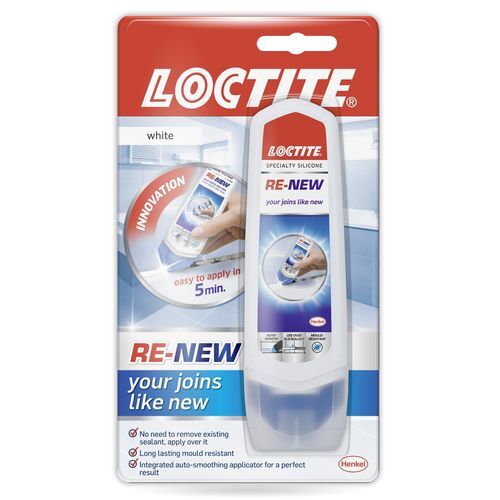
Sealants as good as new in just one step, easy to apply in 5 minutes. Is the sealant in your bathroom mouldy, yellowish, cracked...? Damaged bathroom sealants can ruin the look of your bathroom. Today you can easily re-new with Loctite RE-NEW. There's no need to be an expert DIYer. You can get a great result thanks to its integrated smoothing tool and innovative silicone formula with anti-mould properties. Recomended on:Bathroom, shower and kitchen seals Easily applied over existing joins Covers discolourations and cracks Wipes off easily if mistakes are made Mould resistant Ready to use in just 6 hour HOW TO USE: STEP 1: CLEAN THE DAMAGED SEALANT No need to remove the existing sealant. Clean the existing sealant with a damp cloth. Ensure sealant is dry before applying RE-NEW. If the sealant is too mouldy, use a mould remover first. STEP 2: APPLY RE-NEW Apply RE-NEW on top of the existing sealant, holding the tube with the Loctite logo facing towards you. Shake the tube to bring the RE-NEW content to the bottom. Gently squeeze to apply RE-NEW. Squezeed too hard? Go over the sealant again without squeezing the tube. STEP 3: RELAX: YOU CAN REPEAT Want to try again? Go over the sealant again without squeezing the tube or remove immediately using a damp cloth and start over. Remove excess sealant from surface or hands with a damp cloth. STEP 4: THE PERFECTIONIST'S TOUCH Go over your RE-NEW without squeezing the tube. Thanks to the integrated smoothing tool, the sealant will be smoothed. Good adhesion to existing sealant including siliconeIce white in colour to cover every damaged sealant STEP 5: TA-DA! Clean the smoothing tool with water and a damp cloth. Let it dry for 6 hours before showering!
$16.24

Loctite Go2 Gel contains a revolutionary FLEXTEC® formulation that bonds multi-materials when projects or repairs require higher viscosity, tremendous bond strength, and resistance to extreme conditions. It is a versatile, gap-filling adhesive that bonds, seals and repairs almost all materials. It is ideal for bonds subject to harsh or extreme conditions or for situations where constant flexing is a problem. It can be used indoors and outdoors, has excellent adhesion and high initial grab that cures quickly. Loctite Go2 Gel dries clear and creates a flexible and durable bond which is dishwasher safe and has excellent resistance to vibration, impact, moisture, UV and extreme temperatures, offering long reliability anywhere it is used. Recommended For NOTE: 1See limitations below in the 'not recommended for' section. Compatible with many porous and non-porous materials such as metals1 (aluminum, stainless steel, steel, copper, brass, bronze, zinc, etc.), glass, concrete, ceramic, tiles, natural stones, wood, cork, paper, cardboard, textiles, leather, varnished surfaces1, chipboard, MDF, fiberglass reinforced polyester, rigid PVC, polycarbonate, sanded ABS, and polystyrene foam/Styrofoam™. DIY repairs and modelling work in and around the house. Not Recommended For Before application, carry out tests to ensure the compatibility with non-ferrous metals such as aluminium, copper, bronze and brass as well as with different coatings such as paints, varnishes and powder coatings. Variations in the composition may affect adhesion. Aquariums or potable water systems Archival applications Applications requiring service temperatures below -58°F (-50°C) and above 248°F (120°C) Polyethylene (PE), polypropylene (PP) and polytetrafluoroethylene (PTFE) plastics, metal-to-metal (one surface should be porous) or rubber Applications requiring solvent resistance Applications with prolonged water immersion Safety Precautions Well-ventilated area, gloves. Preparation Use between 41°F (5°C) and 104°F (40°C). Protect work area. Surfaces must be clean and free of grease, dust and other contaminants. For improved adhesion, abrade very smooth surfaces (such as metal) prior to cleaning. Remove cap. Application Apply a thin layer of adhesive to one surface. Immediately position and press parts firmly together within 5 minutes. For difficult bonds, clamp parts or use tape to hold pieces together. Do not move or use parts for at least 2 hours. Full bond strength is achieved in 24 hours. Cure times will increase with lower temperatures and humidity and if bonding two non-porous surfaces. For Gap-Filling: Apply in a thick layer to fill gaps up to 5mm max. Fix or clamp the items together for 1-3 hours and do not touch or move them. In 24 hours, 70% of full adhesion and bond strength is achieved. Cure time is 24 hours for every 2mm of adhesive. To Get High Initial Grip: Apply on both surfaces in thin and even layers. Leave for 3-5 minutes. Use as a contact cement. After, GO2 gel has become tacky, bring the items together immediately and press firmly. Fixation is not necessary in many cases. Note that final strengths decrease when used as a contact glue. Two Non-Porous Surfaces: Bonding two non-porous surfaces can result in a slower cure time and is generally not recommended. If bonding two non-porous surfaces, surfaces can be wetted using a damp cloth, taking care to avoid wetness, pooling water or drop formation, to optimize cure time. Cleanup Clean tools and adhesive residue immediately with mineral spirits. Cured adhesive may be carefully cut away using a sharp-edged tool.
$11.70


Kwik Grip Waterbased is a contact adhesive that is ideal for bonding flat, close fitting surfaces. Forms a durable, heat and water resistant bond for long lasting results. Features High Strength (Stronger than Kwik Grip or Kwik Grip Gel) Easy to use – Applies white, and turns clear when ready to join surfaces Easy to clean up – Cleans up with water Low odour/Low VOC /Non-toxic – No harmful solvent fumes (Safer than solvent based adhesives). Especially useful if repairing inside your home or in a confined space. E.g. Car. Dries clear – For seamless repairs Instant bond – No clamping required* and in most cases repaired item can be used immediately. (*Clamping of warped or curled surfaces may be required) Suitable for use on horizontal or vertical surfaces Can be used in same method as other adhesives (wet bond) for small repairs. Heat resistant to 130oC Non-flammable Coverage: 500mL tub covers 1 surface up to 2.5m2 depending on porosity Where can this product be used? Bonding veneers of timber and laminated plastics, eg. Laminex and Formica to bench tops, table tops or other furniture. Areas where clamping or pressing facilities are either not available or difficult to use. Patching vinyl flooring Replacing a vinyl tile Cork tiling Laying a vinyl floor Leather work eg handbags Adhering flexible or other material to Aluminium Joining, repairing holes in tents, car covers and other outdoor equipment Replacing lifting edges or laying lino Attaching rubbers to your fridge door Bonding labels to tins Repairing your wetsuit Craft and scrapbooking projects (safe to use on Polystyrene)Areas where clamping or pressing facilities are either not available or difficult to use What materials is this product suitable for? Fabric Laminated plastics Veneers Hard board Polystyrene foam Fibrous cement sheet Aluminium Polyurethane foam Rubber Cork Leather Canvas Felt Metals Most plastics (Not recommended for bonding Polyethylene or Polypropylene Plastics, for these we recommend Plastics Glue ) How to use this product General bonding – use contact method or for small porous surfaces join with a wet bond by applying Kwik Grip Advanced to one surface only and immediately press together and lightly clamp. Kwik Grip Advanced can be used as wet bond on absorbent surfaces such as timber, cardboard etc. Contact bonding: 1 Ensure surfaces to be bonded are clean, dry and free from dirt, grease, dust or particles. 2 Using applicator provided with pack, completely cover both surfaces with adhesive and keep surfaces apart until the surface turns from white to clear – approx. 20 minutes. Tip: use dowels or something similar to keep surfaces apart 3 Position the items carefully, still keeping surfaces apart. When edges are perfectly aligned, remove dowels and working from one edge press surfaces firmly together. Note: Grabs IMMEDIATELY on contact. 4 Secure bond by running a roller over the bonded surfaces or by hammering the surface from the centre outwards using a padded block. Maximum Bond strength is achieved after 24 hours. Note: Drying time may be extended in cold and wet weather conditions. Wet bonding: Ensure surfaces to be bonded are clean, dry and free from dirt, grease, dust or particles. Apply to one surface then bring surfaces together and clamp until dry. Clean up application tools and excess adhesive with damp cloth & water before it dries. Handy tips What is a contact adhesive? A contact adhesive is an adhesive that must be applied to two surfaces and allowed to dry before surfaces are joined. Once surfaces are pushed together an instant bond forms. Therefore extended pressure or clamping is unnecessary (*Clamping of warped or curled surfaces may be required) Being Low VOC/low odour this product is much safer for use indoors than most other contact adhesives which tend to be solvent-based.. Can be used on horizontal or vertical surfaces In the event of prolonged open time, Kwik Grip Advanced will continue to give good contact bond for up to 8 hours. What does this mean? This means that once you have applied the adhesive, if you suddenly need to run out to the shops or go and do another job, you can safely come back within 8 hours and join the two surfaces for a great result! Many solvent-based contact adhesives have a much shorter open time limit.
$13.11

Kwik Grip Waterbased is a contact adhesive that is ideal for bonding flat, close fitting surfaces. Forms a durable, heat and water resistant bond for long lasting results. Features High Strength (Stronger than Kwik Grip or Kwik Grip Gel) Easy to use – Applies white, and turns clear when ready to join surfaces Easy to clean up – Cleans up with water Low odour/Low VOC /Non-toxic – No harmful solvent fumes (Safer than solvent based adhesives). Especially useful if repairing inside your home or in a confined space. E.g. Car. Dries clear – For seamless repairs Instant bond – No clamping required* and in most cases repaired item can be used immediately. (*Clamping of warped or curled surfaces may be required) Suitable for use on horizontal or vertical surfaces Can be used in same method as other adhesives (wet bond) for small repairs. Heat resistant to 130oC Non-flammable Coverage: 500mL tub covers 1 surface up to 2.5m2 depending on porosity Where can this product be used? Bonding veneers of timber and laminated plastics, eg. Laminex and Formica to bench tops, table tops or other furniture. Areas where clamping or pressing facilities are either not available or difficult to use. Patching vinyl flooring Replacing a vinyl tile Cork tiling Laying a vinyl floor Leather work eg handbags Adhering flexible or other material to Aluminium Joining, repairing holes in tents, car covers and other outdoor equipment Replacing lifting edges or laying lino Attaching rubbers to your fridge door Bonding labels to tins Repairing your wetsuit Craft and scrapbooking projects (safe to use on Polystyrene)Areas where clamping or pressing facilities are either not available or difficult to use What materials is this product suitable for? Fabric Laminated plastics Veneers Hard board Polystyrene foam Fibrous cement sheet Aluminium Polyurethane foam Rubber Cork Leather Canvas Felt Metals Most plastics (Not recommended for bonding Polyethylene or Polypropylene Plastics, for these we recommend Plastics Glue ) How to use this product General bonding – use contact method or for small porous surfaces join with a wet bond by applying Kwik Grip Advanced to one surface only and immediately press together and lightly clamp. Kwik Grip Advanced can be used as wet bond on absorbent surfaces such as timber, cardboard etc. Contact bonding: 1 Ensure surfaces to be bonded are clean, dry and free from dirt, grease, dust or particles. 2 Using applicator provided with pack, completely cover both surfaces with adhesive and keep surfaces apart until the surface turns from white to clear – approx. 20 minutes. Tip: use dowels or something similar to keep surfaces apart 3 Position the items carefully, still keeping surfaces apart. When edges are perfectly aligned, remove dowels and working from one edge press surfaces firmly together. Note: Grabs IMMEDIATELY on contact. 4 Secure bond by running a roller over the bonded surfaces or by hammering the surface from the centre outwards using a padded block. Maximum Bond strength is achieved after 24 hours. Note: Drying time may be extended in cold and wet weather conditions. Wet bonding: Ensure surfaces to be bonded are clean, dry and free from dirt, grease, dust or particles. Apply to one surface then bring surfaces together and clamp until dry. Clean up application tools and excess adhesive with damp cloth & water before it dries. Handy tips What is a contact adhesive? A contact adhesive is an adhesive that must be applied to two surfaces and allowed to dry before surfaces are joined. Once surfaces are pushed together an instant bond forms. Therefore extended pressure or clamping is unnecessary (*Clamping of warped or curled surfaces may be required) Being Low VOC/low odour this product is much safer for use indoors than most other contact adhesives which tend to be solvent-based.. Can be used on horizontal or vertical surfaces In the event of prolonged open time, Kwik Grip Advanced will continue to give good contact bond for up to 8 hours. What does this mean? This means that once you have applied the adhesive, if you suddenly need to run out to the shops or go and do another job, you can safely come back within 8 hours and join the two surfaces for a great result! Many solvent-based contact adhesives have a much shorter open time limit.
$40.93

Dunlop Multipurpose Floor Leveller is a high-flow, cement-based compound ideal for smoothing and levelling uneven internal concrete surfaces before applying tiles, vinyl, carpet, or other floor coverings. Designed for ease of use, it pours and spreads to form a smooth surface ready for foot traffic and covering in minimal time. It’s perfect for domestic and light commercial applications. Surface Preparation: Ensure the surface is sound, dry, and clean. Remove all traces of dust, grease, oil, curing compounds, wax, or any loose particles. New concrete must be fully cured. Mechanically remove surface laitance or contamination. Porous surfaces may require priming to reduce absorption and improve adhesion. Priming (if required): Apply a compatible primer using a broom or roller and allow it to dry before applying the leveller. On extremely porous substrates, a second coat may be necessary. Mixing Instructions: Slowly add the contents of the 5kg bag to approximately 1L of clean water while stirring with a mixing paddle. Mix for 2–3 minutes until a lump-free, smooth consistency is achieved. Do not retemper once the mixture begins to set. Application Instructions: Pour the mixed product onto the floor and spread using a steel trowel or smoothing blade. The product will self-level and settle to a smooth finish. Apply at a thickness of 1–10mm in one application. Protect from foot traffic until it is fully cured. Coverage: Covers approximately 3.5m² at 1mm thickness per 5kg bag. Coverage varies with substrate texture and thickness. Drying Time: Walkable: 4 hours Ready for tiling: 4–6 hours Ready for other coverings: 24 hours Dry times will vary depending on temperature, humidity, and layer thickness. Clean Up: Clean tools and mixing equipment with water immediately after use. Do not allow the product to dry on tools or surfaces. Technical Data: Type: Cement-based self-levelling compound Application Thickness: 1mm to 10mm Working Time: 15–20 minutes Walkable: After 4 hours Final Cure: Up to 24 hours Colour: Grey Shelf Life: 12 months if stored in original, sealed packaging
$40.20

Dunlop Floor Repairer Rapid Patch Mortar is a high-performance, fast-setting compound ideal for repairing holes, cracks, and uneven surfaces on internal floors. Suitable for use prior to the installation of tiles, vinyl, carpet, or other floor coverings, it delivers a smooth, level finish ready for light foot traffic within 45 minutes and covering applications in as little as 2 hours. Surface Preparation: Ensure the substrate is clean, sound, and free of grease, dust, oil, paint, or other contaminants. Surfaces should be dry and firm. Smooth or sealed surfaces must be roughened or etched. For porous substrates like timber, fibre-cement, or plasterboard, priming may be required. For floors in direct contact with soil, a moisture barrier should be used before applying the patch mortar. Mixing Instructions: Add 5kg of product into approximately 1.5L of clean water in a clean container. Mix thoroughly with a mixing paddle to a lump-free, smooth consistency. Mix only what can be used within 15 minutes. Application Instructions: Apply with a steel trowel to the required thickness (up to 20mm in a single application). Shape and smooth the surface before the material begins to set. For deeper repairs, additional layers can be applied once the initial layer has set. Avoid adding extra water once mixed. Coverage: Approximately 3m² at 1mm thickness per 5kg bag. Coverage varies with surface texture and thickness applied. Drying Time: Initial set: ~45 minutes Ready for coverings (tiles, vinyl, carpet): ~2 hours Final cure: 24 hours (depending on thickness and ambient conditions) Clean Up: Clean tools and equipment immediately with water before the mortar sets. Technical Data: Type: Rapid-setting cementitious repair mortar Application Thickness: Up to 20mm Pot Life: 15 minutes Foot Traffic: 45 minutes Ready for Coverings: 2 hours Colour: Grey Shelf Life: 12 months in original unopened packaging stored in a dry area
$39.52

Bostik Epoxy Bond is a special two-part adhesive which, when mixed and allowed to set, produces bonds of immense strength. This resin based epoxy sets in approximately 5 minutes to give a permanent and colourless bond. It will adhere to pottery, china, metals, glass, wood, rigid and semi-rigid plastics and cardboard, etc. where an Industrial strength bond is required by handymen, hobbyists and tradesmen. FEATURES AND BENEFITS 1. Quick setting – will bond in 5 minutes 2. When fully cured, the adhesive can withstand boiling water for short periods of time. 3. Heat resistance rating of 60ºC temperature continuously. 4. Adhesive shear strength of up to 800 psi for metal/metal bonds APPLICATION 1. Surfaces to be joined must be clean, dry and free from dirt and grease. Metals should be abraded and washed with a petroleum solvent. China and pottery should be washed in detergent, rinsed and dried. 2. Dispense and mix thoroughly, sufficient material of the two parts to carry out the job at hand with a matchstick, screwdriver or similar implement. Reseal the nozzles of the syringe with the enclosed plug and tube with cap and store in an upright position (nozzles upward). 3. Apply a thin film of adhesive to one or both of the surfaces to be joined, press together and do not move until the adhesive has set - usually 5 minutes @ 20ºC. Very good handling strength is obtained after 20 minutes and maximum adhesion is achieved after 24 hours
$9.00

A strong and durable, fast setting two part epoxy adhesive that dries crystal clear making it ideal for areas where an invisible bond is required. Mixed product gels in 5 minutes. Initial bonding is achieved in 20 minutes with maximum bond strength after 16 hours. Weather and yellowing resistant. Shock resistant. Features: -Araldite is stronger than other glues due to the chemical reaction of the two parts. -Bonds a variety of surfaces -Dries Crystal Clear so there’s no visible evidence of repair -Quick setting in 5 minutes -No clamping necessary -High water resistance -Forms a rigid, durable bond -Can be used for gap filling (Surfaces need not mate closely) -Good chemical resistance -Heat Resistant -Doesn’t yellow over time so is ideal for use on glassware Appearance: Crystal Clear Where can this product be used? -Fixing a broken glass vase -Repairing jewellery -Toy repairs -Fixing ornaments or crockery -Fixing your handbag strap -Not suitable for bonding plastics such as Polypropylene and Polyethylene or for use on polystyrene -What materials is this product suitable for? -Glass -Metal -Wood -Fabric -Rigid Plastic – refer to Selley's plastic guide for more info -Crystal -Leather How to use this product: -Before applying the Araldite mixture, all surfaces MUST be thoroughly clean and dry. -All traces of grease, rust paint, etc. should be removed. -For best results, smooth surfaces should be roughened by mechanical abrasion after solvent cleaning. -Onto a clean, disposable surface (e.g. polyethylene or cardboard), dispense equal volumes of Part A and Part B. Thoroughly mix together with a spatula, nail or stick. When using the tubes it is essential to use the correct mixing ratio, i.e. 1 part each -Apply adhesive immediately to both surfaces and press together. Clamping is not necessary, but allow the bond to remain undisturbed for at least 20 minutes. Scrape off excess adhesive and wipe mixing utensils immediately. -When using tube kit, ensure correct caps are replaced on each tube or they will adhere. Handy tips: -A useful solvent to clean up epoxy and polyester resins BEFORE they are cured can be prepared by mixing 2 parts toluene with 1 part alcohol (eg methylated spirits or denatured alcohol). -Clamping is recommended for a stronger bond. -For a maximum working time, mix in small quantities. Large quantities accelerate the curing process and reduce working time. -To extend product life replace caps immediately after use. -When using the tube variant, ensure you replace the correct cap on the correct tube. Placing the wrong cap on the wrong tube will cause the tube to harden. (lids and tubes are colour coded to help) -Wipe off any uncured Araldite with acetone or nail polish remover. -To remove product after cure, mechanical action (scraping or sanding) is recommended. Since the product is chemically resistant solvent will NOT dissolve this product. -To reposition the bond once cured, check that the item is heat resistant. If safe, heat the item slowly, e.g. in an oven, to at least 150oC. The product will soften and liquify slightly. -Scrape off any excess then reposition the joint carefully using appropriate safety equipment. Allow the item to cool down in the correct position. The product will reharden once returned to room temperature. -Keep a box of Selleys Sugar Soap Wipes around for quick & effective cleanup -For cleaning surfaces prior to application of adhesive, if the surface is porous, we would recommend using Selleys Liquid Sugar Soap. If the surface is non-porous eg glass or metal, firstly clean the surface with Methylated Spirits. If there is old difficult to remove residue such as old paint, we recommend using paint stripper such as Selleys Kwik Strip Smart. Safety tips: -Avoid contact with the skin and eyes. -Avoid breathing vapour. -Do not use solvents near eyes or open wounds. -In case of contact with eyes, flush with water for at least 15 minutes and seek medical attention. -Non-toxic when set. Storage and re-use: Ensure caps or lids are replaced and product stored in a cool dry place.
$16.58


A very fast setting two part epoxy adhesive. Initial bonding achieved in 90 seconds with maximum bond strength after 16 hours. Features Araldite is stronger than other glues due to the chemical reaction of the two parts Bonds a variety of surfaces Dries Clear Very quick setting in 90 seconds No clamping necessary Moderate water resistance Forms a rigid, durable bond Can be used for gap filling Good chemical resistance Where can this product be used? General small household repairs Fixing gemstones to mounts Repairing metal toys Not suitable for bonding plastics such as Polypropylene and Polyethylene Bond strength weakens above 65°C but strength is regained when temperature drops What materials is this product suitable for? Glass Metal Wood Fabric Most Plastics How to use this product General Use Before applying the Araldite mixture, all surfaces MUST be thoroughly clean and dry. All traces of grease, rust paint, etc. should be removed. For best results smooth surfaces should be roughened by mechanical abrasion after solvent cleaning. Onto a clean, disposable surface (e.g. polyethylene or cardboard), dispense equal volumes of Part A and Part B. Thoroughly mix together with a spatula, nail or stick. When using the tubes it is essential to use the correct mixing ratio, i.e. 1 part each Apply adhesive immediately to both surfaces and press together. Scrape off excess adhesive and wipe mixing utensils immediately. Ensure correct caps are replaced on each tube or they will adhere. Handy tips Note: For information on how to identify plastics refer to the Selleys plastics guide. For maximum working time, mix in small quantities. Large quantities accelerate the curing process and reduce working time. To extend product life replace caps immediately after use. Ensure you wipe excess from nozzle with a tissue dipped in acetone (or nail polish remover) before replacing cap. When using the tube variant, ensure you replace the correct cap on the correct tube. Placing the wrong cap on the wrong tube will cause the tube to harden. (lids and tubes are colour coded to help) Wipe off any uncured Araldite with acetone or nail polish remover. To remove product after cure, mechanical action (scraping or sanding) is recommended. Since the product is chemically resistant solvent will NOT dissolve this product. To reposition the bond once cured, check that the item is heat resistant. If safe, heat the item slowly, e.g. in an oven, to at least 150oC. The product will soften and liquify slightly. Scrape off any excess then reposition the joint carefully using appropriate safety equipment. Allow the item to cool down in the correct position. The product will reharden once returned to room temperature. Clamping recommended for a stronger bond. Singles are great for those unexpected household breakages, so keep a couple at home just in case. Keep a box of Selleys Sugar Soap Wipes around for quick & effective clean up For cleaning surfaces prior to application of adhesive, if the surface is porous, we would recommend using Selleys Liquid Sugar Soap. If the surface is non-porous eg glass or metal, firstly clean the surface with Methylated Spirits. If there is old difficult to remove residue such as cold paint, we recommend using paint stripper such as Selleys Kwik Strip Smart. Ensure the surface is dry before applying the product.
$28.96
You have seen 144 out of 147 products
Products that level to a clean, smooth surface with minimal tooling, ideal for visible seams and cosmetic repairs. Use filters to refine by chemistry, viscosity and cure profile. Always review the product page and TDS/SDS.